Ensure the Business Type is set to either "Hospitality" or "Other".
Step 1: Set Up a Kitchen Printer
1. On the login screen, select the Register Settings button.
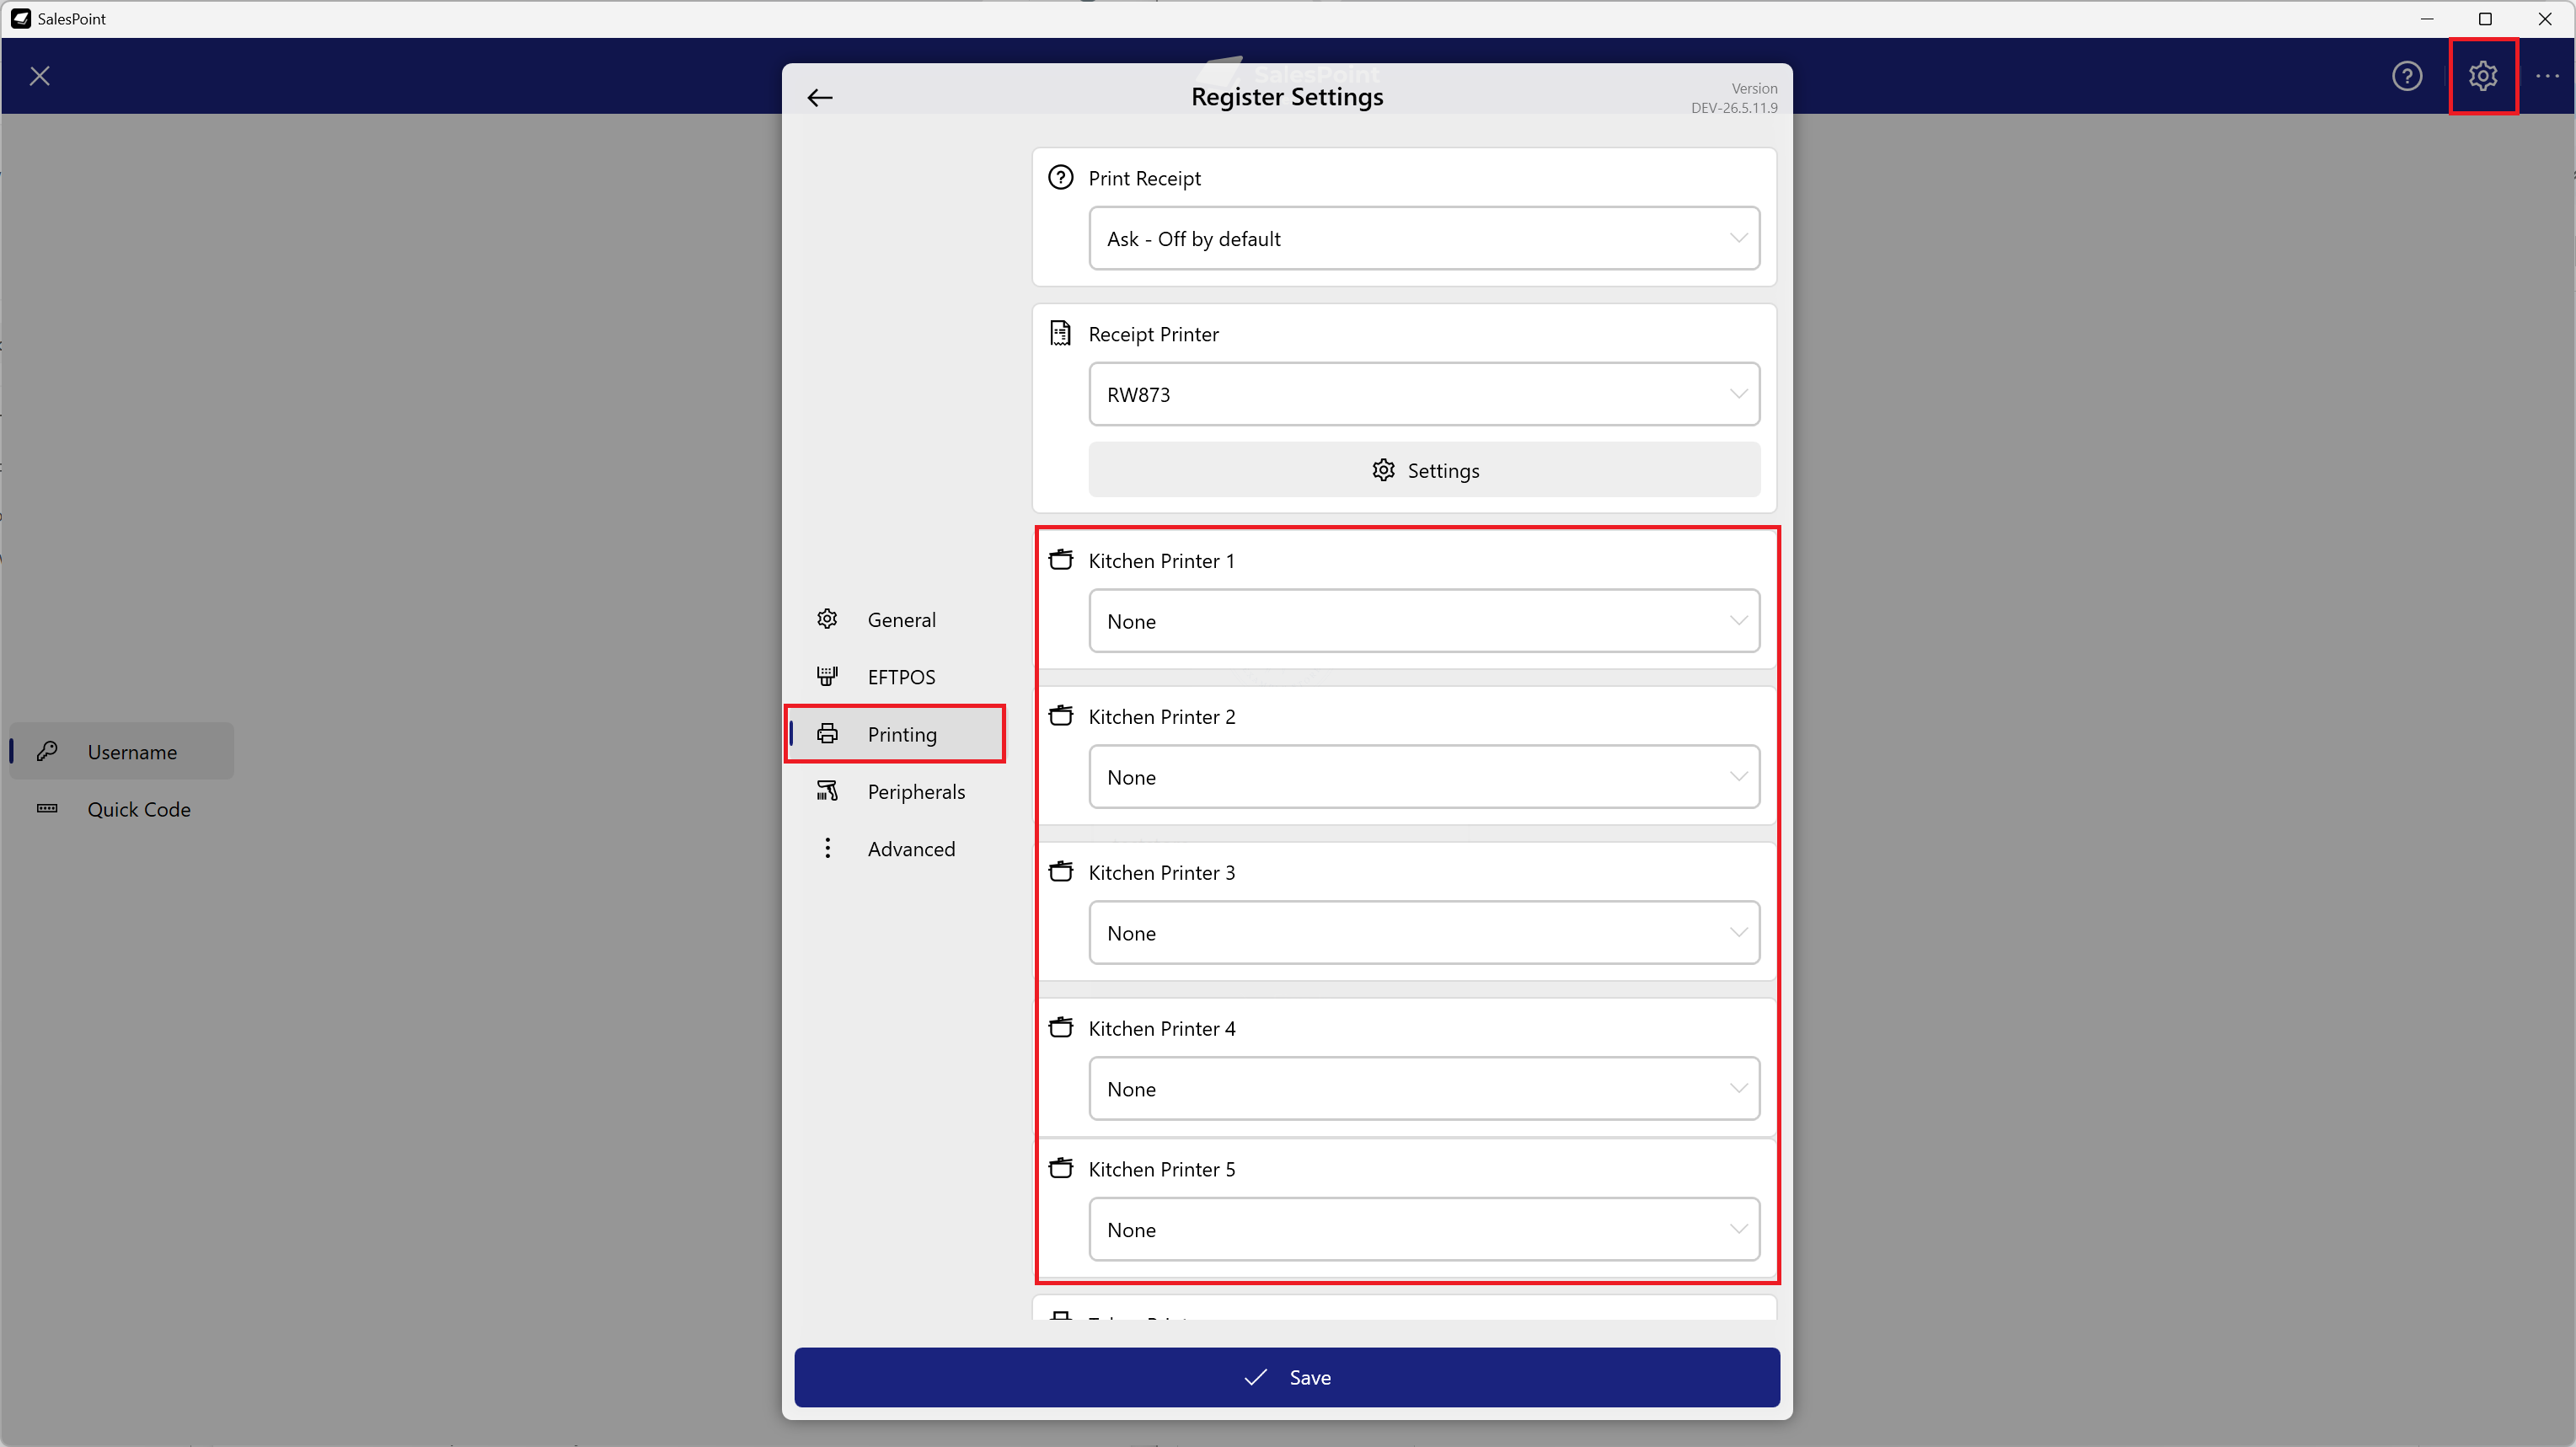
Figure 1: Printing tab in the Register Hardware Settings.
2. Navigate to the Printing section.
3. Select the Kitchen Printer 1 dropdown and choose the printer for kitchen use.
4. You can configure up to 5 kitchen printers.
5. Click "Save" once completed.
Step 2: Configure Product Kitchen Printer Mapping
1. On the Dashboard, navigate to Products.
2. Select the product you want to print in the kitchen.
3. Locate the "Kitchen Ticket" field, which can be found in either the General section or the Advanced section.
4. In the "Print On" dropdown, select Kitchen Printer 1.
5. This printer will map to the kitchen printer configured in the Register Settings.
6. Once configured, the product will automatically print to the kitchen whenever it is added to a sale.
7. Fill in any other required product information.
8. Click "Save" once completed.
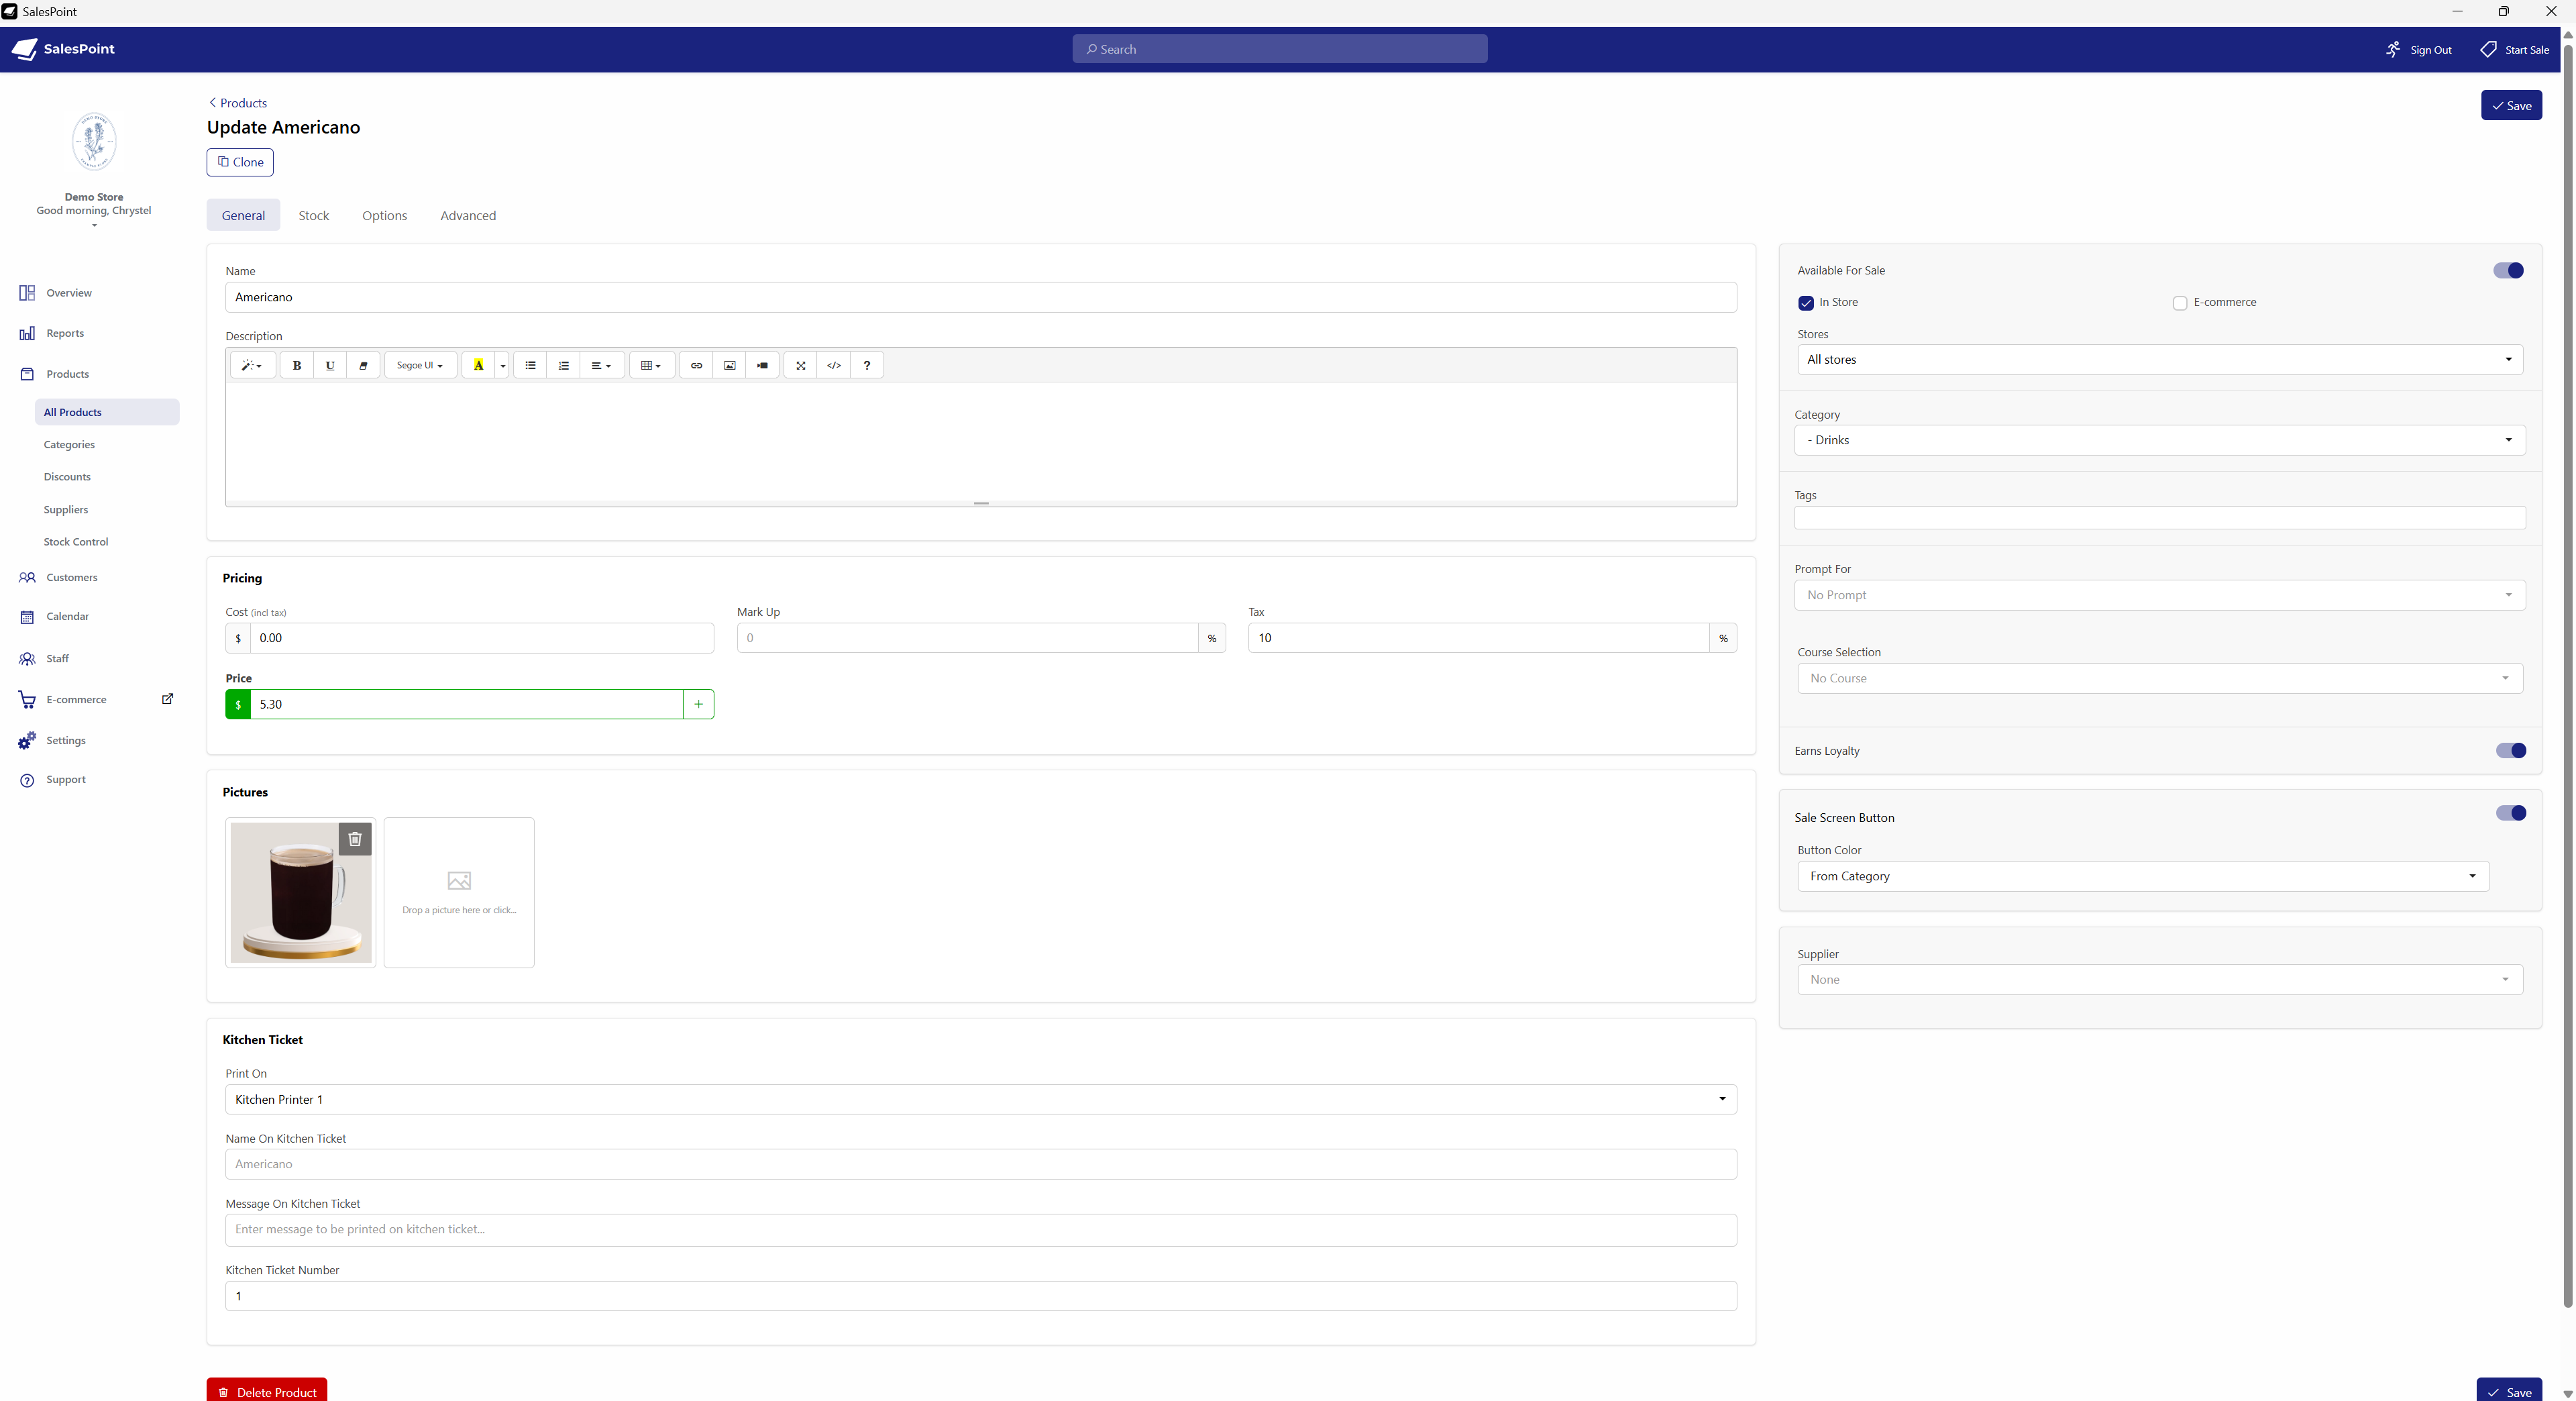
Figure 2: Selecting the kitchen printer configured in Register Settings.
Customize Your Kitchen Printer Names
1. On the Dashboard, navigate to Settings and select the Receipt tab.
2. Locate the Kitchen Receipt section.
3. Scroll down to the Printer Names field.
4. In this section, you can rename your kitchen printers to better identify different preparation stations.
5. The customized printer names will also appear in the Product settings and Register Hardware Settings.
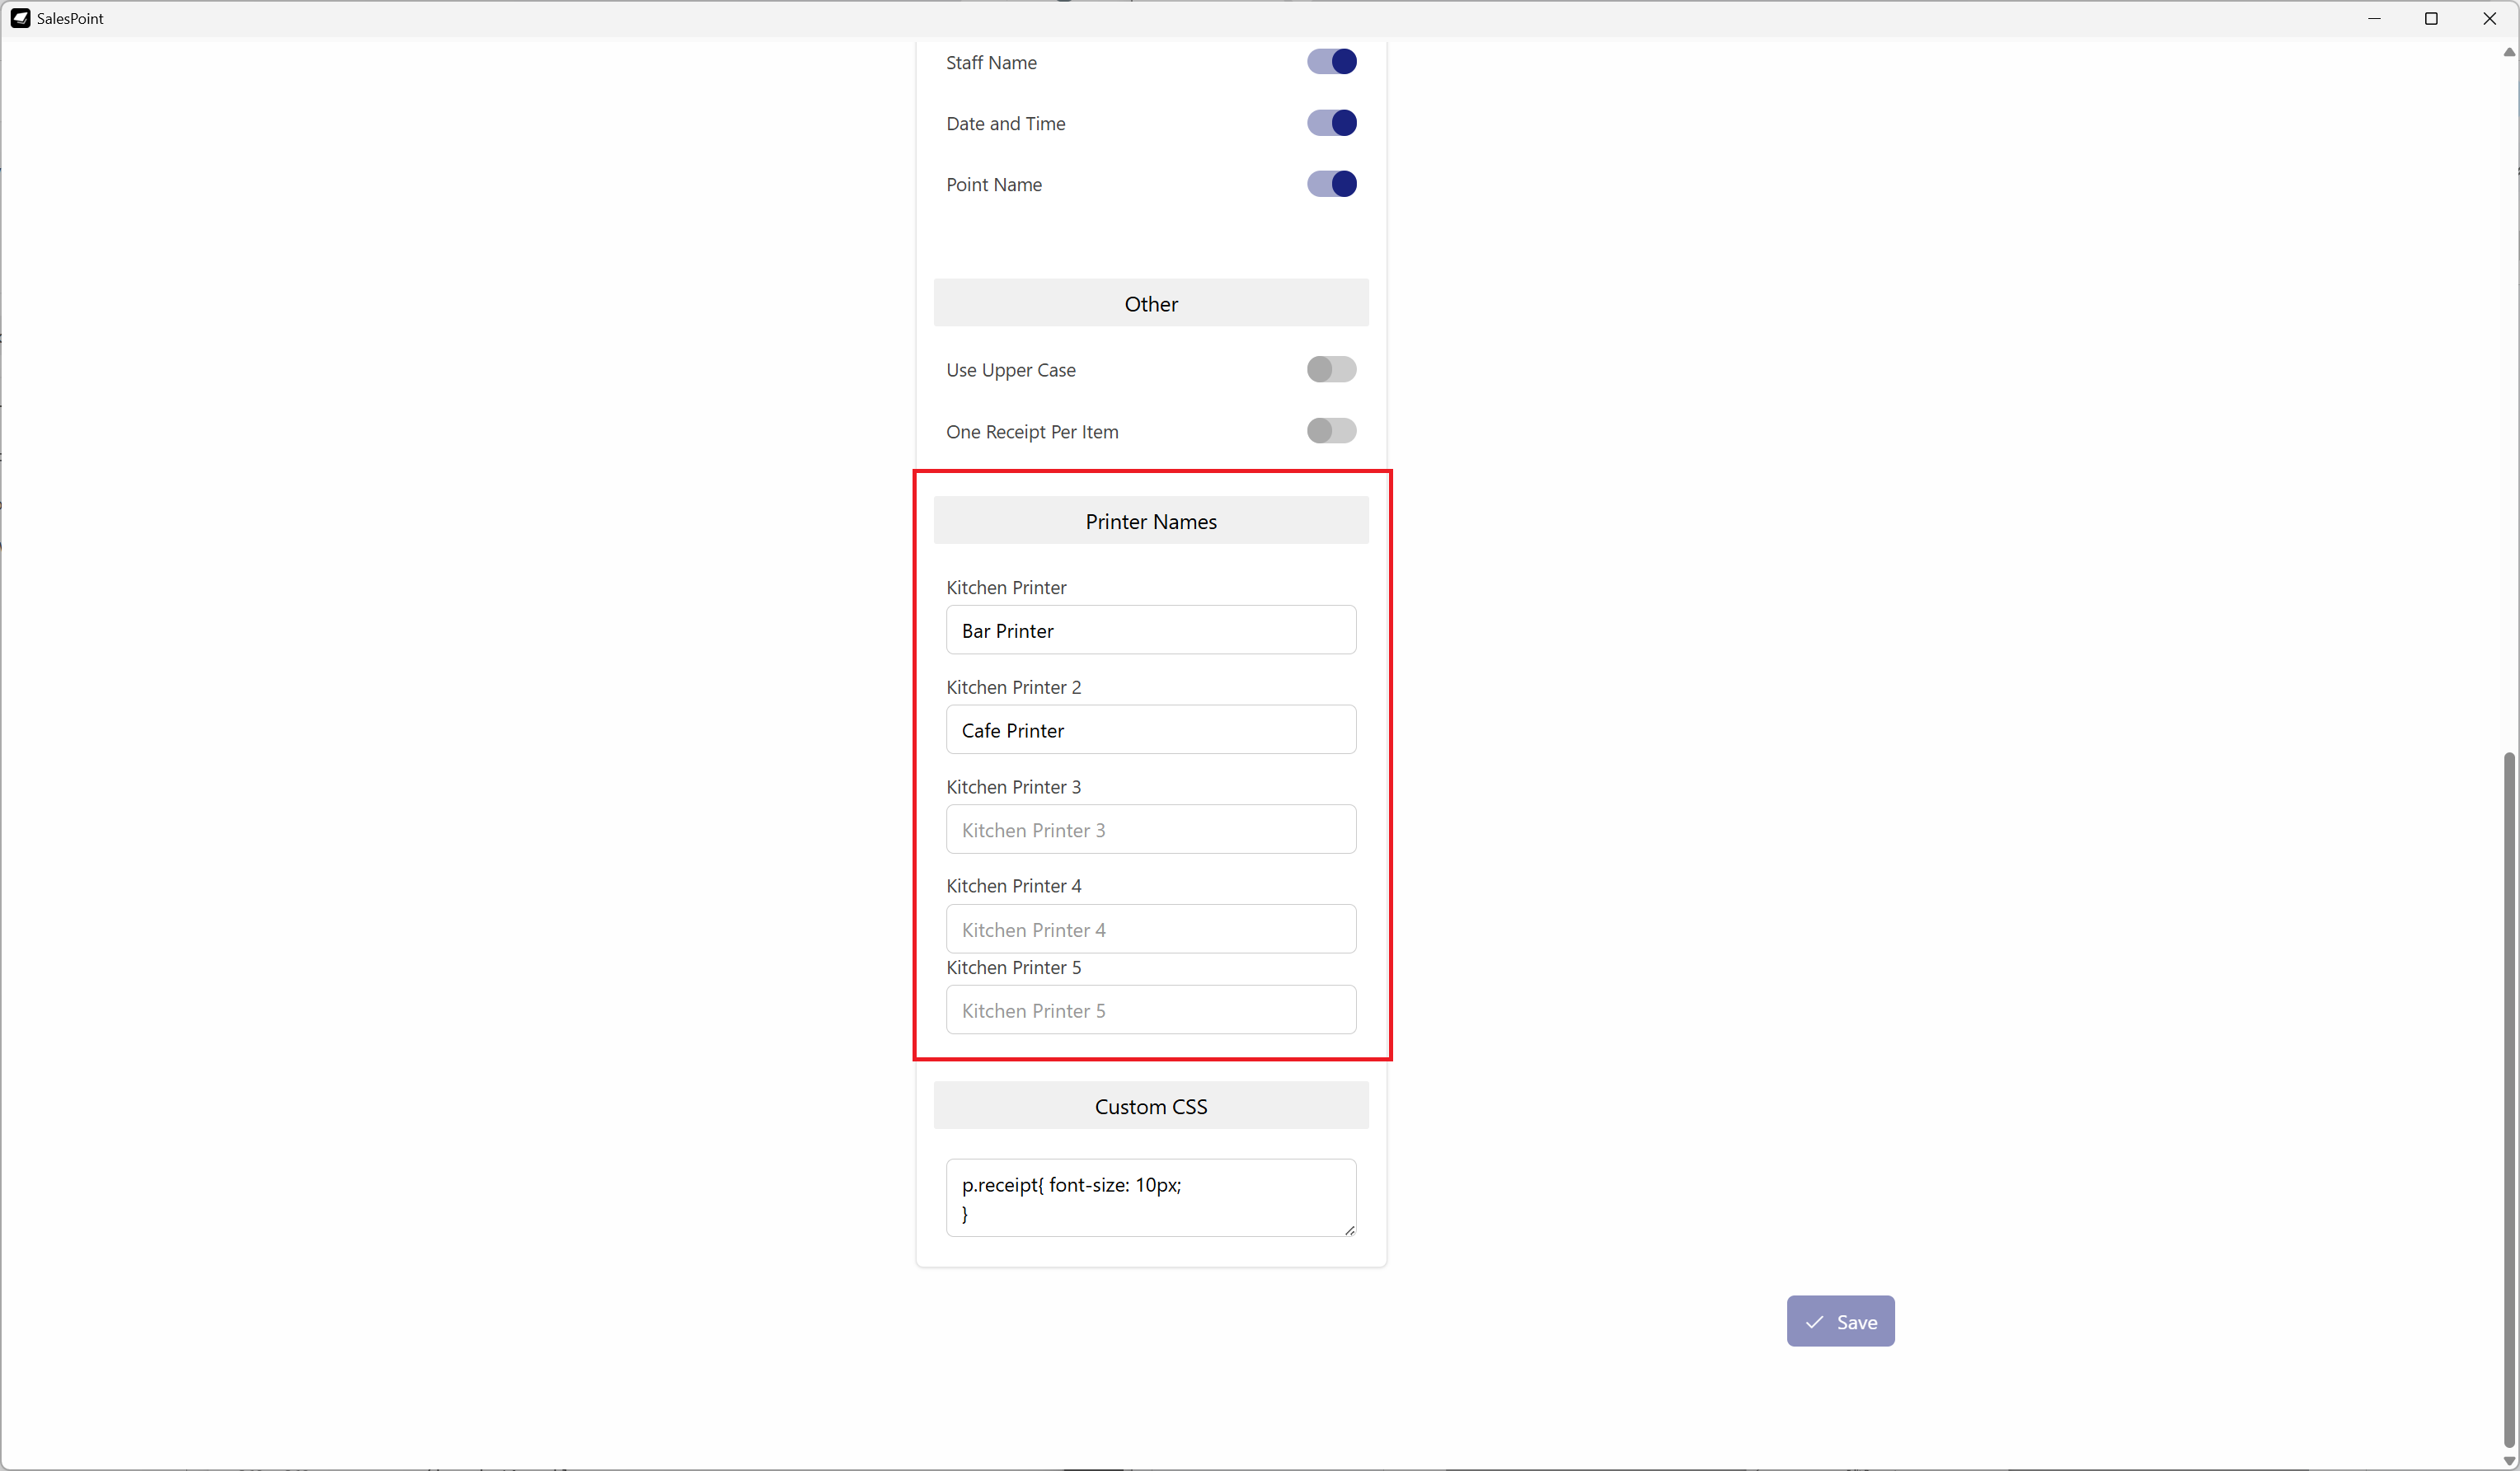
Figure 3: Customizing kitchen printer names in Kitchen Receipt Settings.
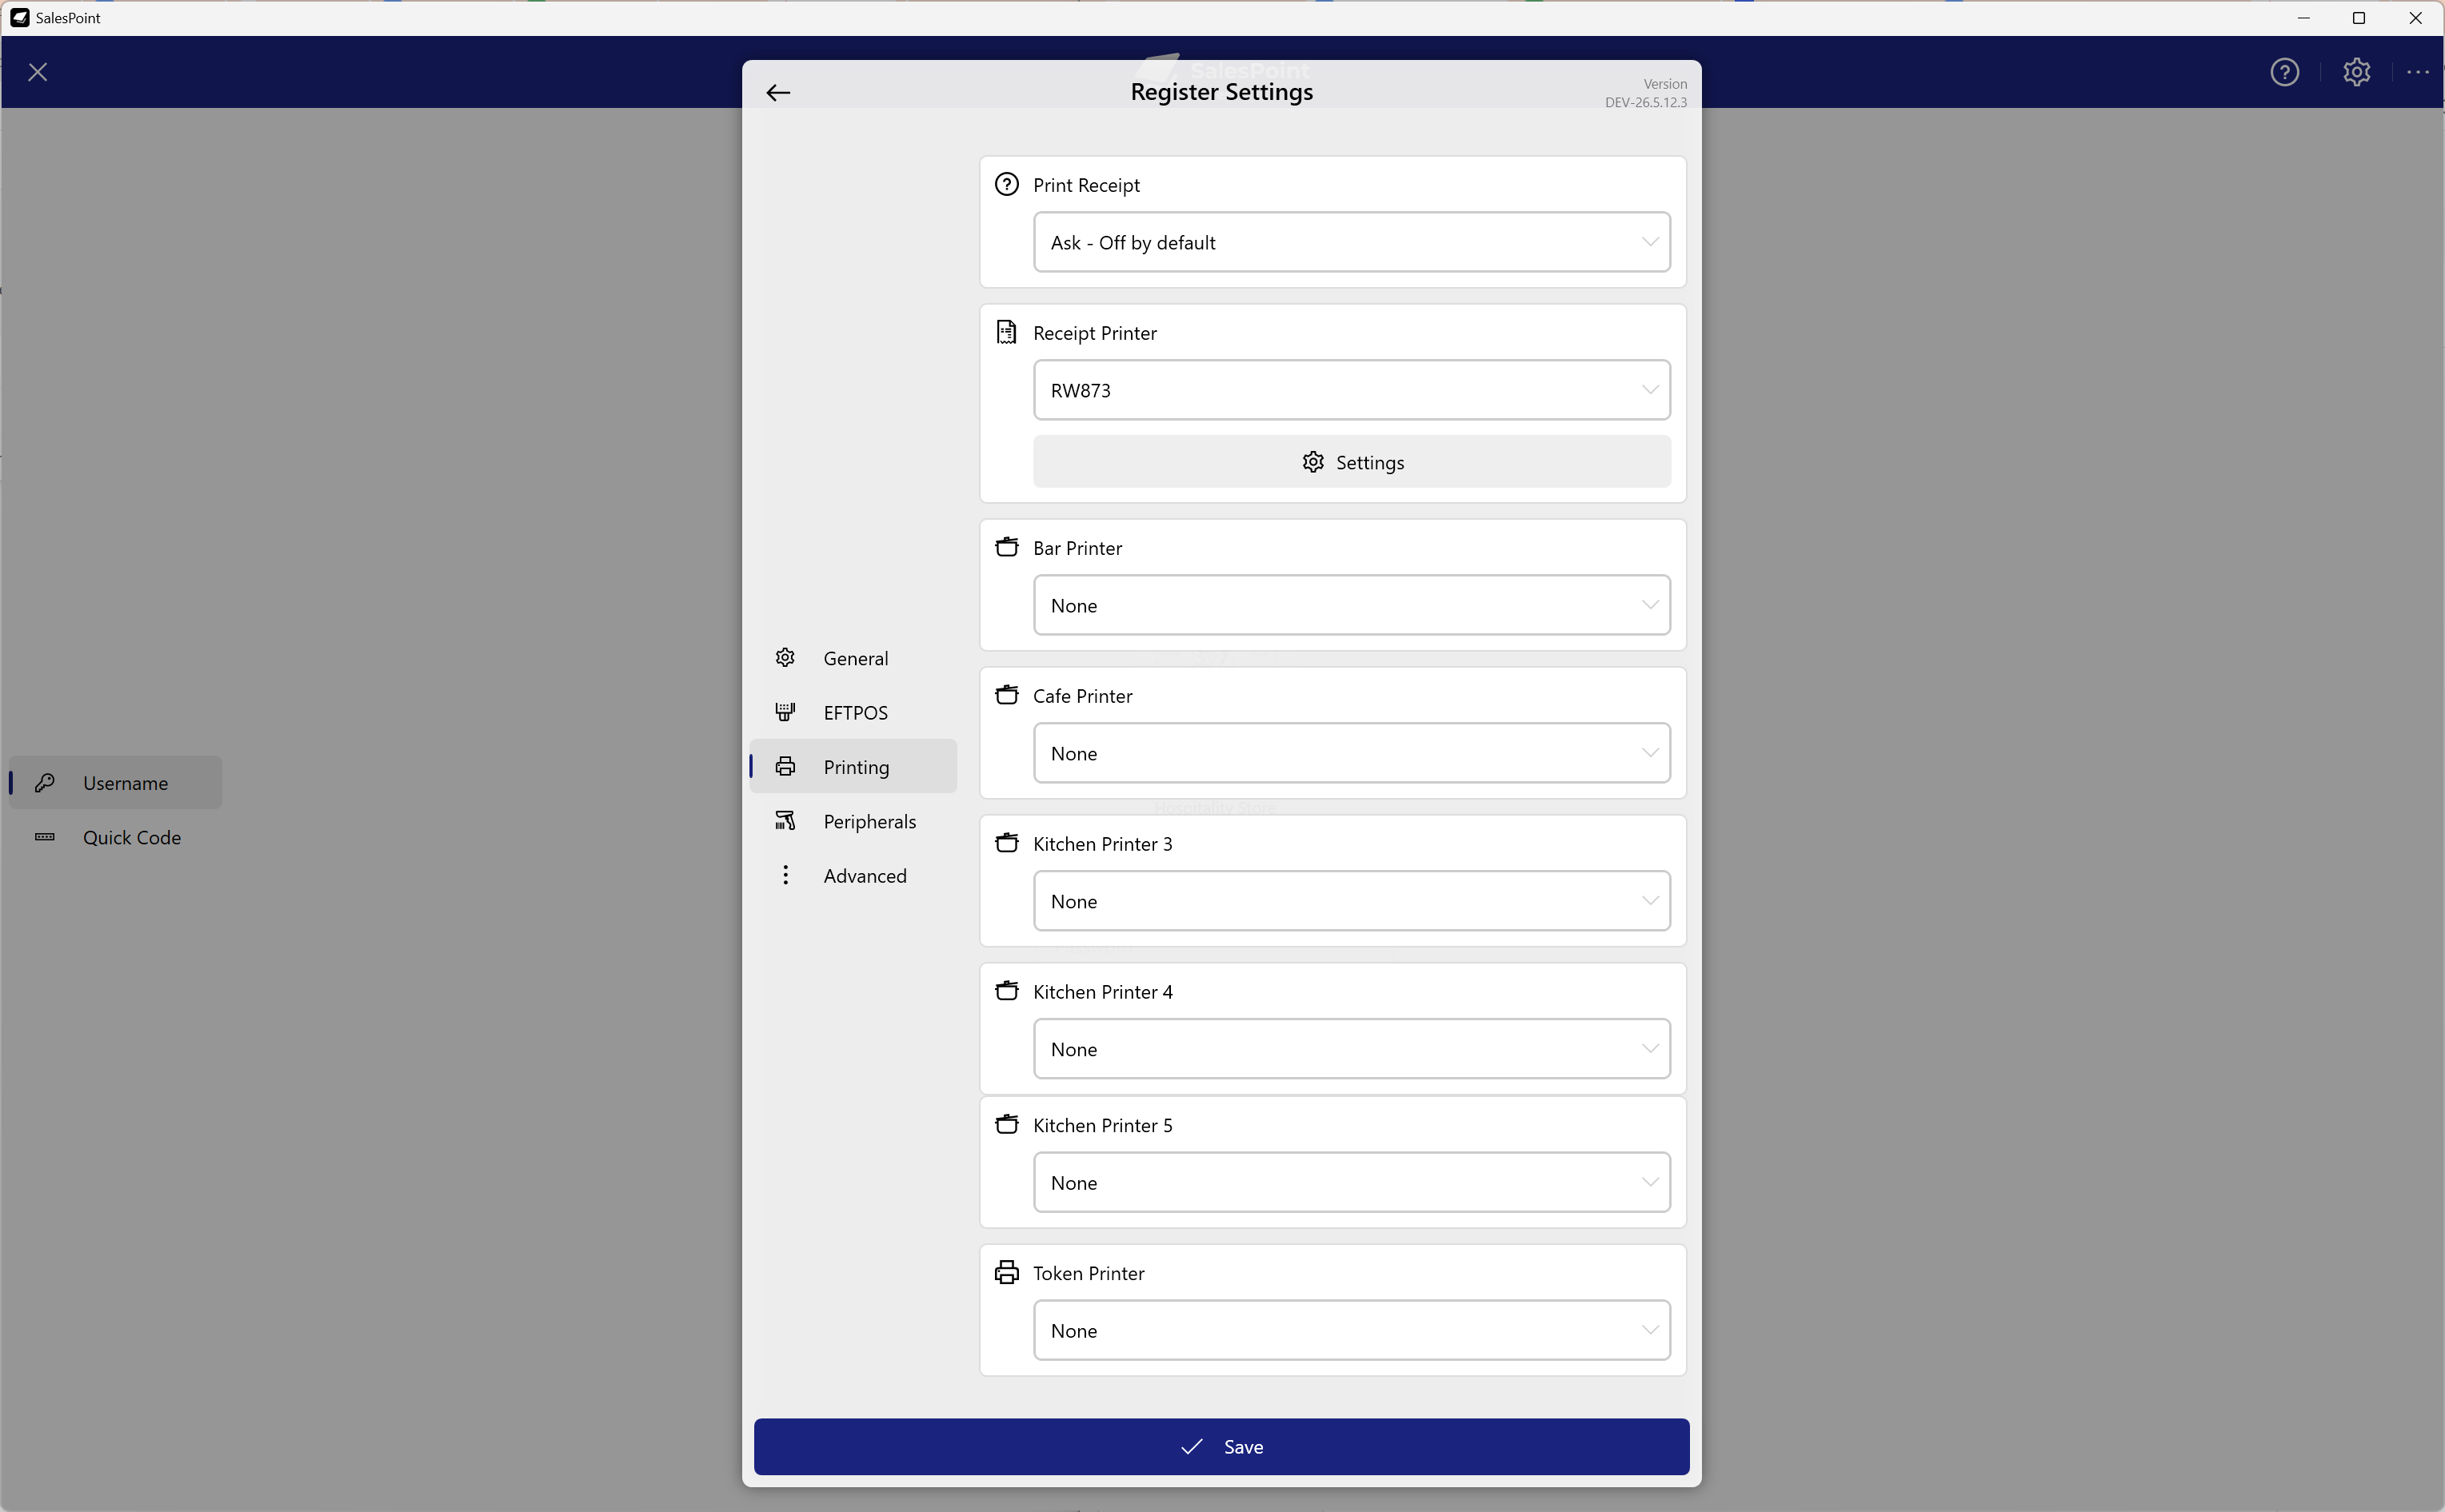
Figure 4: Customized kitchen printer names displayed in Register Hardware Settings.
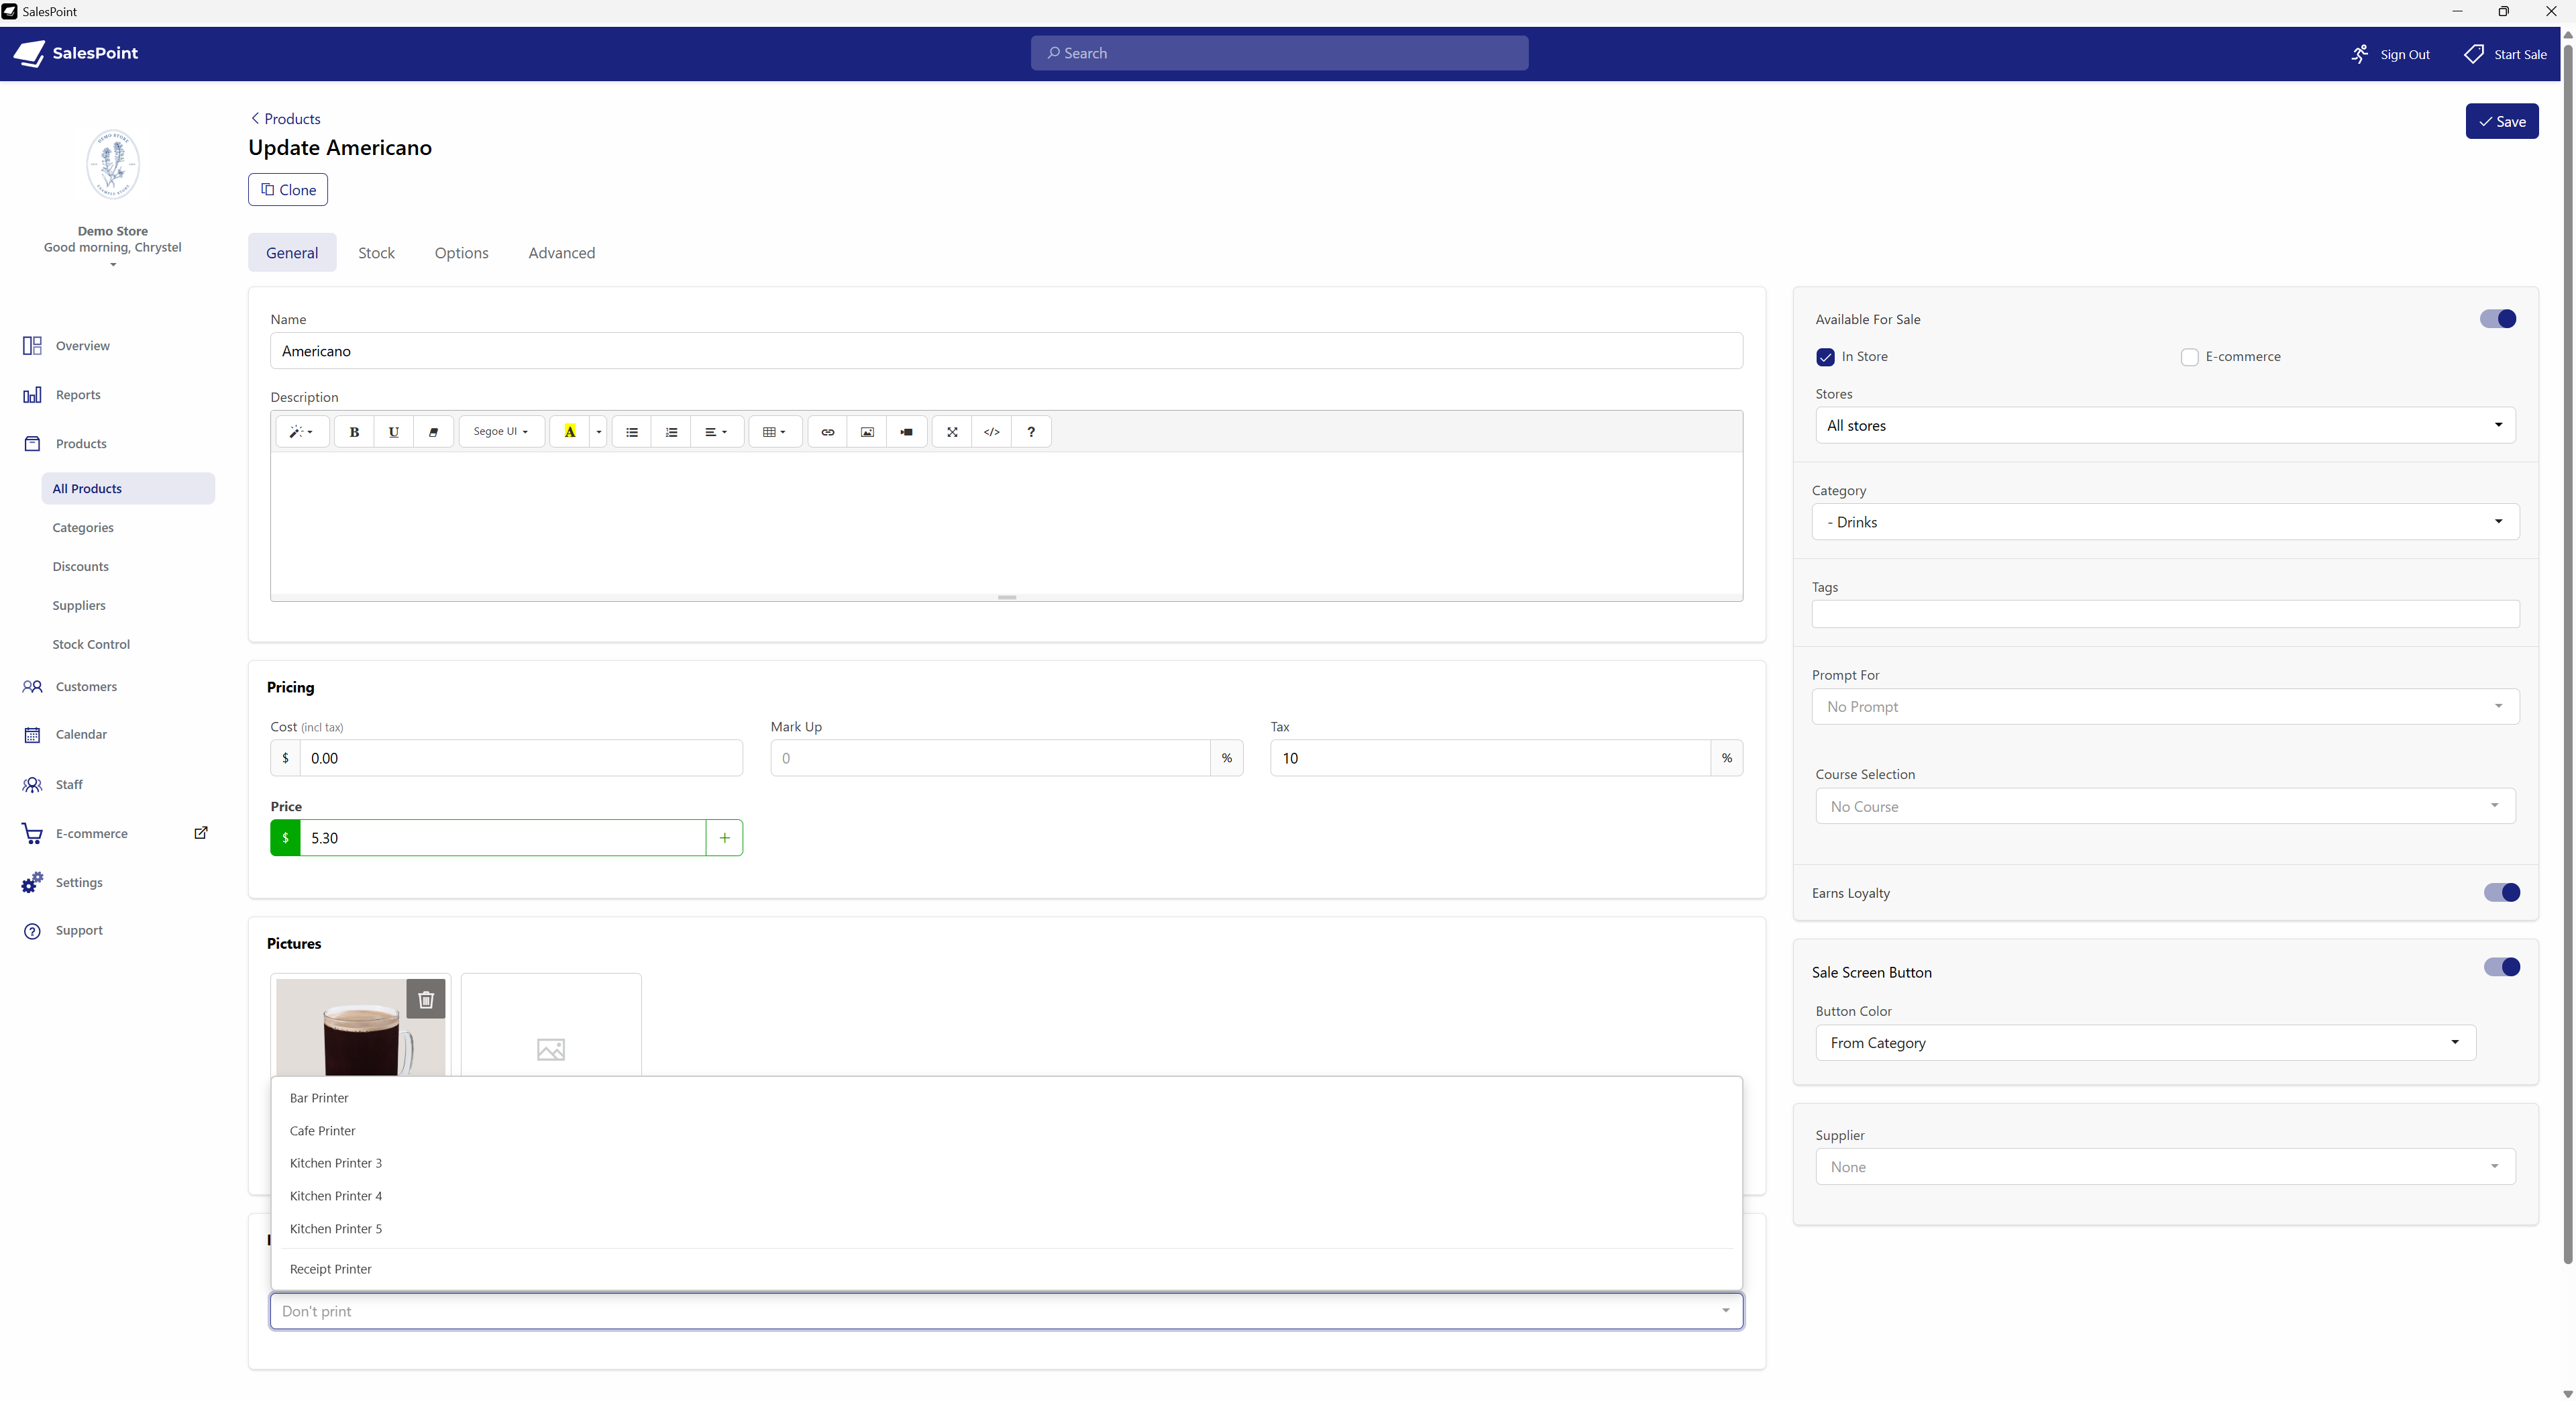
Figure 5: Customized kitchen printer names displayed in Product Kitchen Ticket settings.
Related Articles
- Set Up Products
- Import Products to Your Store
- Markup Calculator
- Product Pricing
- Product Options (Espresso Ordering)
- Activating Product Loyalty
- Product Bulk Update
- Product Category Availability for the Day
- Utilizing Product Coreduction and Stock Control
- Create Product Recommendations
- Enabling Automatic Prompt For Quantity for Product Selection