Set Up Kiosk
1. Enable Kiosk
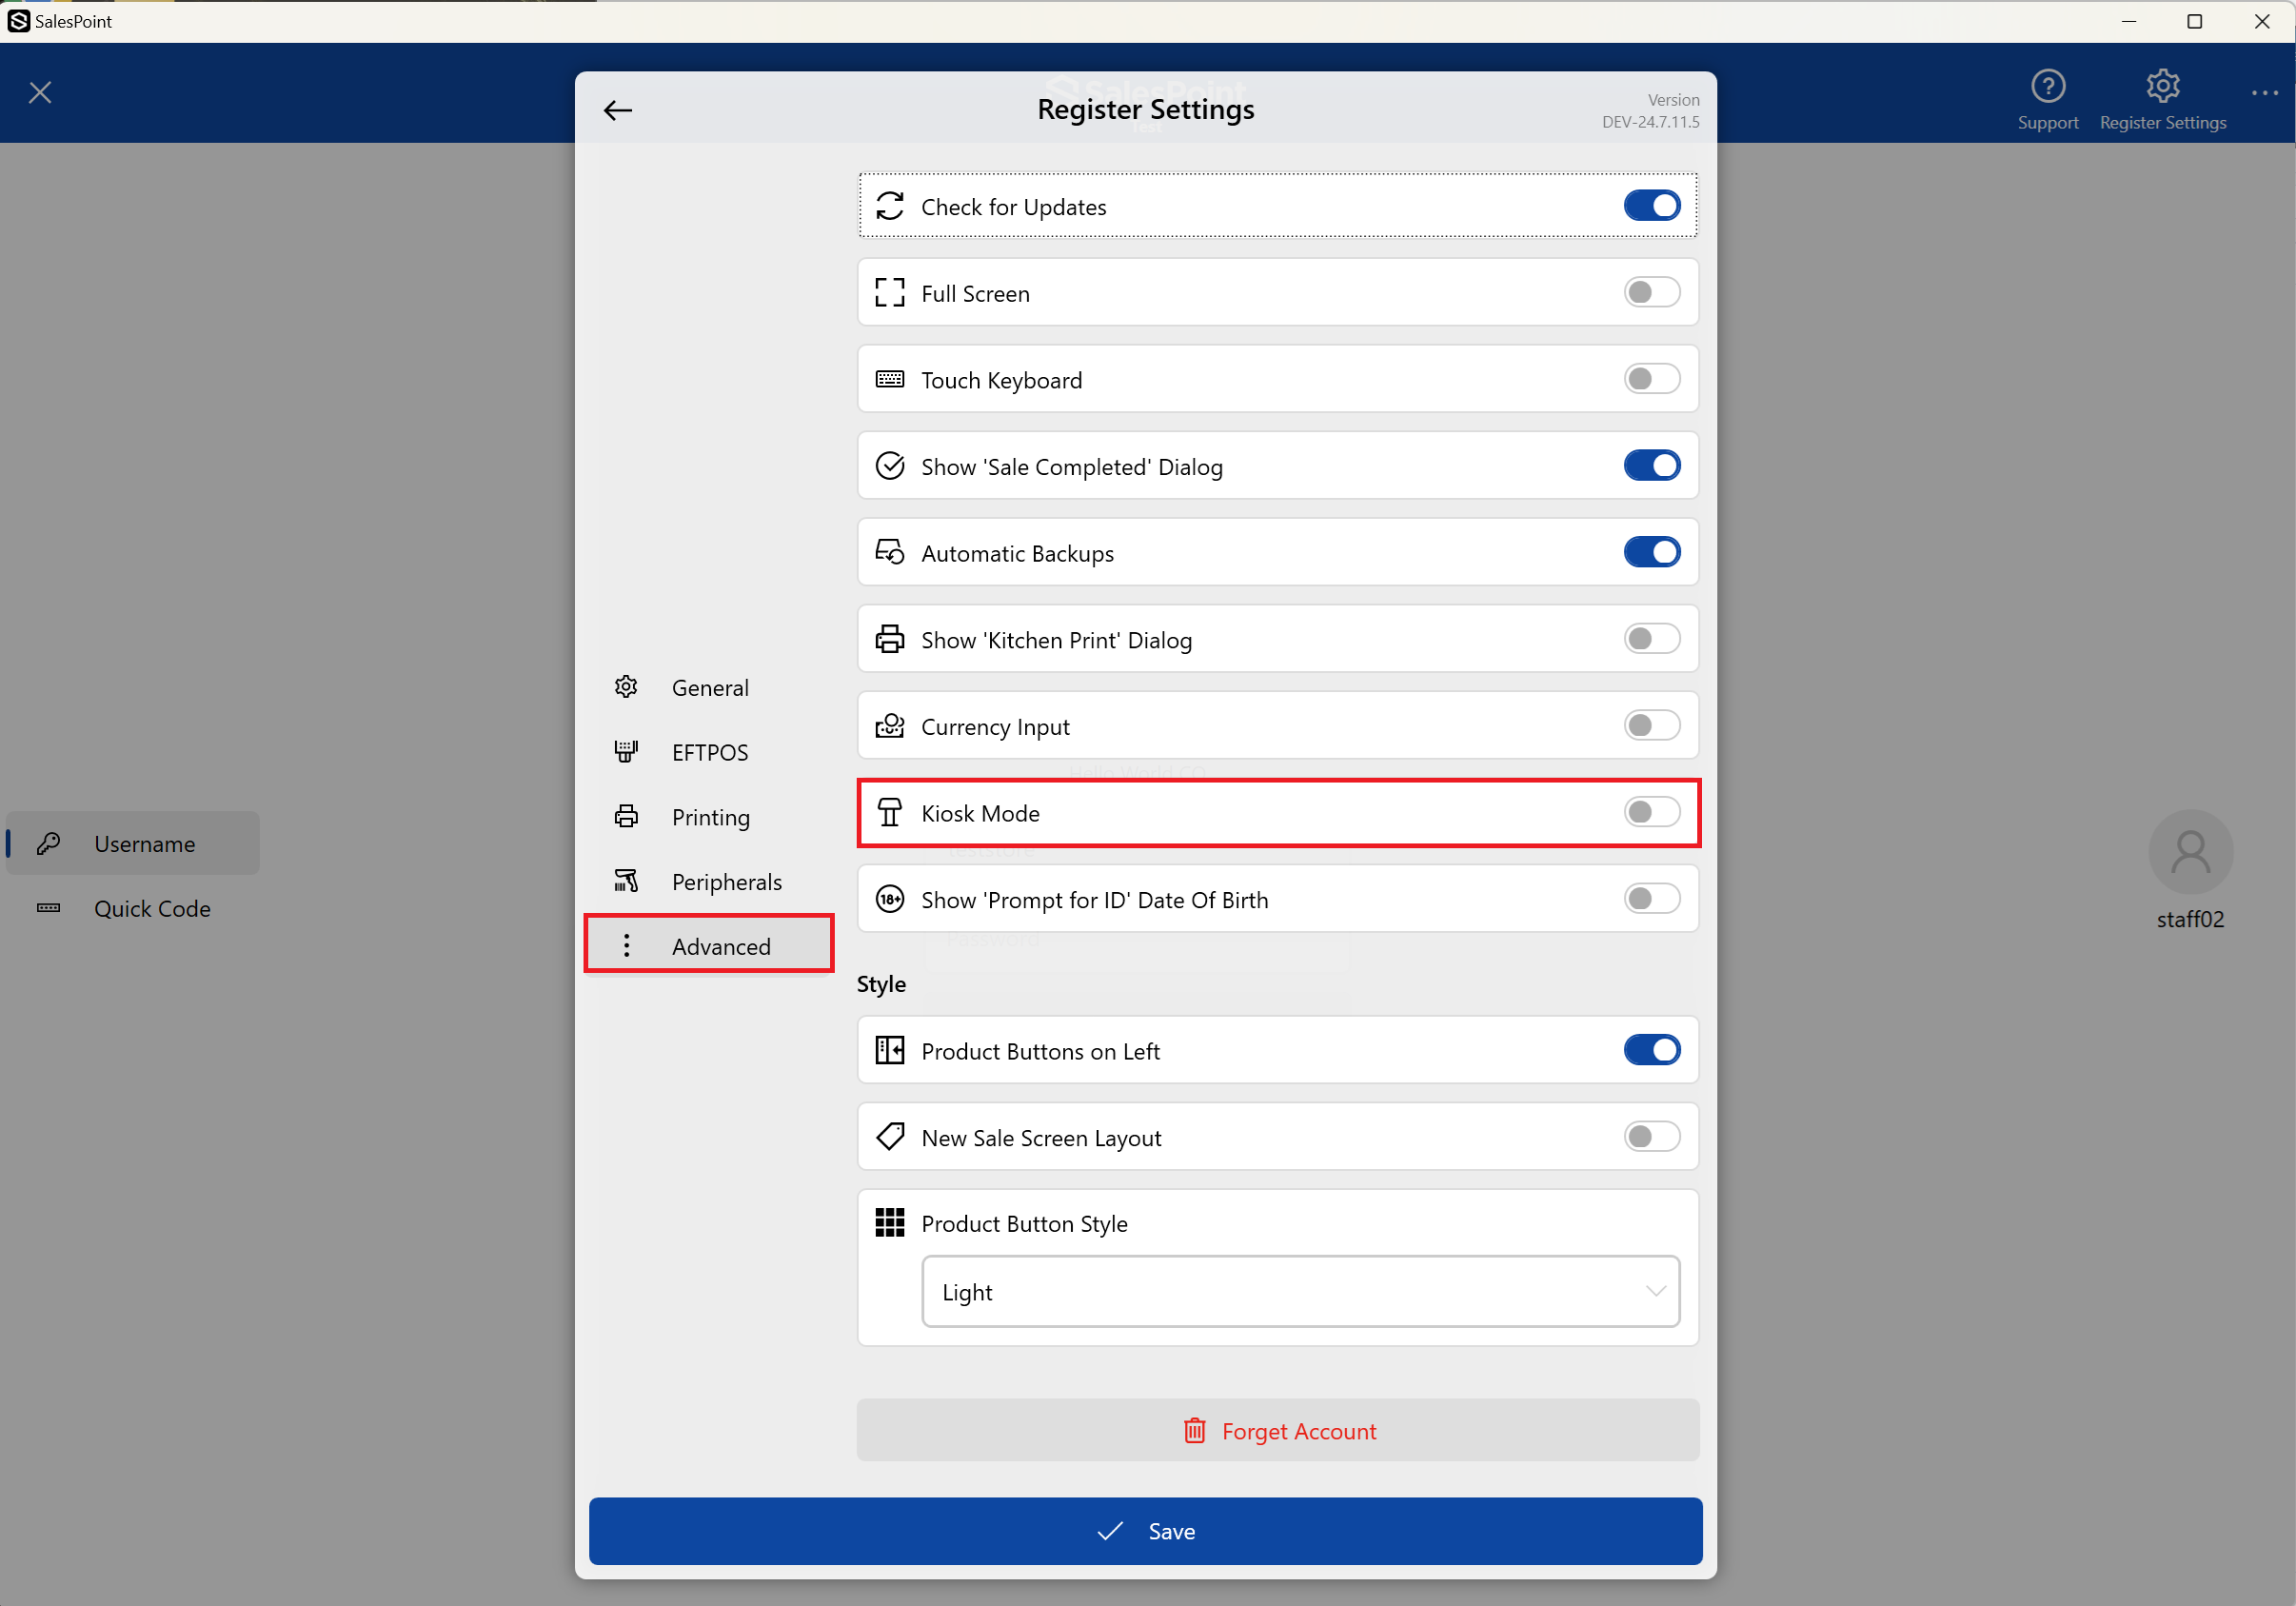
- In the Register Settings, navigate to the Advanced section.
- Enable Kiosk here first.
Once enabled, you will have to enable the Kiosk in the Dashboard.
- Sign in as an admin, go to Settings, and select the Kiosk subcategory tab.
- Enable the Kiosk mode.

2. Customize Kiosk Settings
- Order Numbers: Enable this toggle if you want to have an order number for every sale.
- Capture Customer Name: Enable this toggle if you want to get the customer name for every order.
3. Set an Idle Image
Set an image to display when the kiosk is not in use. There are three different settings:
- Default Horizontal and Default Vertical: Select a background color, which will be set either horizontally or vertically on the screen.
- Custom: Add an image to set as the idle image. This is perfect for a customizable look for your store.
Next, set a timer for the idle image to show up. This timer determines how long the kiosk waits without interaction before displaying the idle image.
4. Set Product Button Width
If you want to resize the product buttons, set the Minimum Product Button Width. The original size is 300px.
5. Set Timeouts
These timers ensure your customers have enough time to order.
- Check Customer Still Present After: When a button is clicked, this timer starts. For example, if set to 30 seconds, the customer has 30 seconds to interact with the kiosk before the next timeout.
- Give Customer (X) Seconds to Respond: When the "Check Customer Still Present After" timer runs out, a pop-up saying "Are You Still There?" will appear and start a countdown. Customers have a set amount of time to respond. If the timer runs out, it will assume the customer has left.
- Close Dialogs After: This is the timeout duration before a dialog closes. For example, if set to 30 seconds, when viewing the customer cart, if there is no interaction for 30 seconds, the dialog will automatically return to the main screen. Another example is the screen showing product options.
- Show Text Entry Screens For: This timer sets how long the text entry screen remains open without interaction. For example, when selecting the Clear Cart button, a text entry will ask for confirmation. If there is no interaction and the timer runs out, the text entry screen will close automatically.
Once you have customized these settings, click the Start Sale button, and your customers will be ready to use the kiosk to place their orders.
How to Use the Kiosk
- To use the kiosk, simply select any product category and the items you want to add to your cart. For example, if you want a burger and a coke, find the burger and the coke and add them to your cart.
- To confirm, select your cart to view the correct information.
- Click the Pay button to complete the order. When the transaction is accepted, a customer receipt will automatically print.
To close the Kiosk, tap the Salespoint Logo five times.