To set up a barcode for a product:
1. On the Dashboard, go to Products.
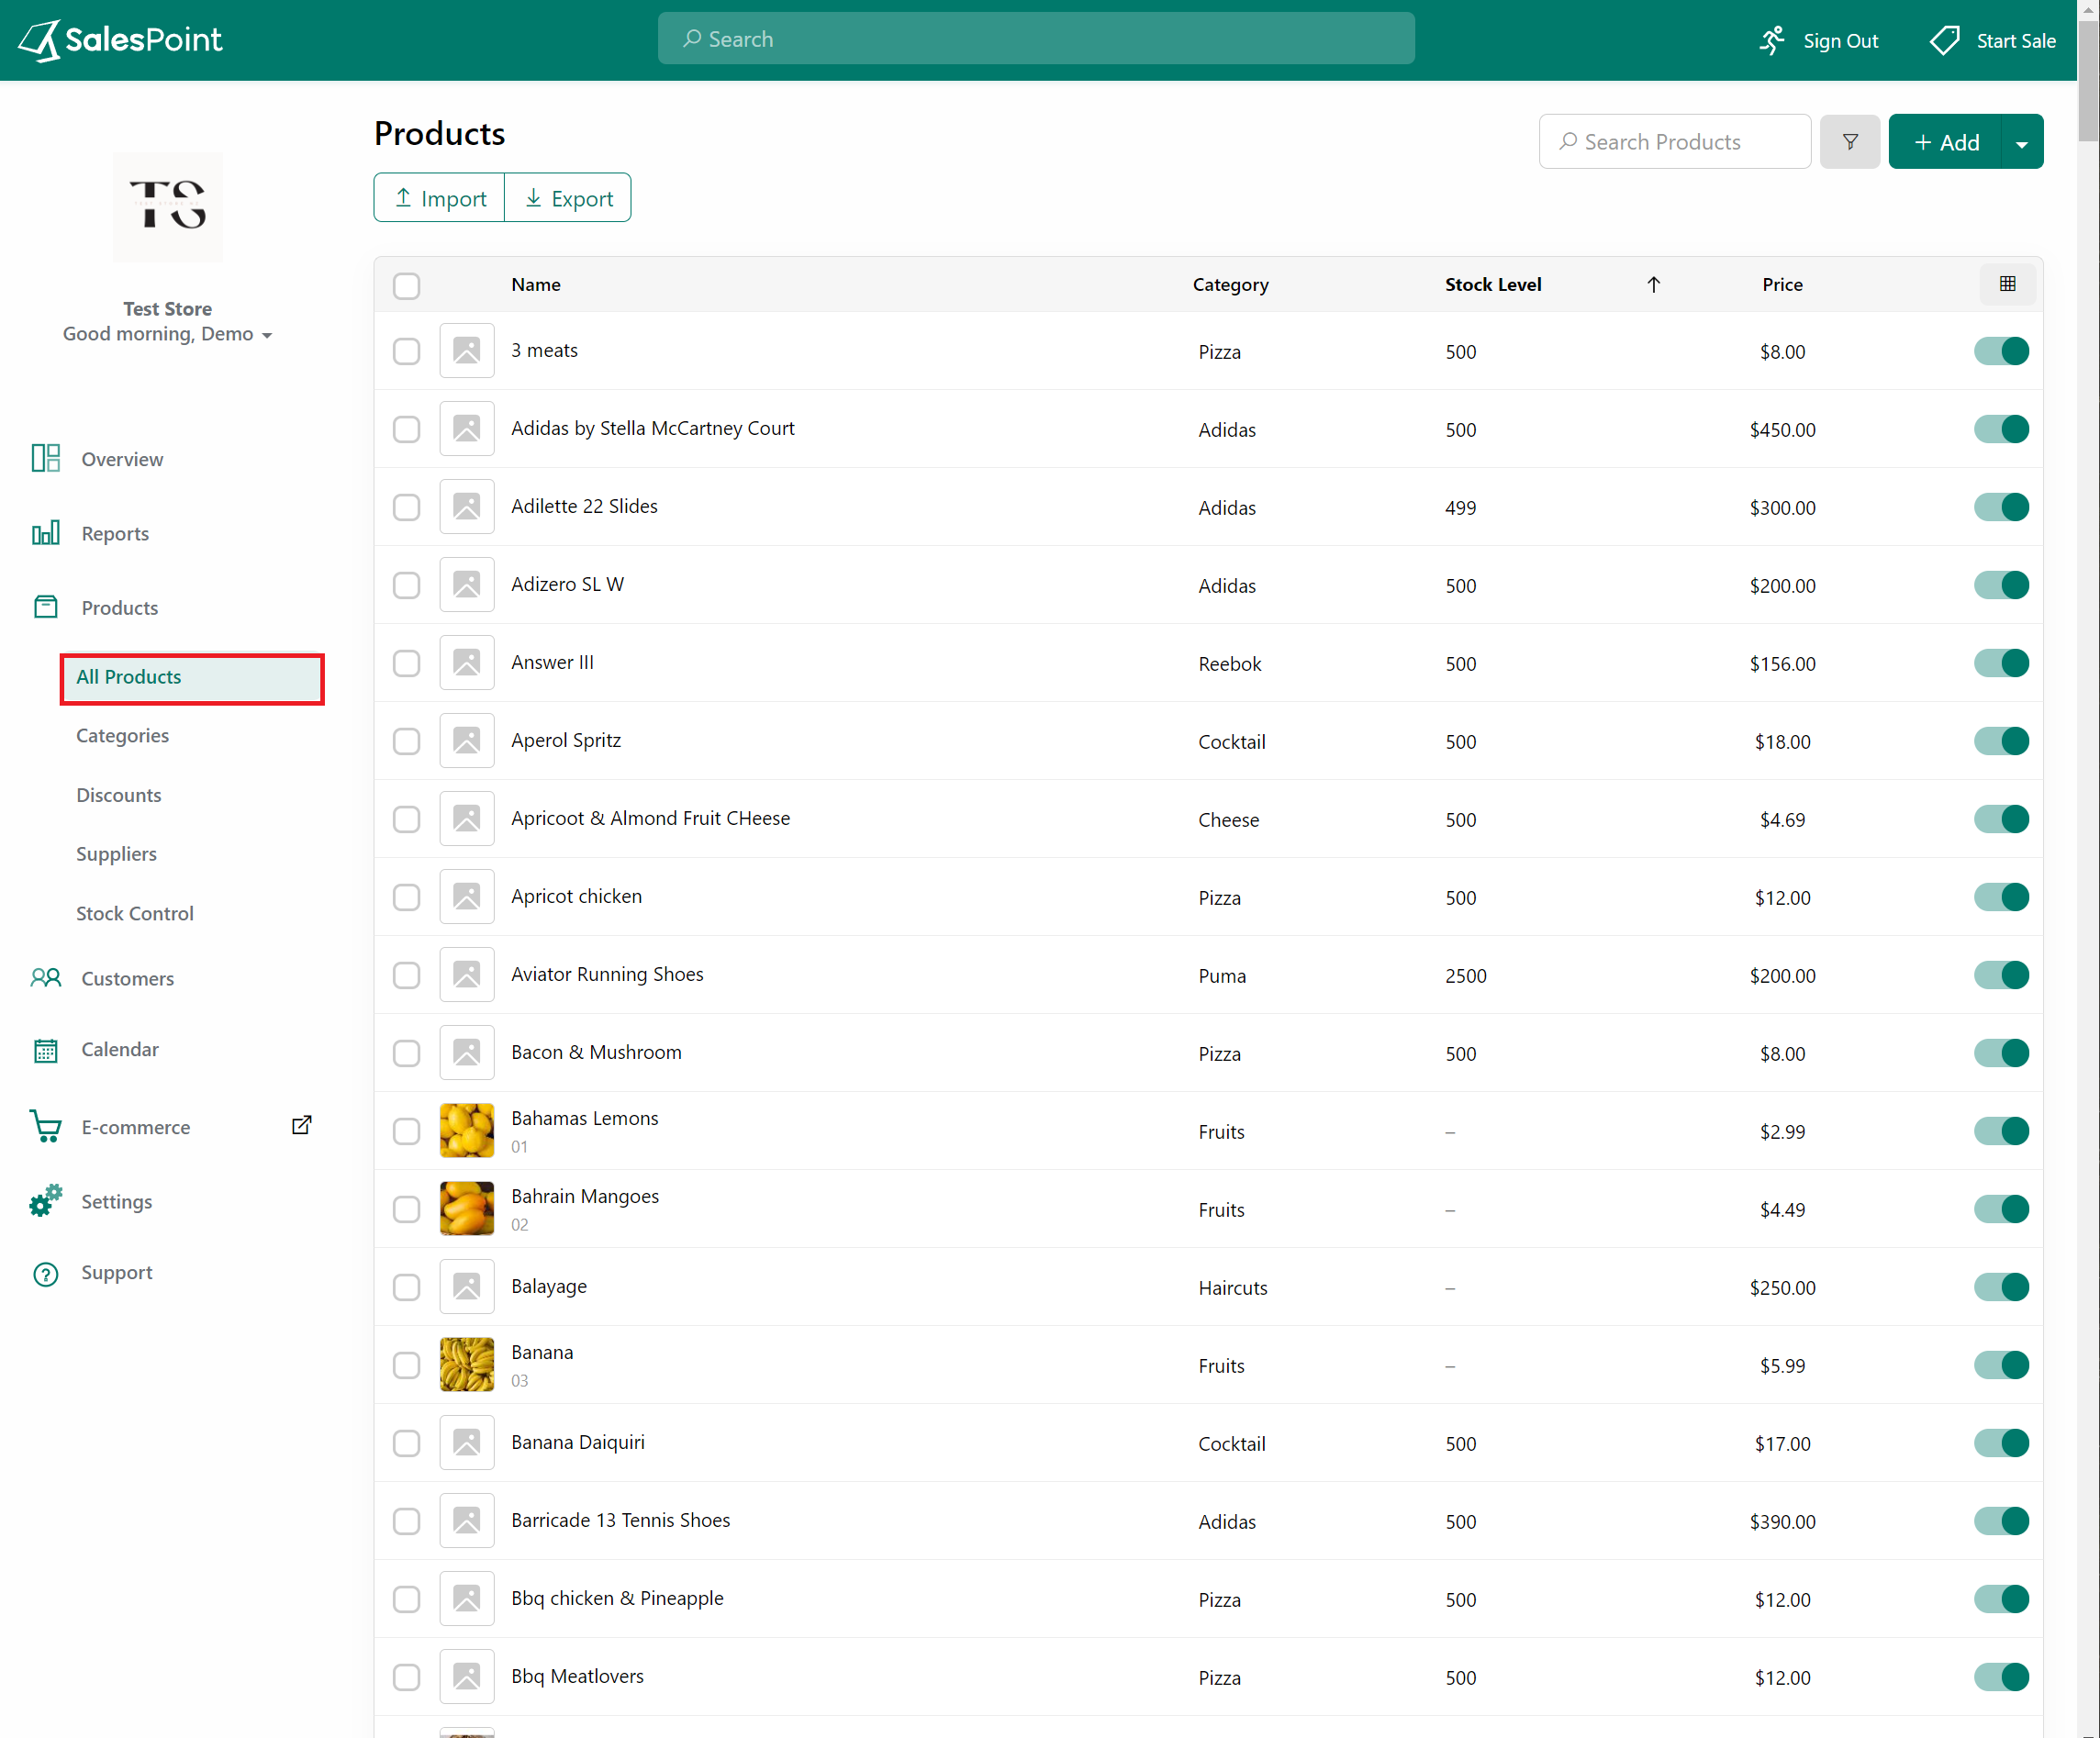
2. If a product has already been created, select it and navigate to the Advanced section or General to find the Barcode field. If not, select the "Add" button to create a new product, and the barcode section should be either in the general or advanced section.
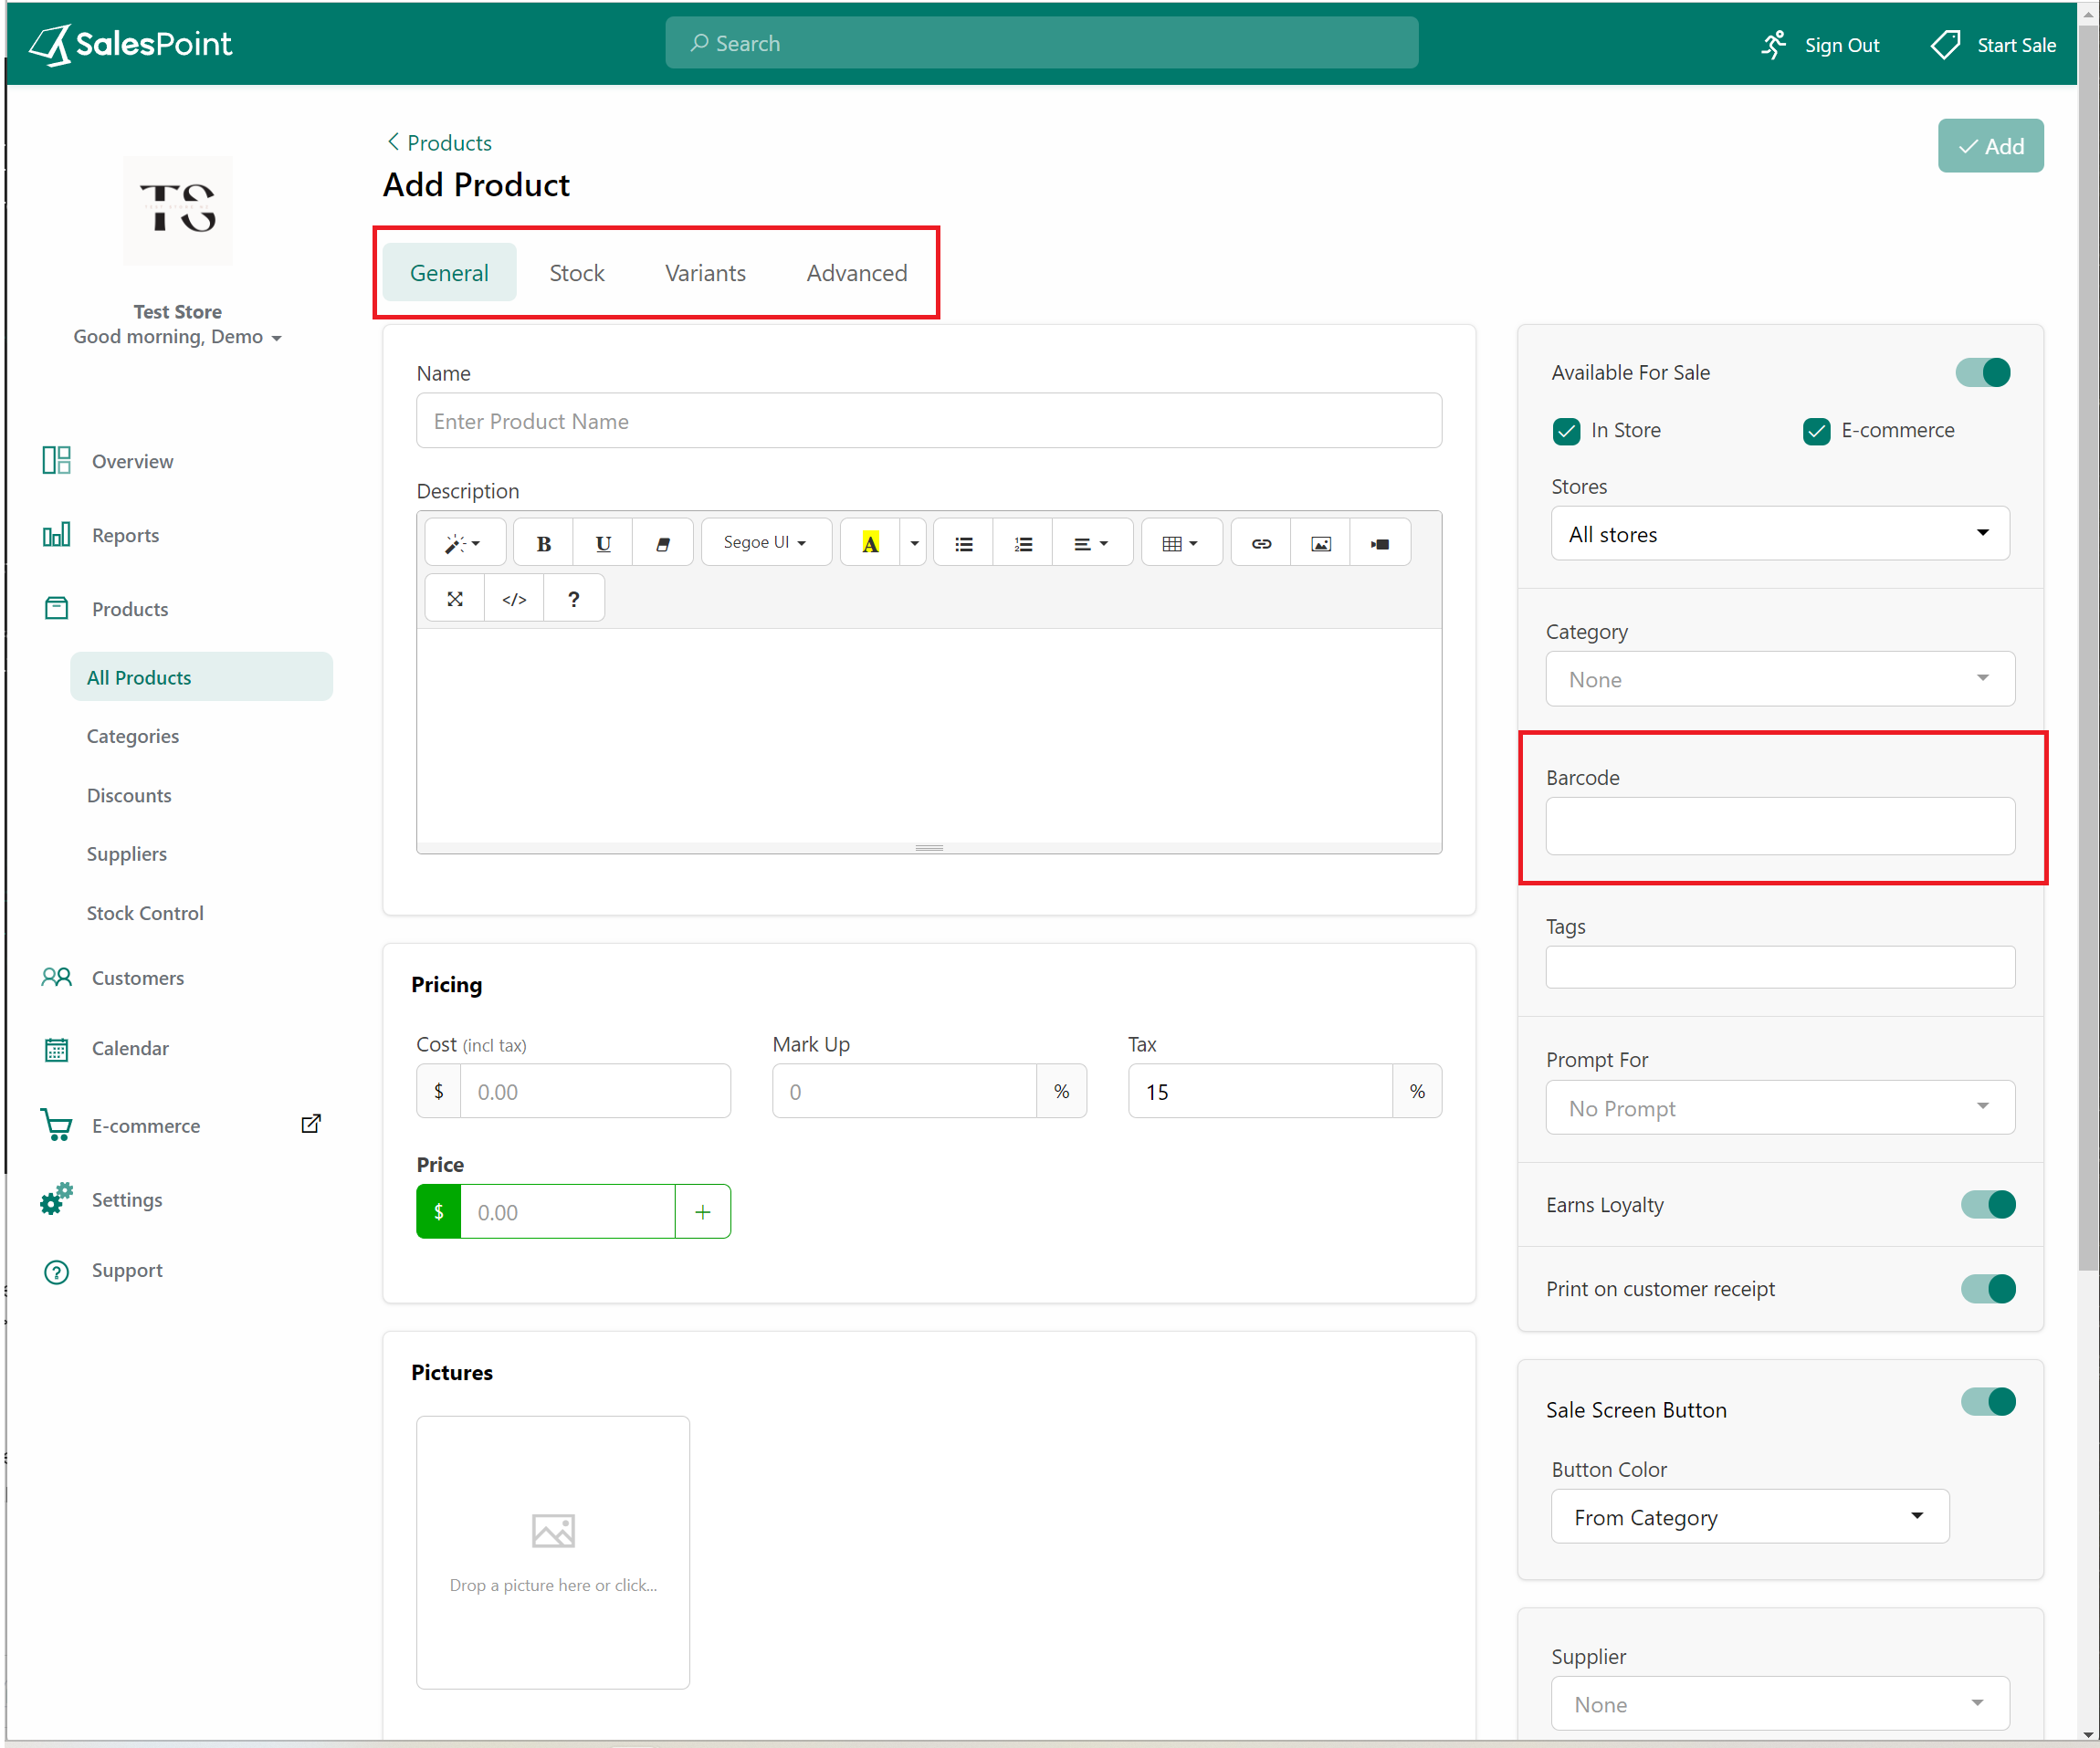
3. Select the Barcode field. You have two options for creating a barcode: either by generating a random code or adding one manually. To generate a random barcode, select the input field for the barcode - this will show two options, "Generate" and "Label." Click the "Generate" button to produce a random barcode number for the product, and the "Label" button will give you access to print the product label.
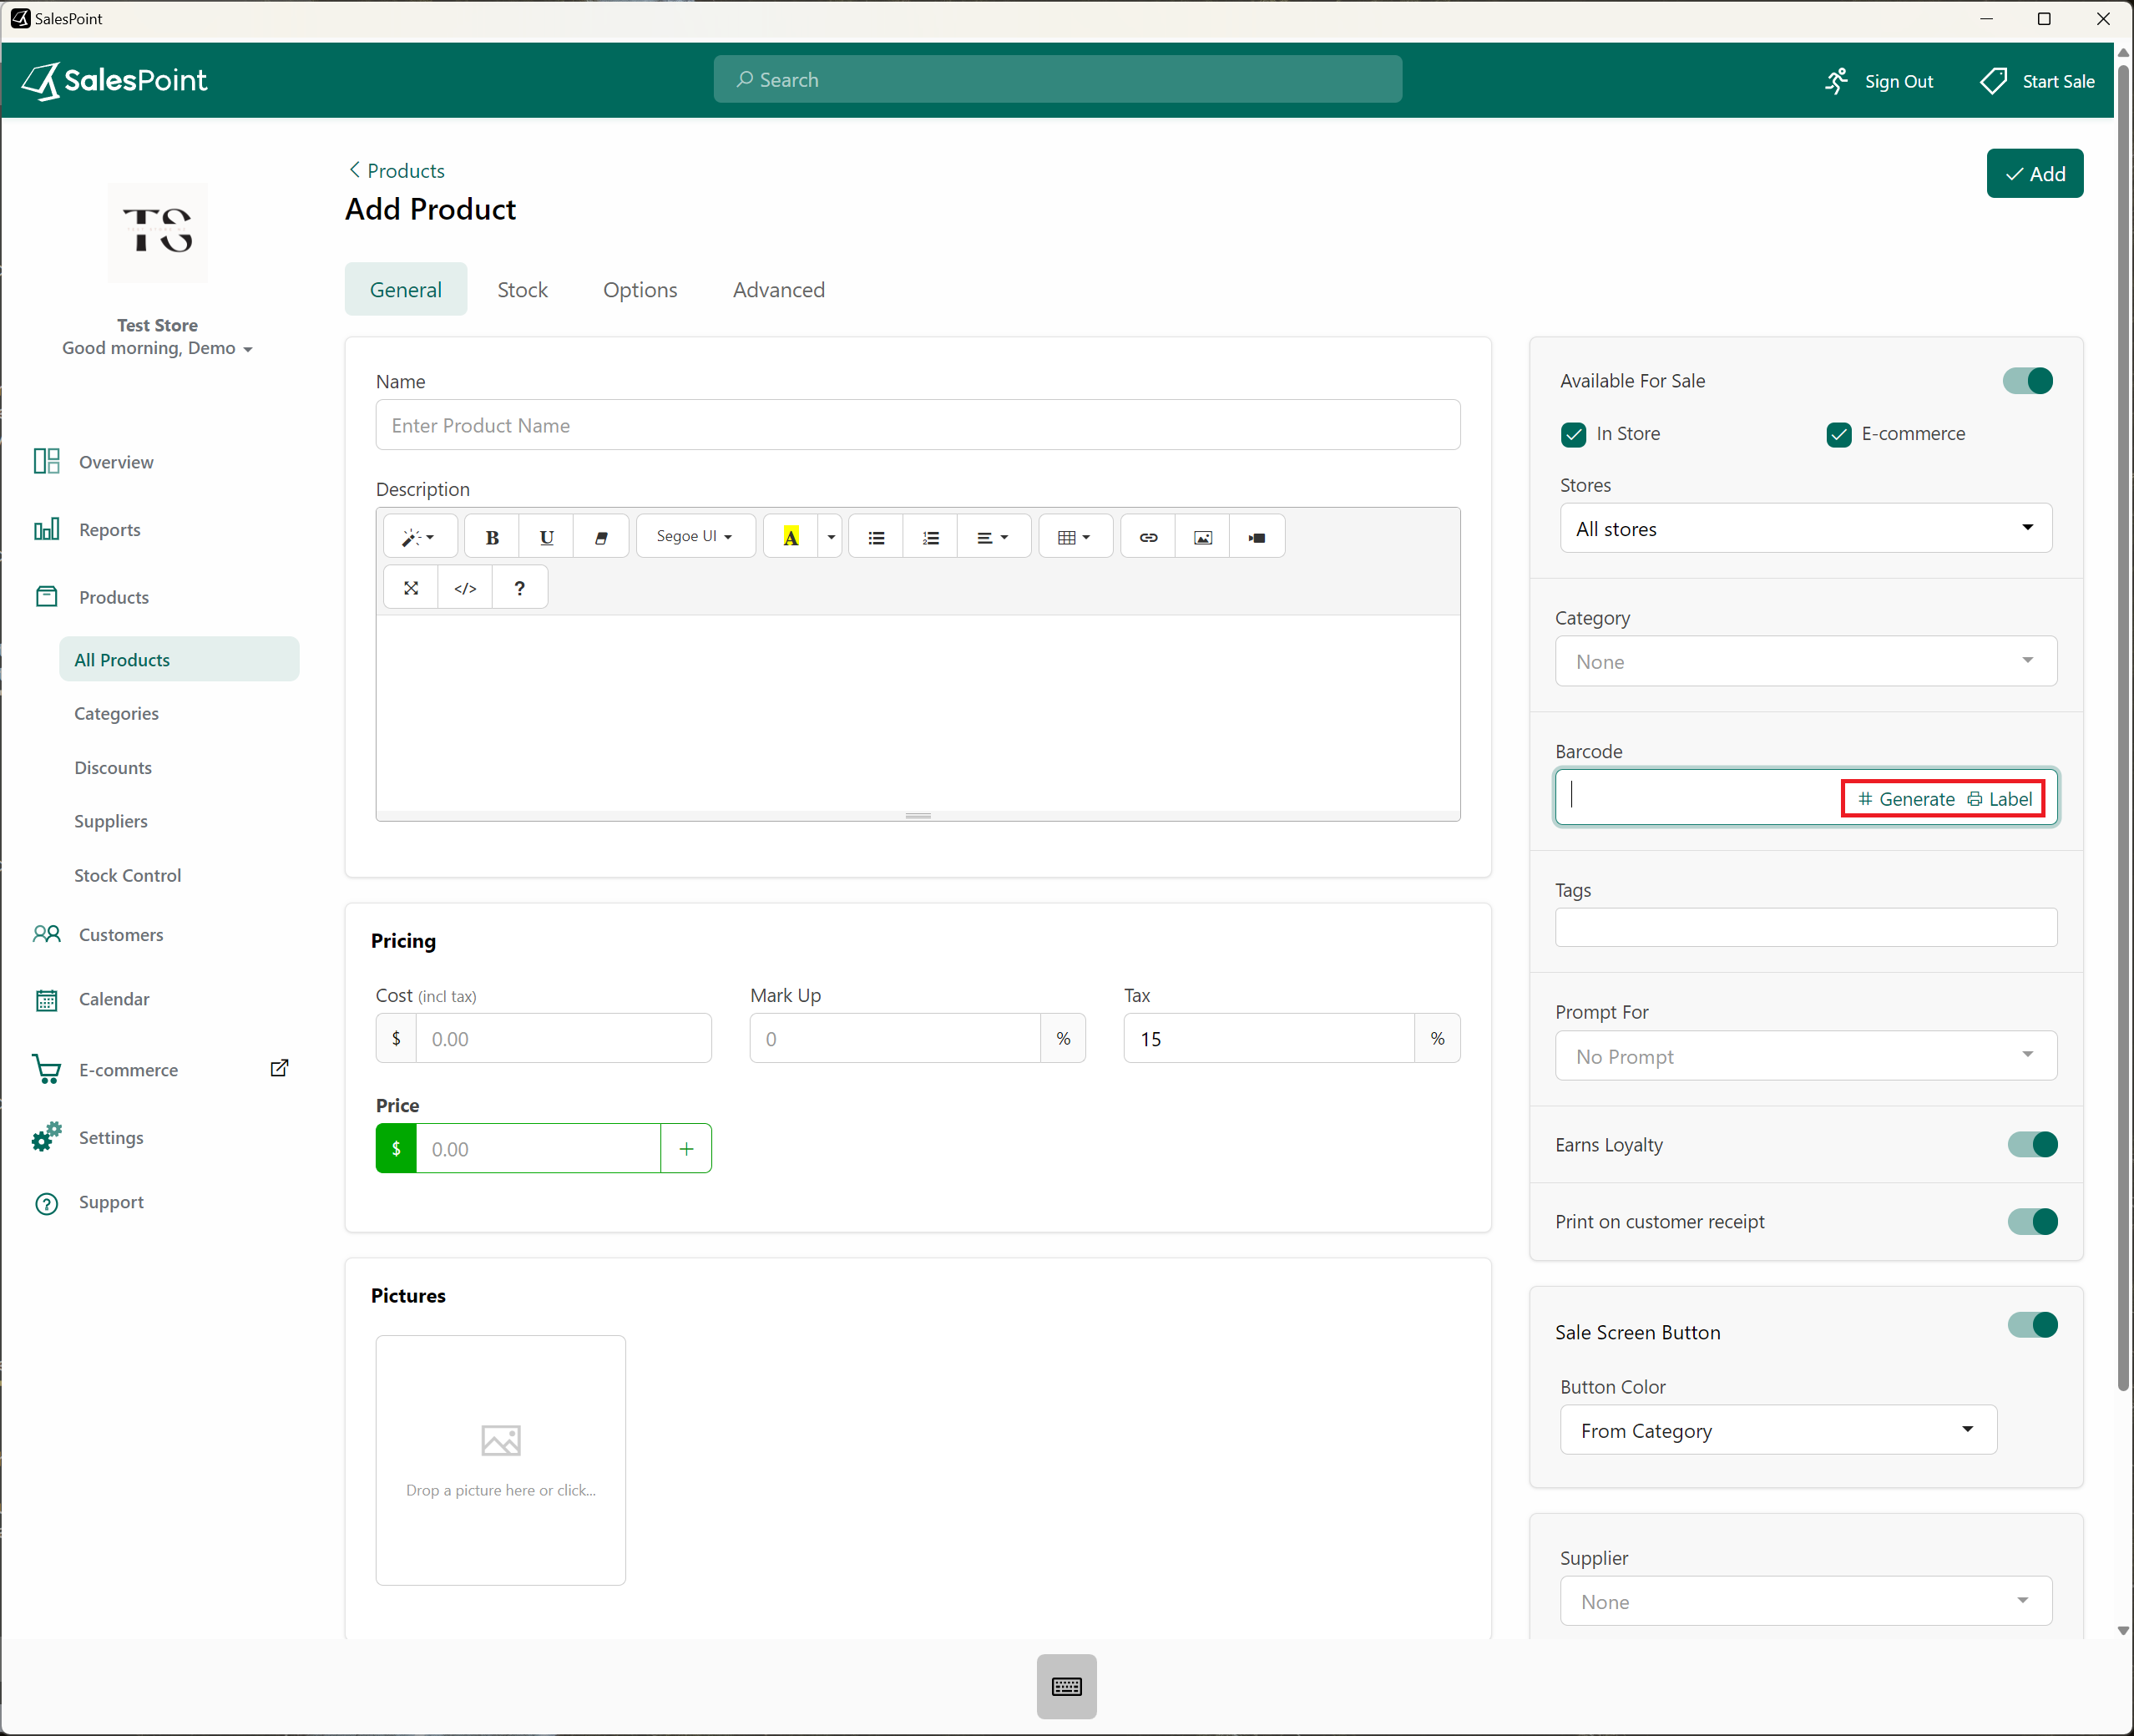
4. Click the "Generate" button to create a random barcode for the product. Alternatively, you can scan the product barcode to add it automatically.
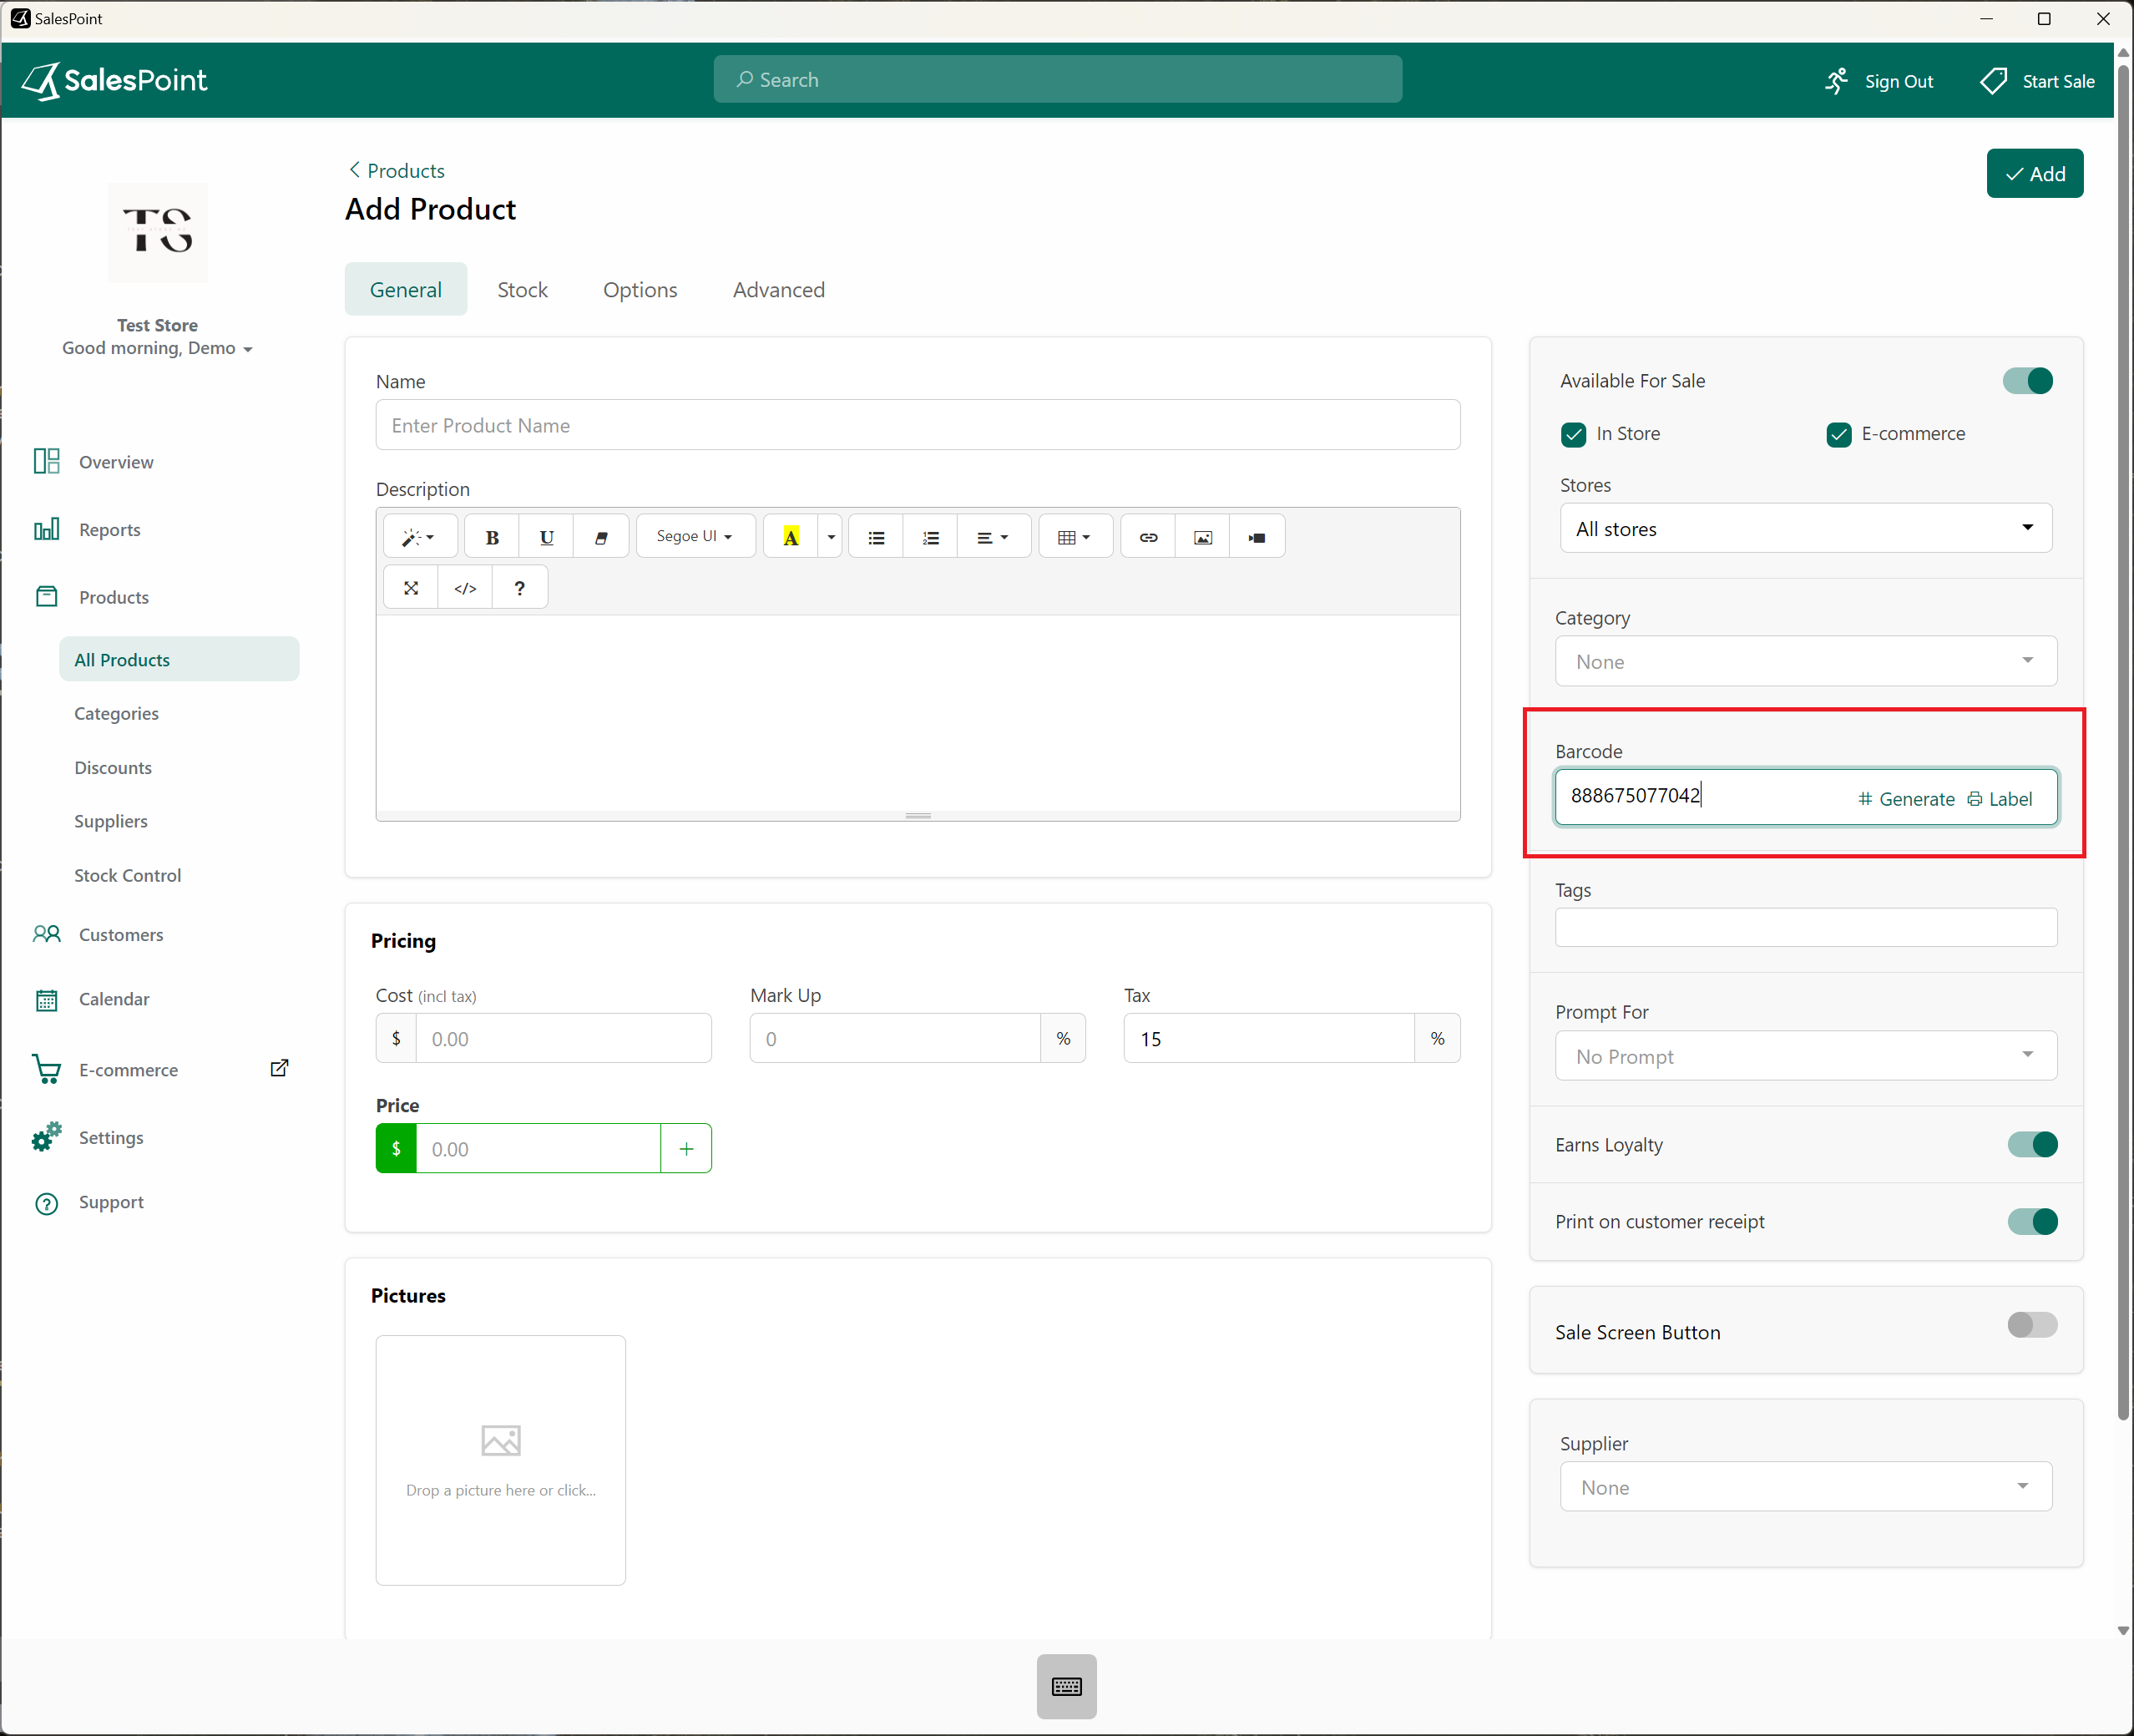
5. Click "Save" once done.
Print the Barcode in the Dashboard
Ensure a printer has been set up in your register settings. To set up, please visit Set Up Printer For Windows.
1. On the Dashboard, go to Products and select the Same product.
2. Select the barcode field, and select the Label button. From here, the receipt printer that's already been set up in the register settings should automatically be selected as the Printer for the Label.
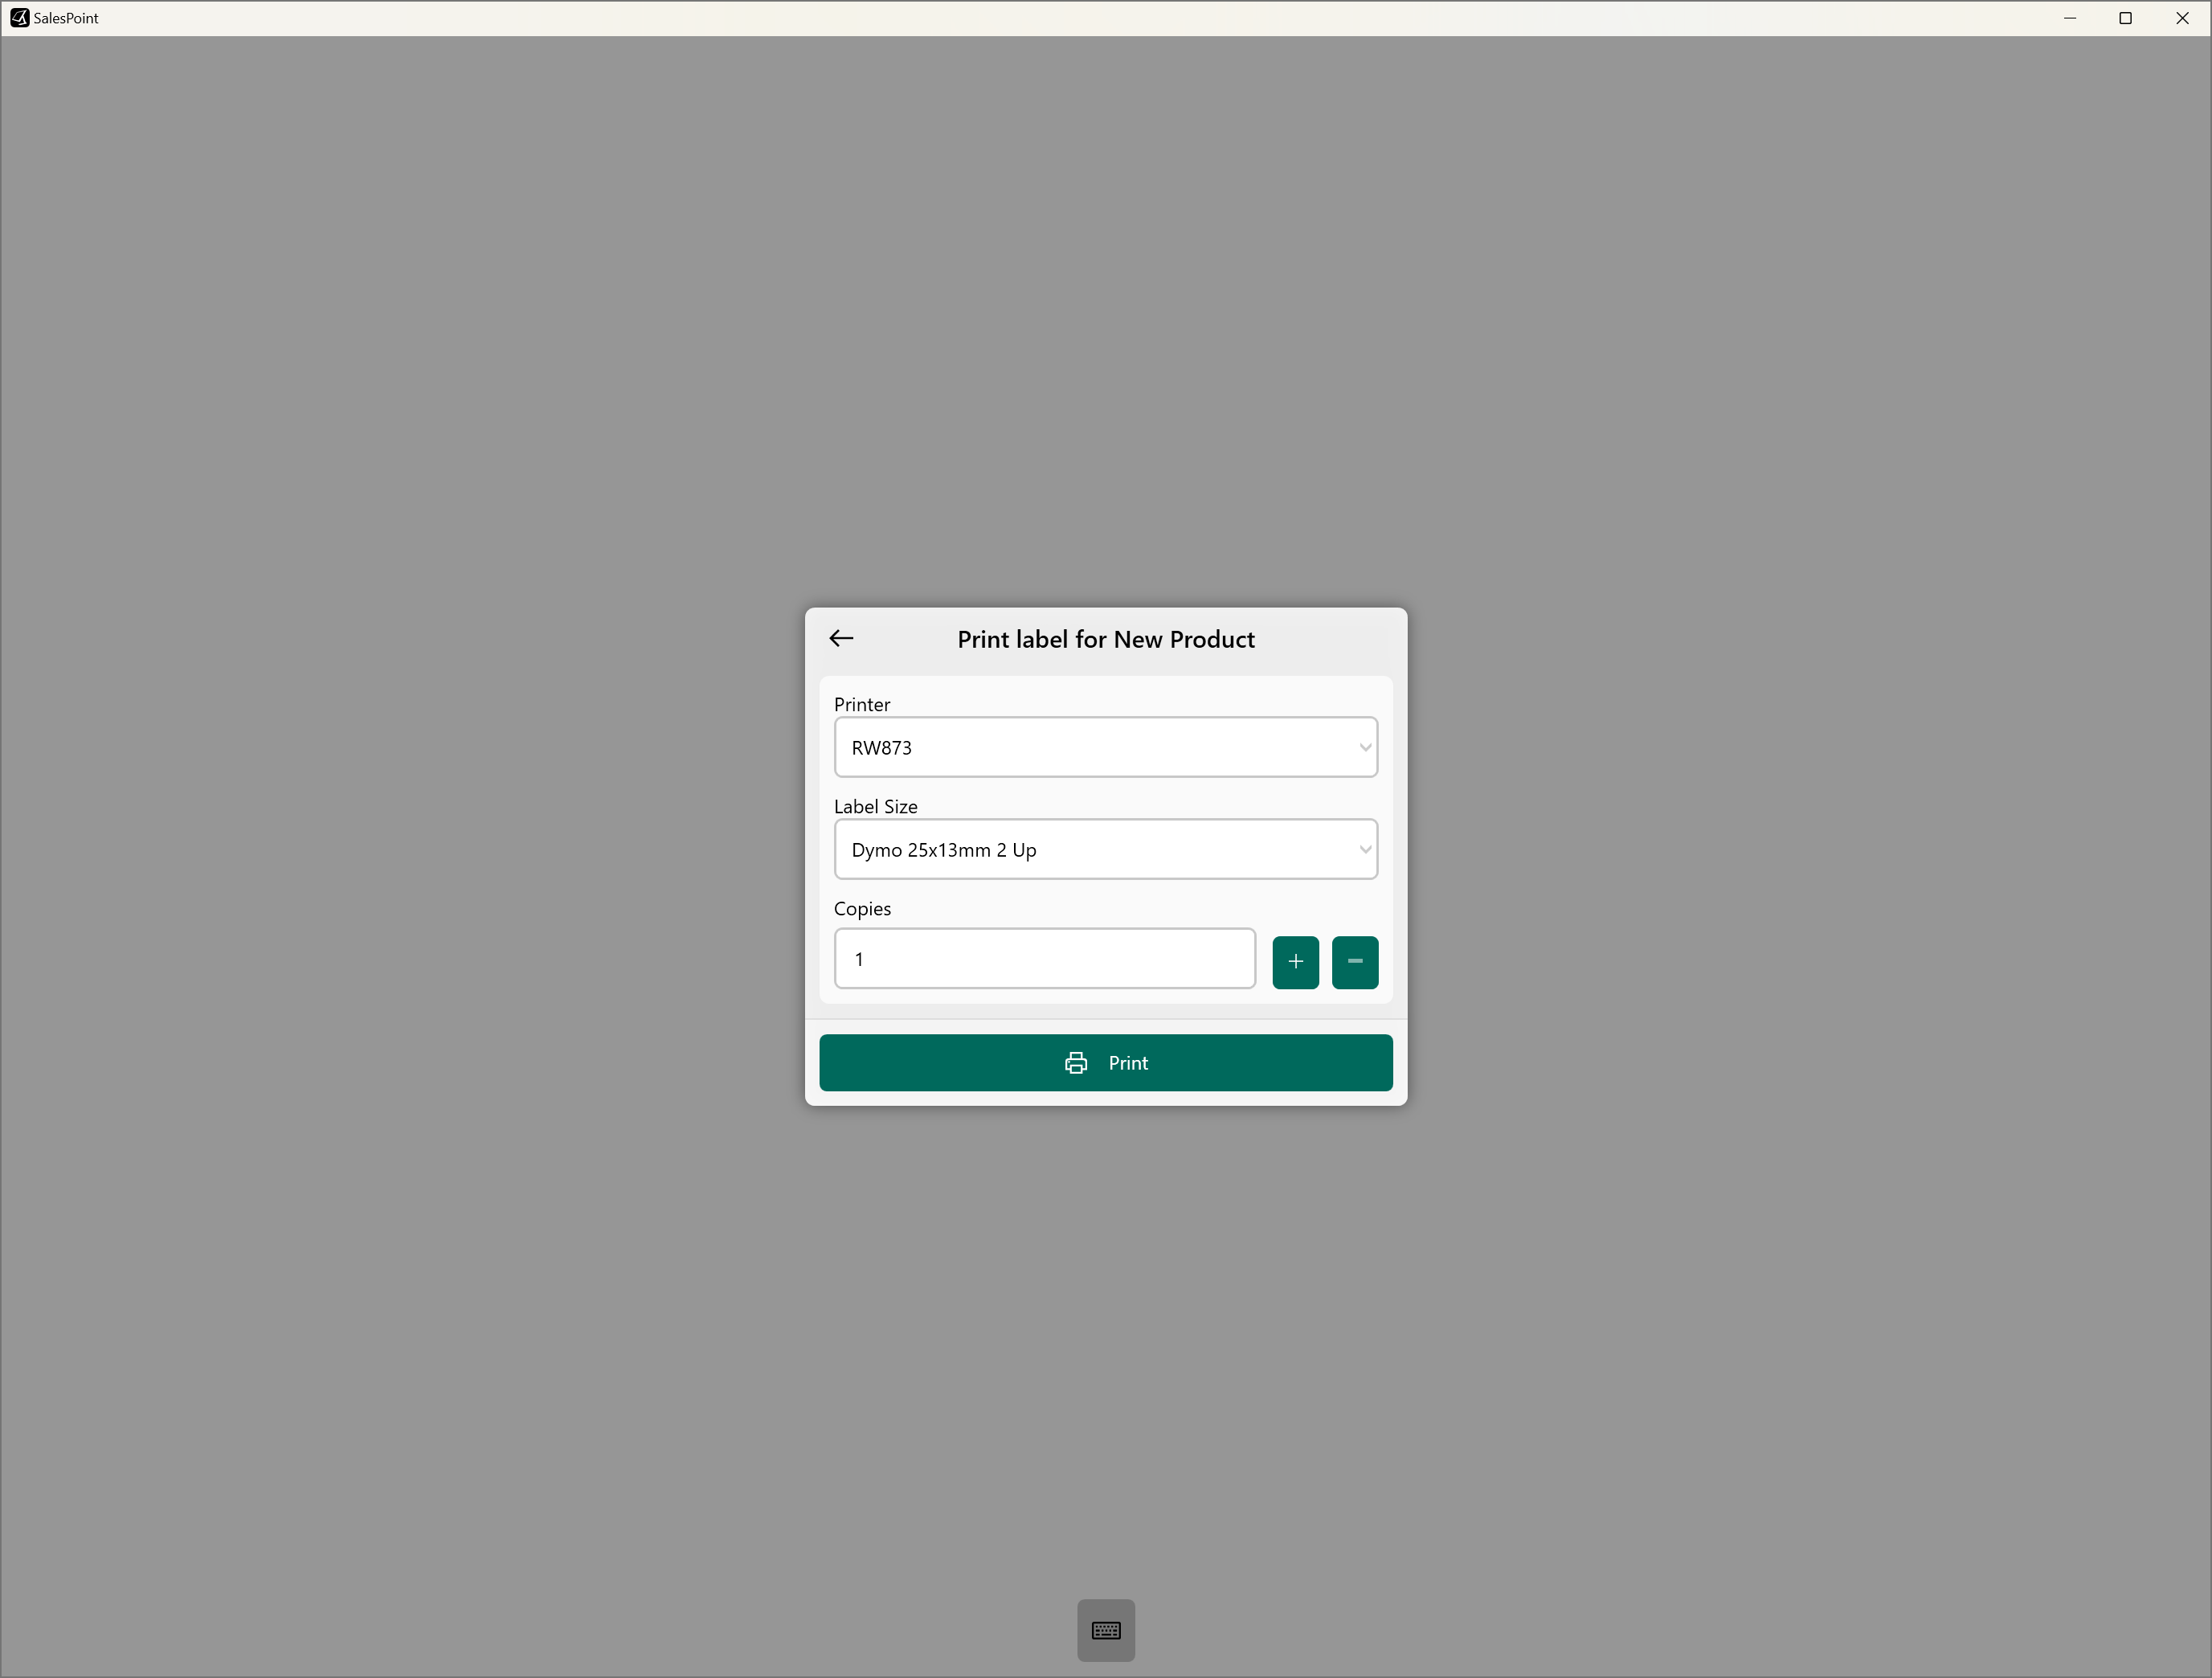
3. Change the Label size according to your preference.
4. Click the Print button once you selected the Label size and the printer to print out the product label.
How to Print the Barcode in Sales
Ensure a scanner has been set up in your register settings. To set up, please visit Set Up Scanner For Windows.
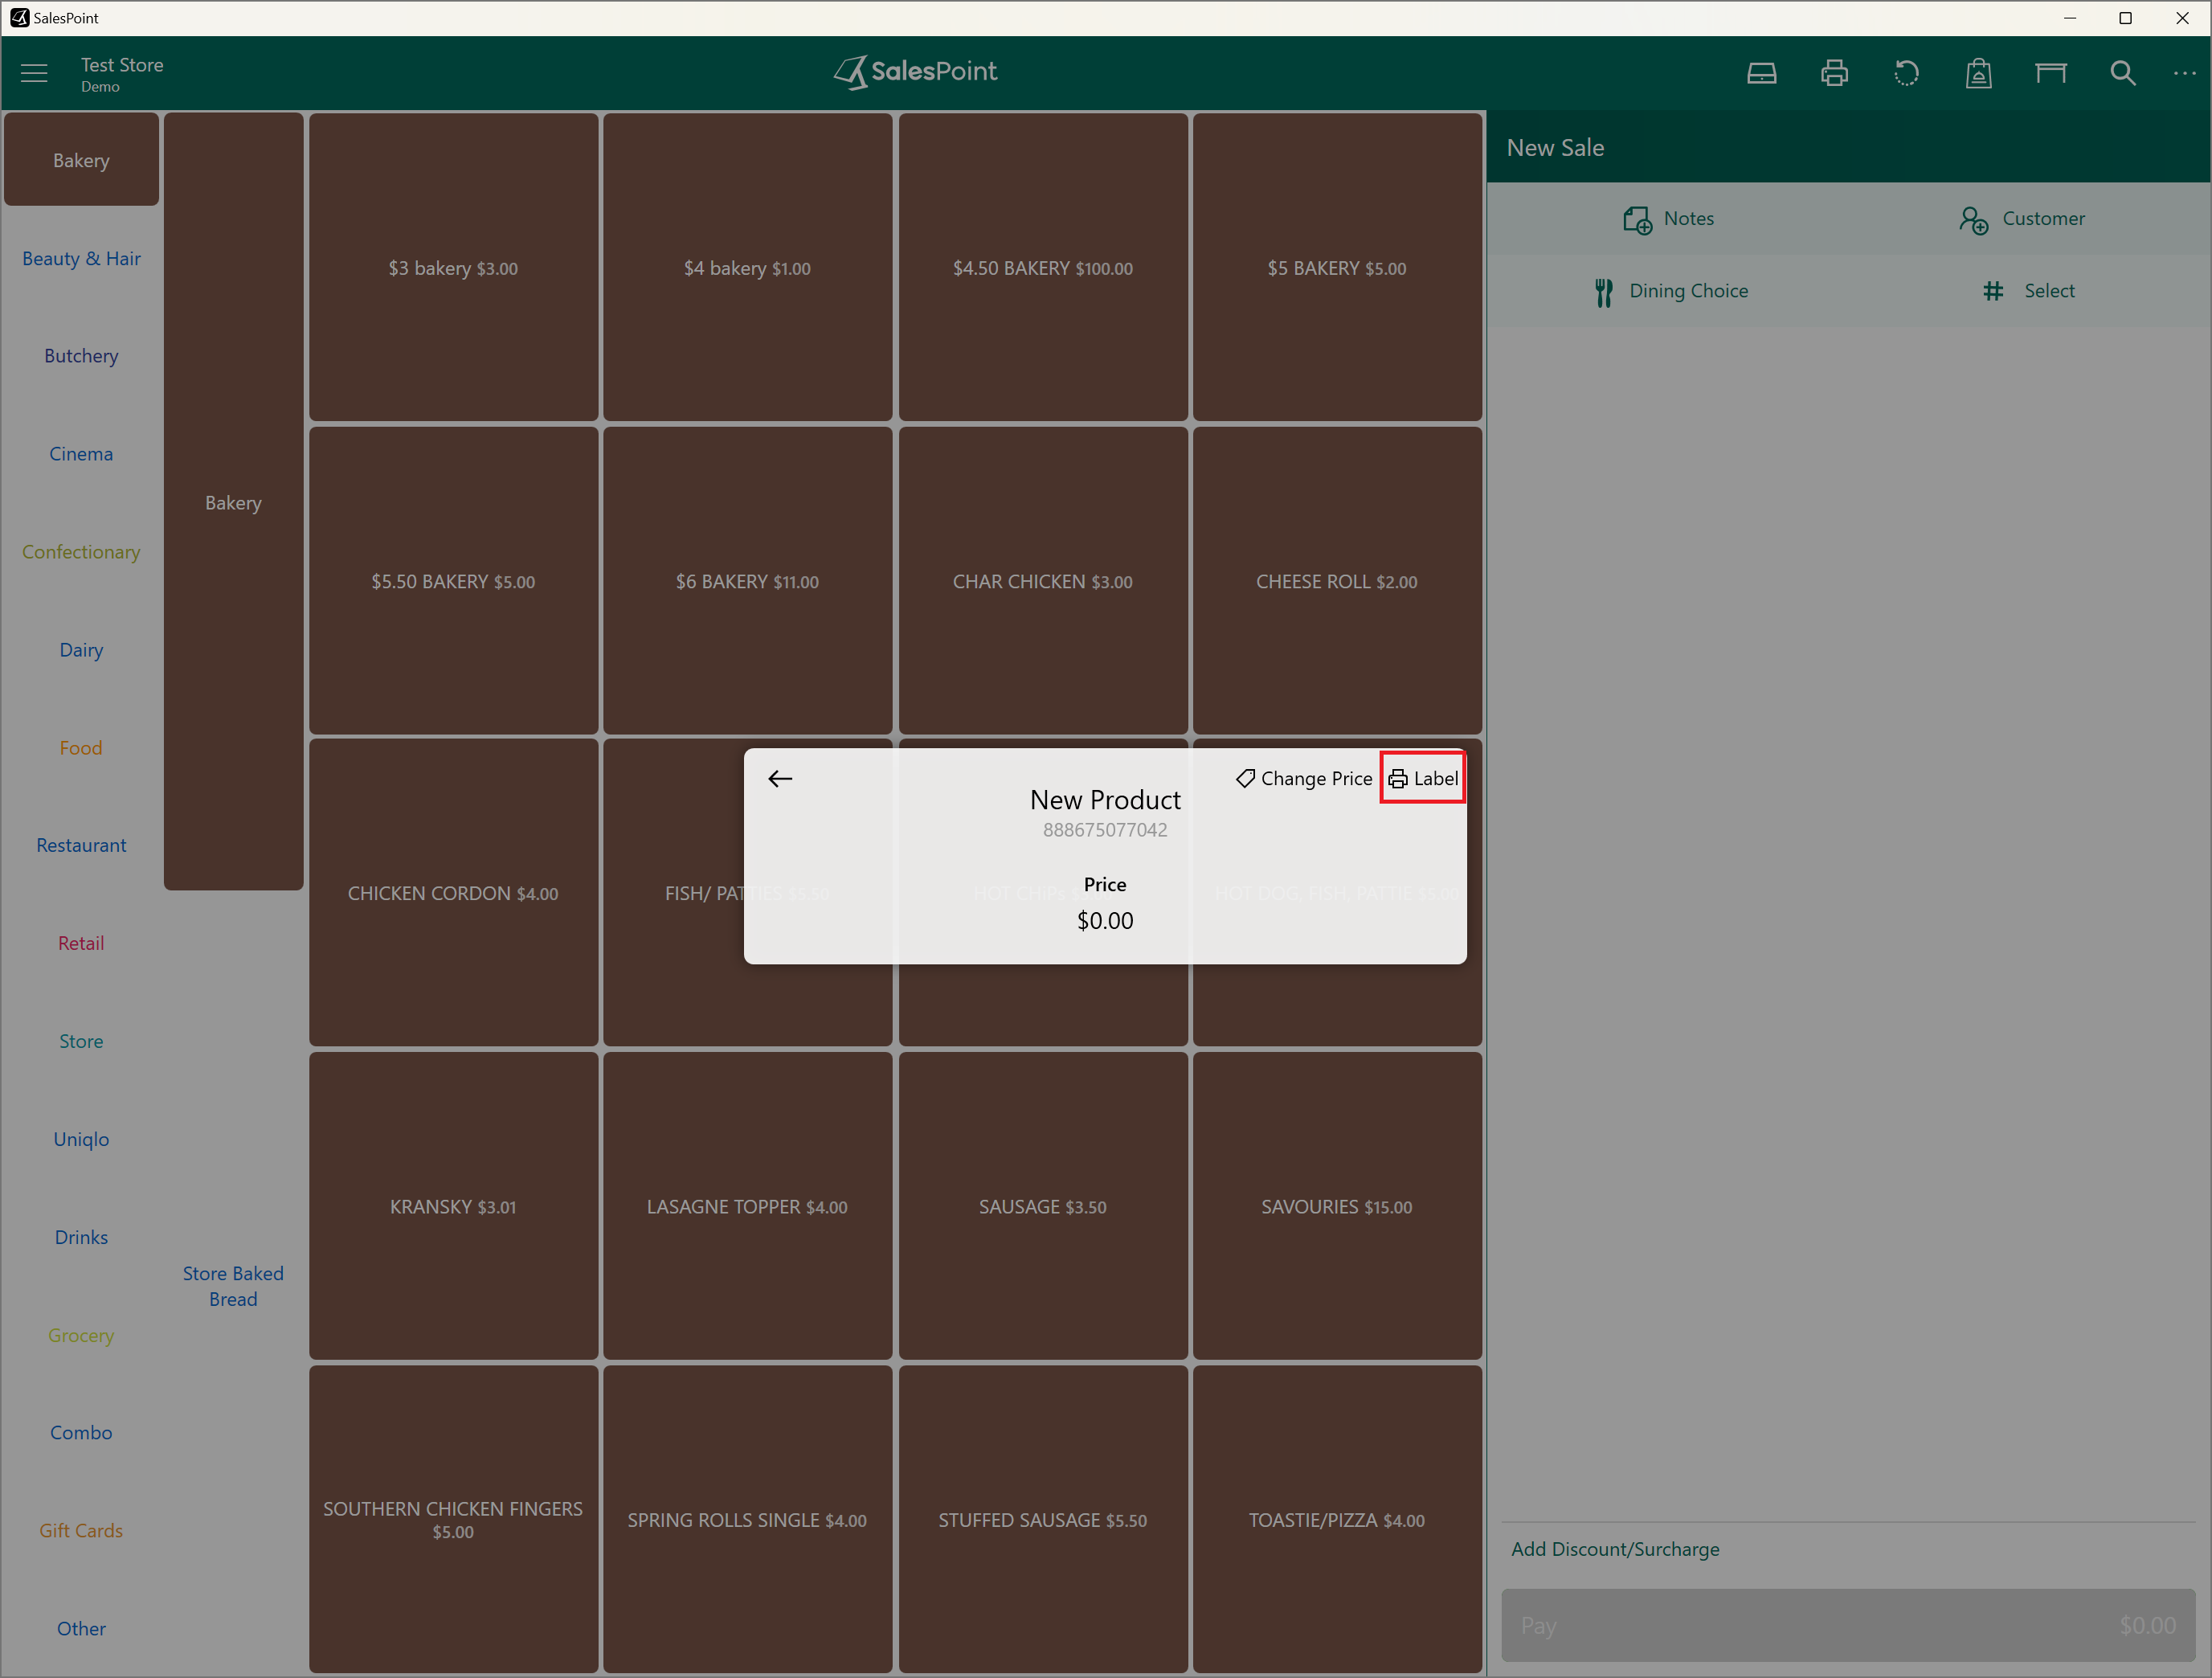
1. If you are signed in as an admin, you can simply right-click a product button to view the product's information. If you are using a touchscreen device, press and hold the button for a couple of seconds. Click the View Information button to print the label.
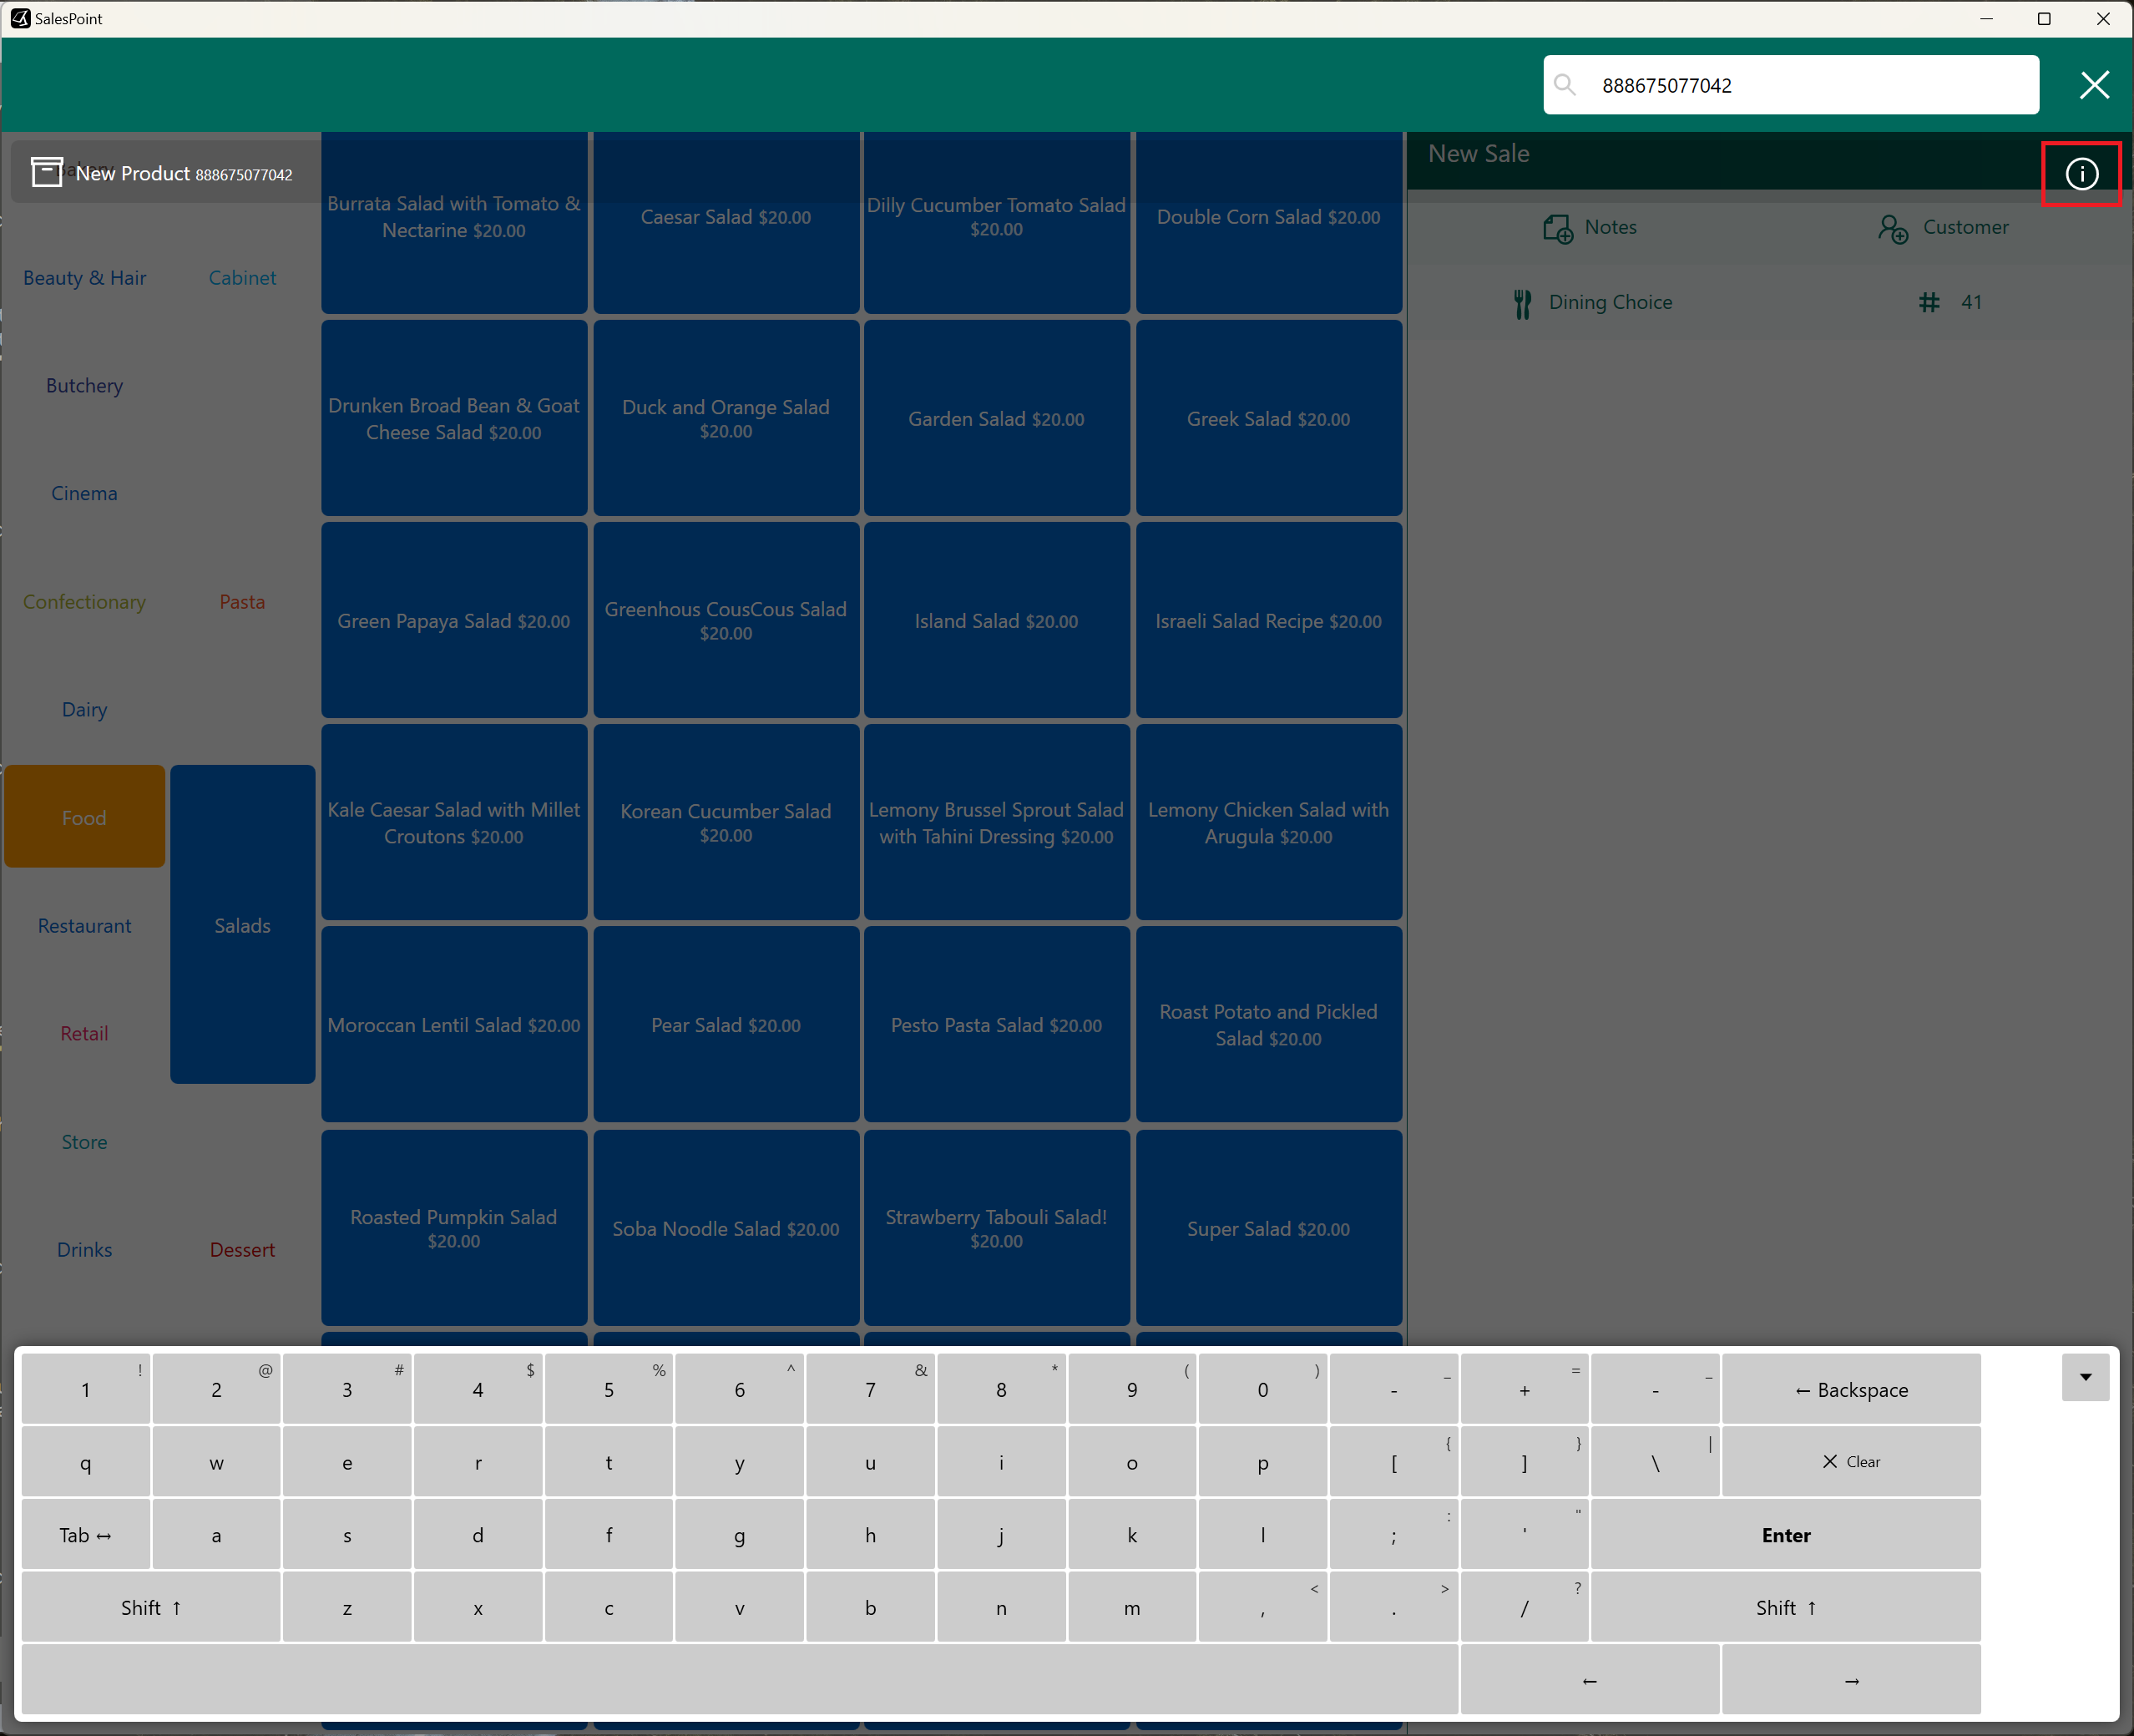
2. If you want to print the product label during a sale, search for the product in the search bar and select the information icon next to the name. This will open the information about the product. Select the "Label" button to print.
3. Configure your label accordingly to the Label Size and Printer. From here, the receipt printer that's already been set up in the register settings should automatically be selected as the Printer for the Label.
4. Change the Label size according to your preference. Photos below will show what the label will look like for each option in the Label Size dropdown.
5. Click the Print button. Once you selected the Label size and the printer to print out the product label.