How to Set Up Store Hours on Your Calendar
By following these steps, you can easily configure and customize the store hours on your calendar, ensuring an accurate representation of your business's operating schedule.
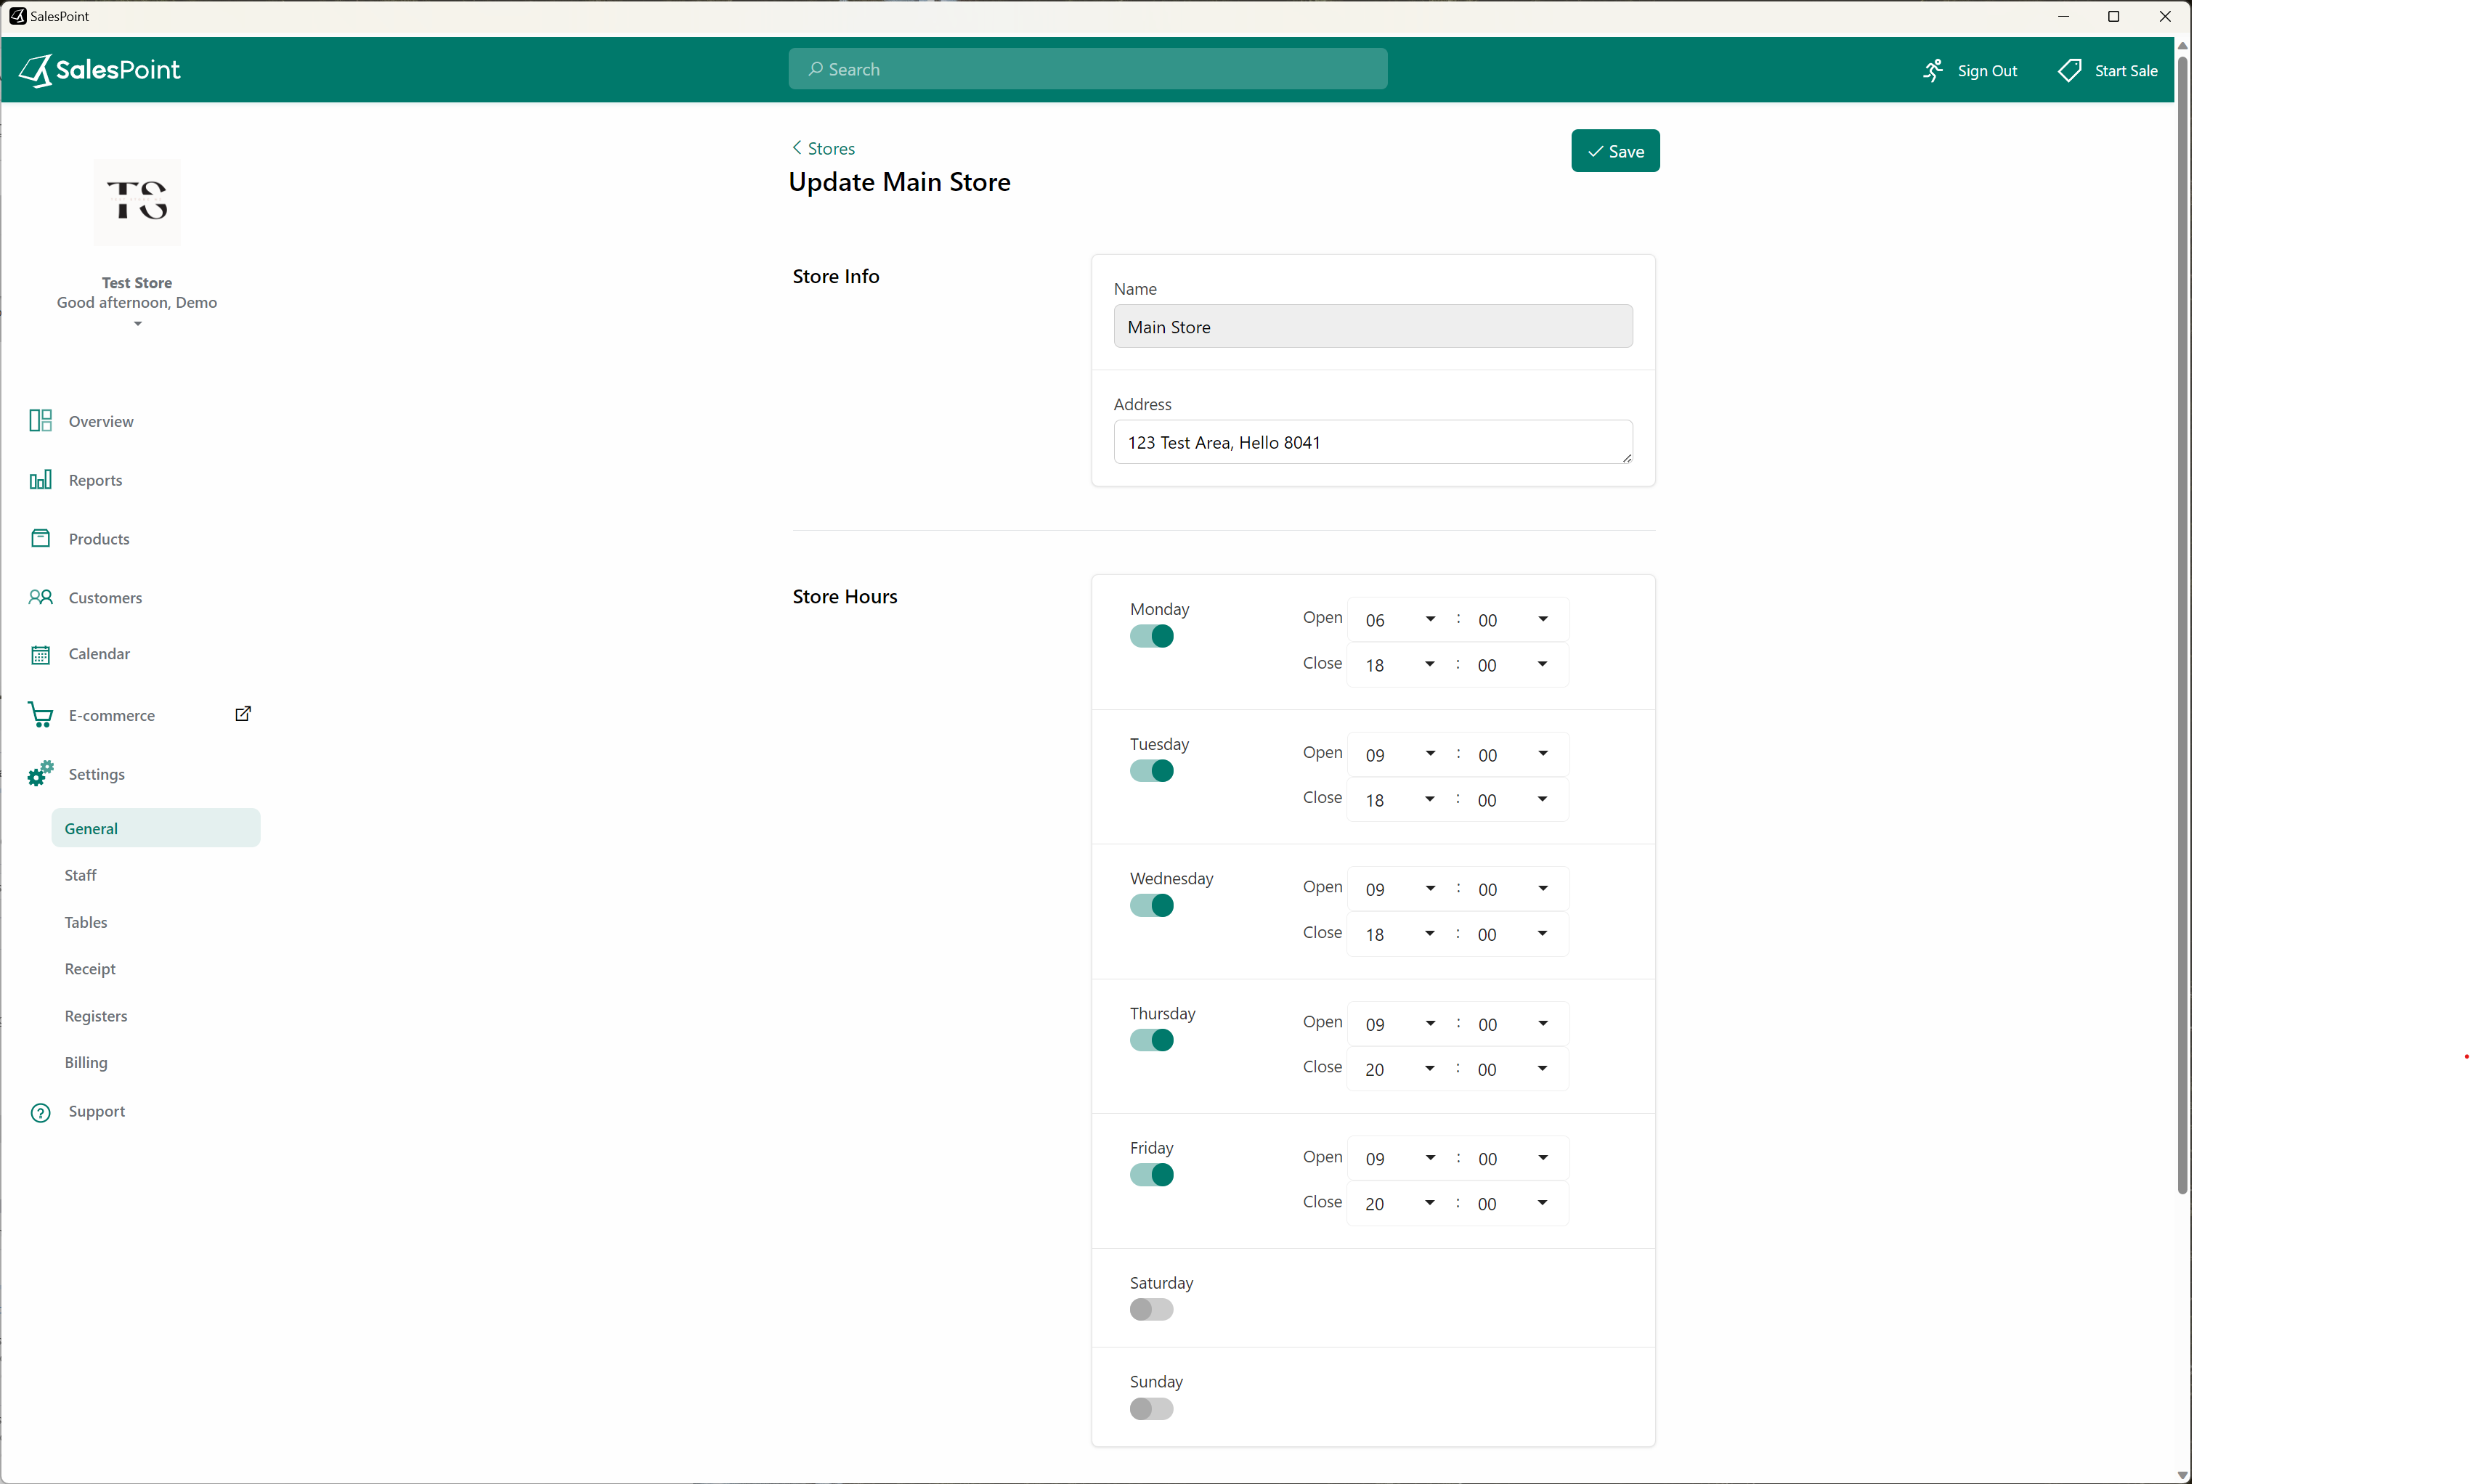
1. Access the "Settings" section in your Dashboard.
2. Navigate to the "General" subcategory.
3. Locate the "Business" section and click on "Change Hours". Alternatively, go to the "Stores" section within the "Settings" menu and select the desired store.
4. Enable the toggle for each day to indicate whether the store is open or closed.
5. Adjust the opening and closing hours for each day as needed.
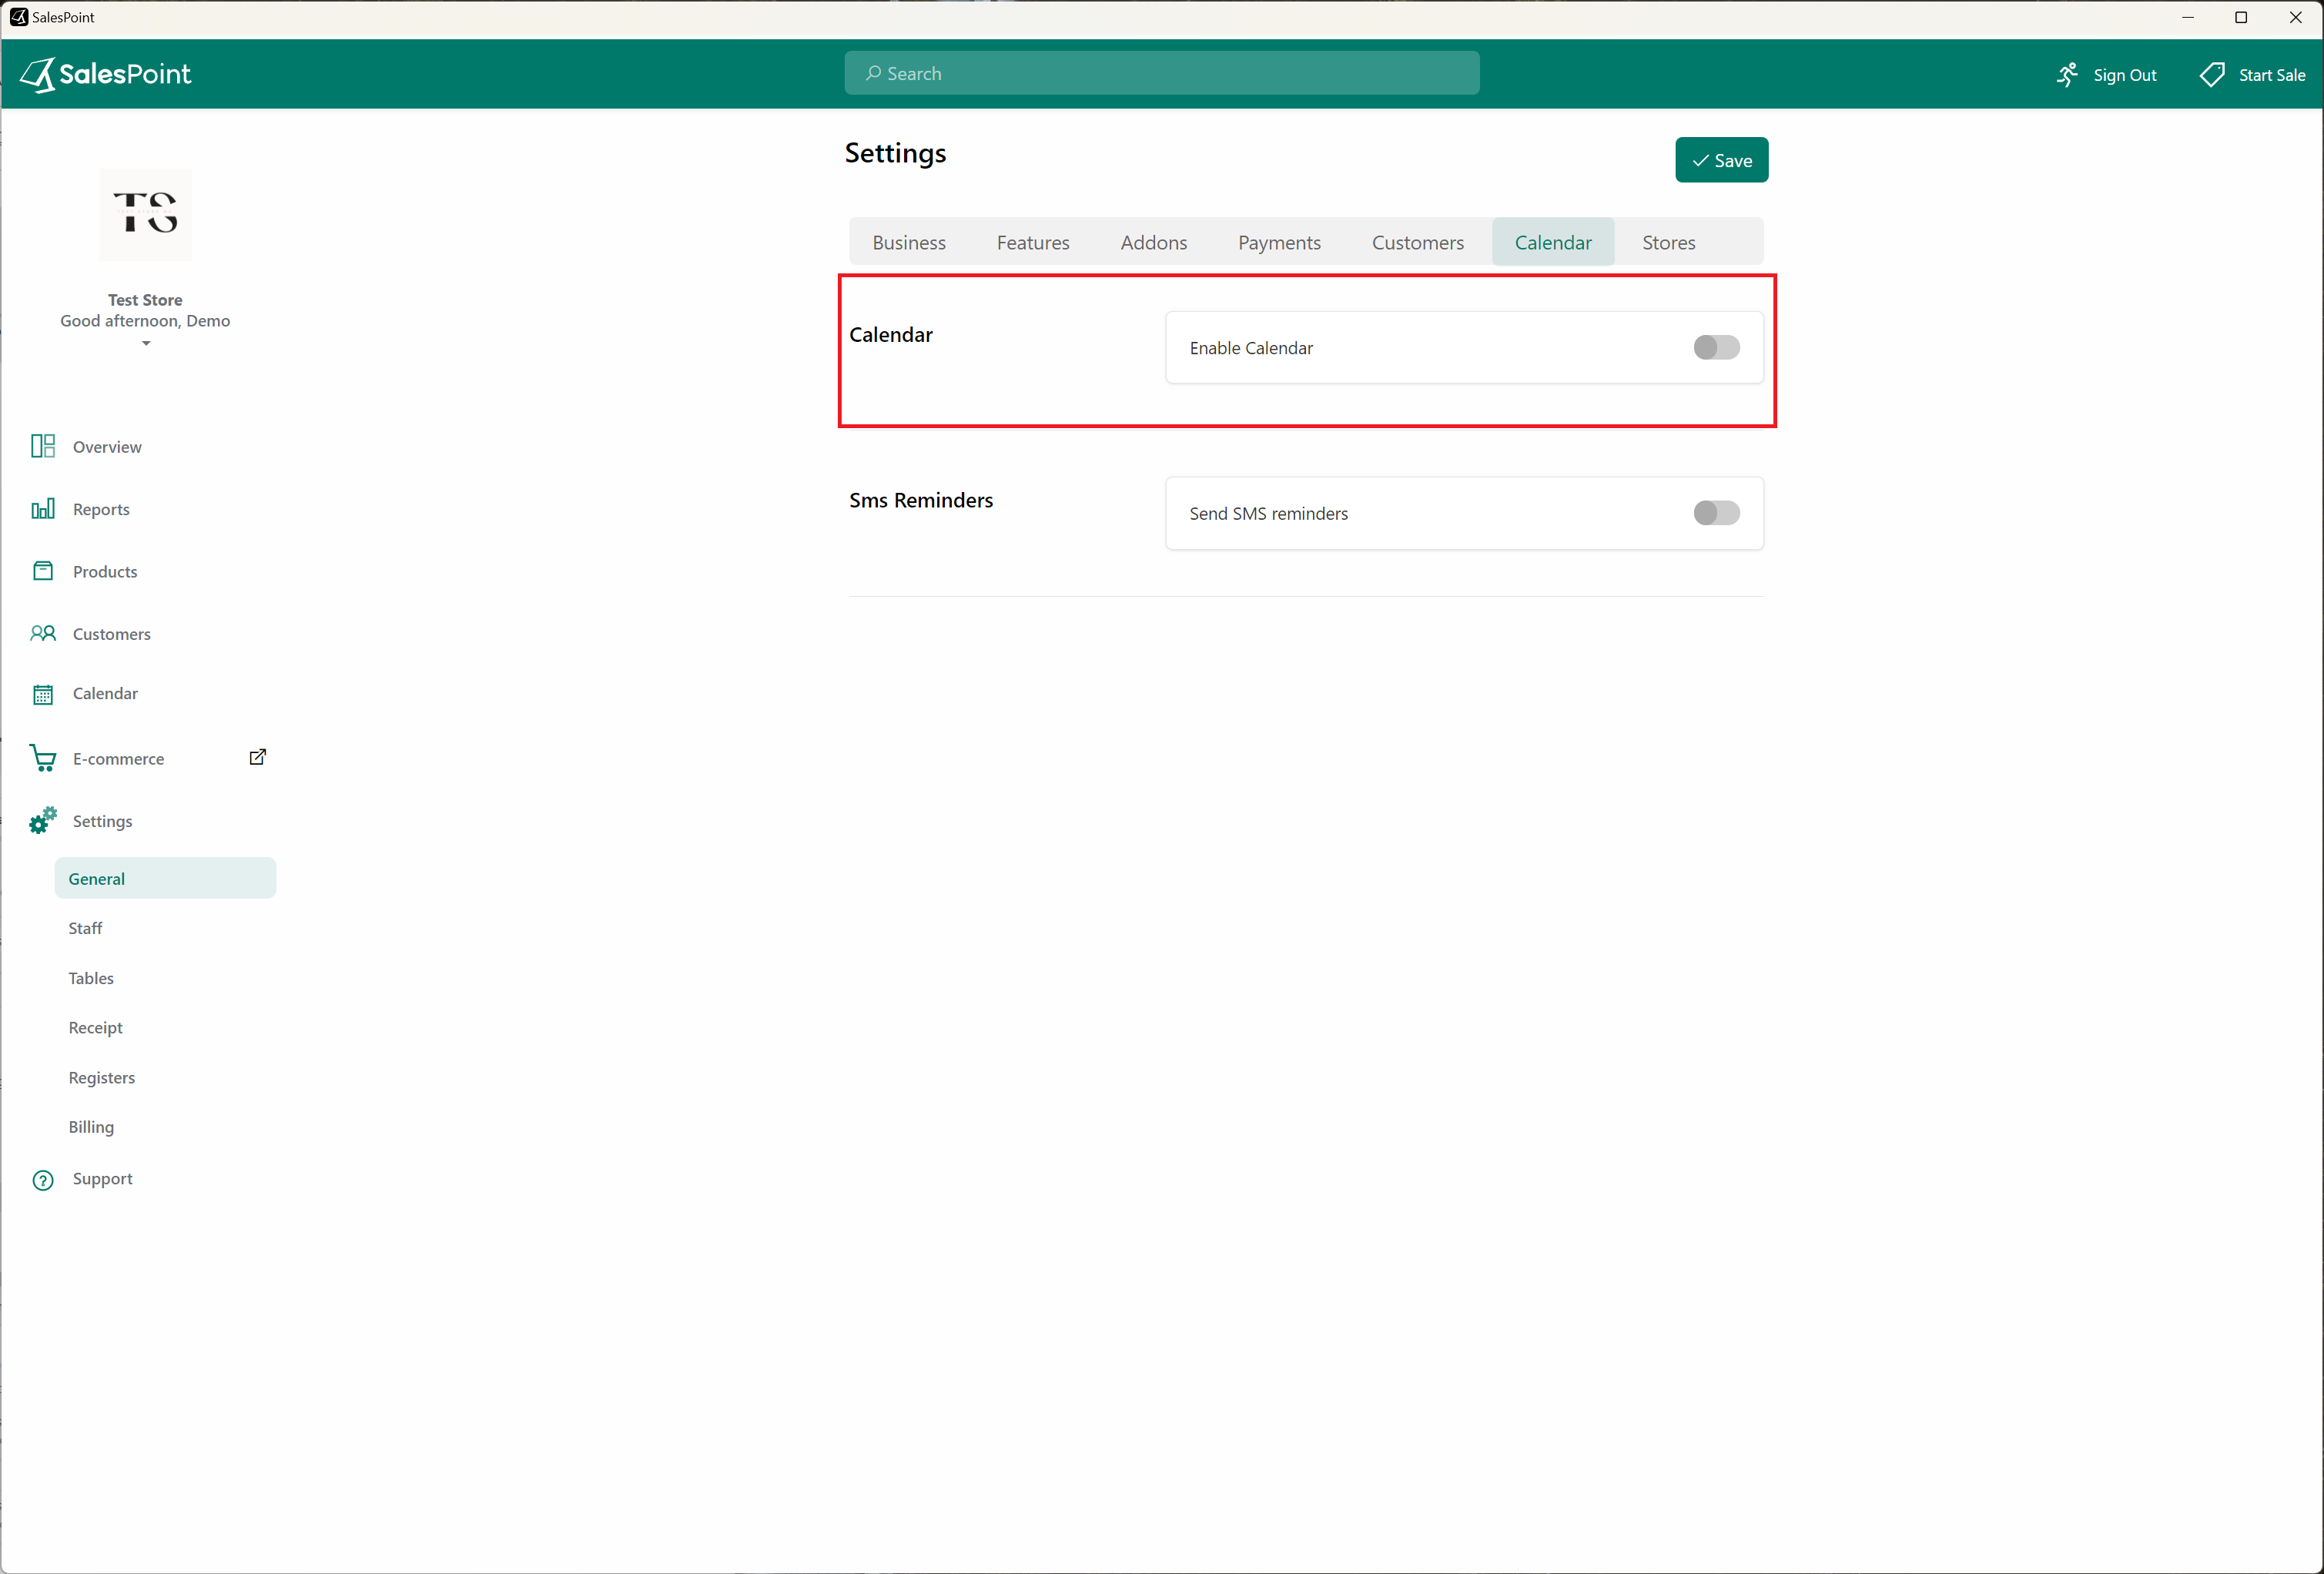
Enable Calendar
Enabling the "Calendar" feature can assist stores in managing important dates, staff schedules, and table reservations. To activate this feature, access the Dashboard, navigate to the "Settings" tab, and select the "Calendar" section. Turn on the "Enable Calendar" option and select your preferred calendar mode. Click the "Save" button to apply your changes.
To view the updated opening and closing hours for the store, return to the "Calendar" tab. Within the calendar, the store's opening hours for each day are represented by white sections. This visual representation allows you to easily identify and reference the specific hours when the store is open for business.