SalesPoint allows restaurants to structure menus by courses to streamline ordering and kitchen production. Courses are managed through the POS Screen Setup, enabling items to be categorized and customised (e.g., Entree, Main, Dessert) and printed to kitchen printers.
Courses are only available for Business Type: Hospitality or Other.
Step 1: Enable Dining Choice
1. On the Dashboard, select the Settings tab.
2. Go to the Features section.
3. Scroll until you find the Dining Choice feature.
4. Enable Dining Choice to activate course functionality.
Step 2: Configure Course Names
1. Once Dining Choice is enabled, scroll down to the Courses section.
2. You will see default course names: Entree, Main, and Dessert.
3. These fields are fully customisable.
The fourth field allows you to add an additional course. The Custom option allows you to create further course types
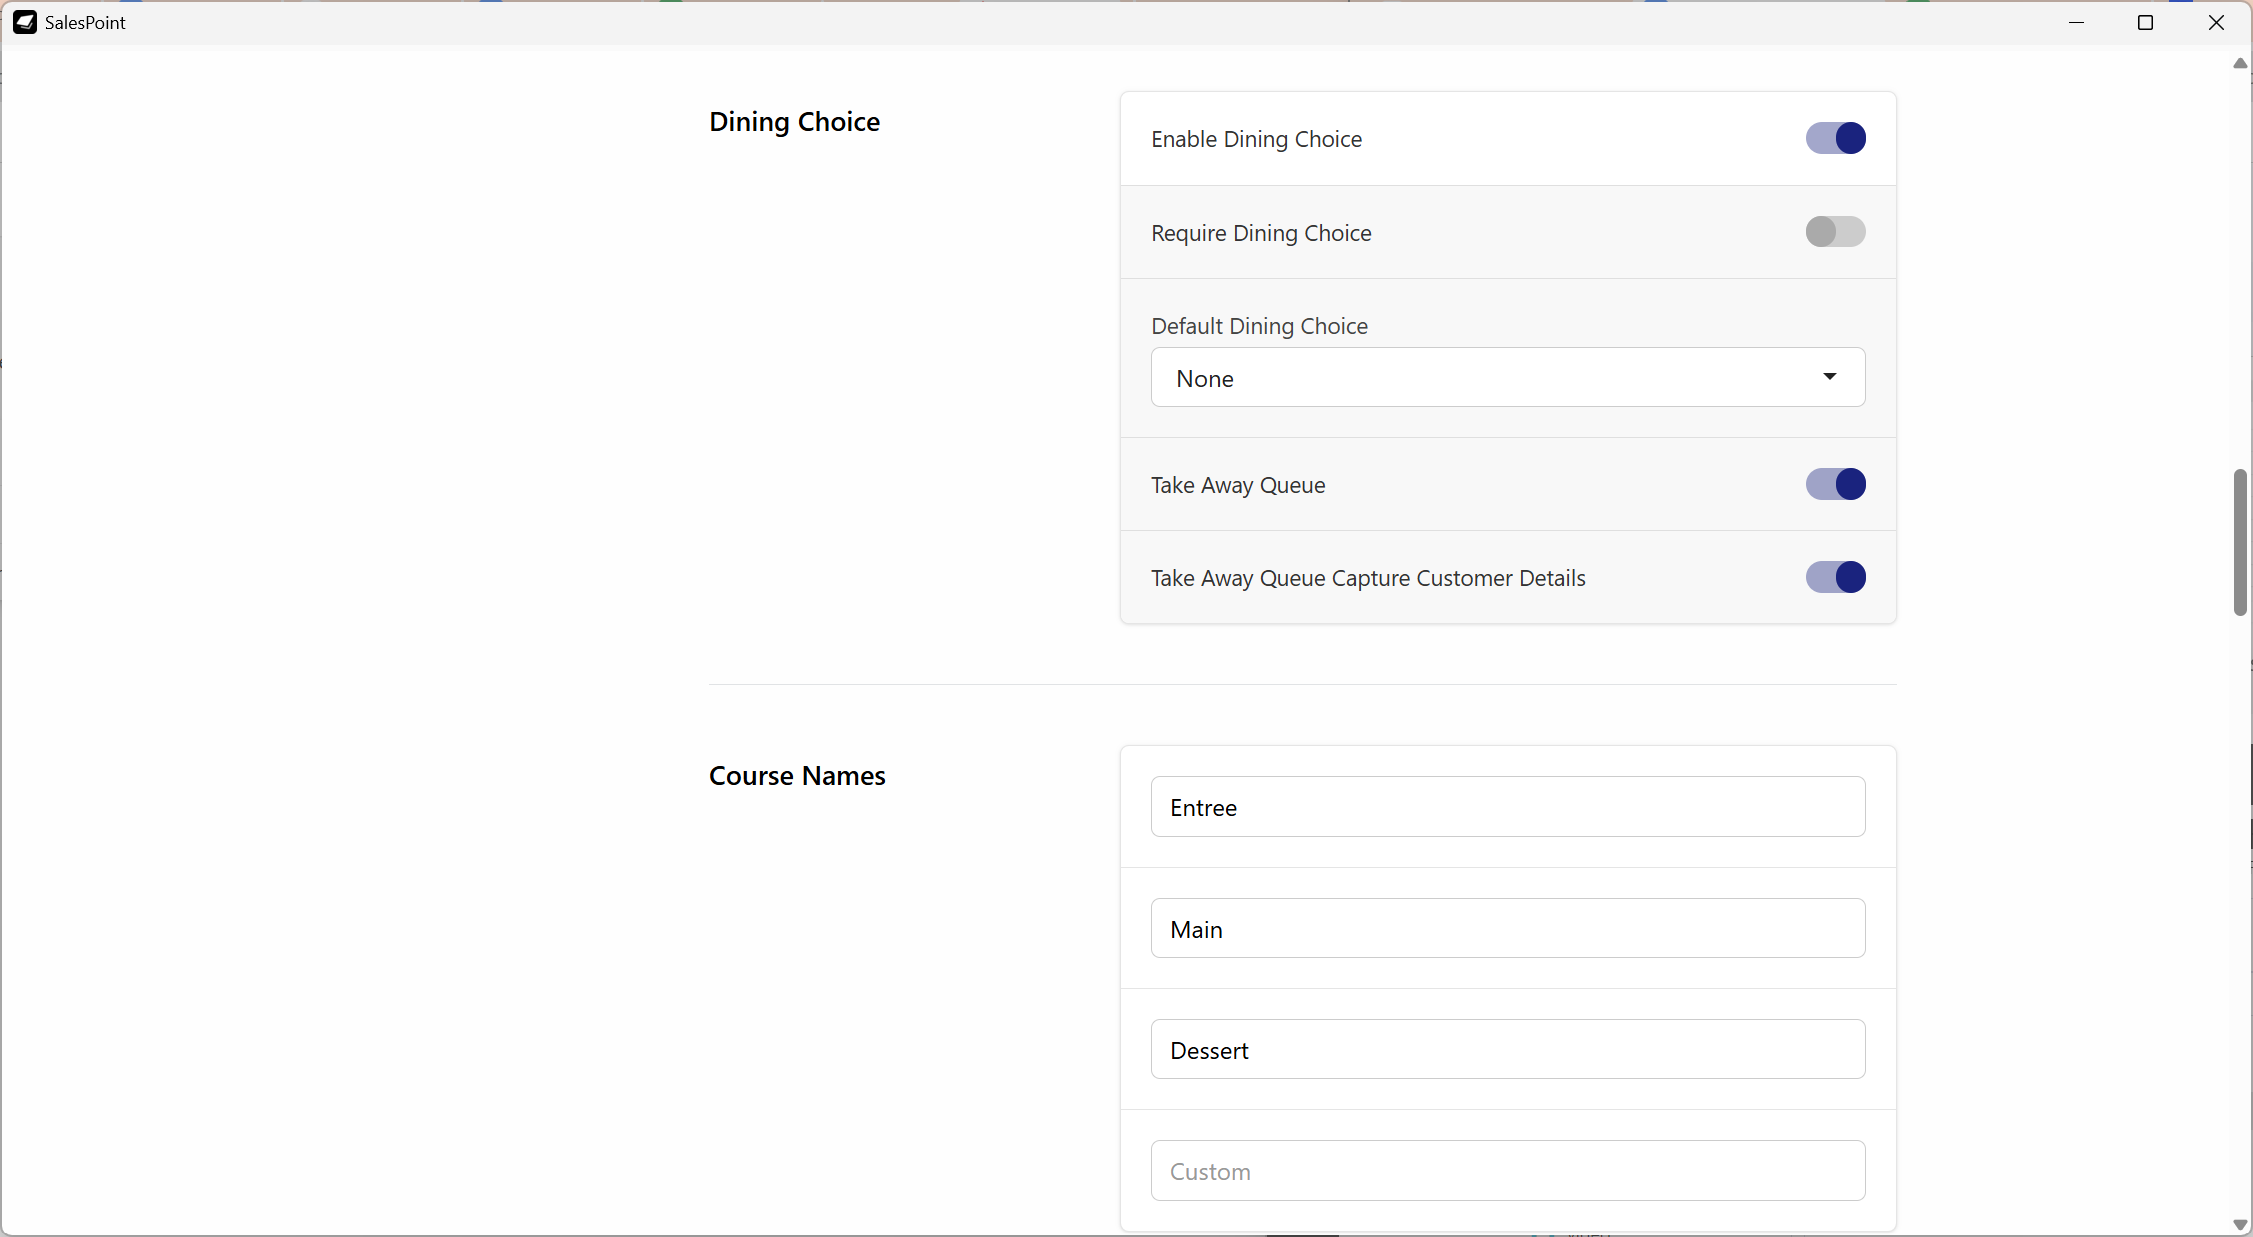
Figure 1: Course configuration settings in the Dashboard.
Step 3: Assign Courses to Products
1. Navigate to the Products tab.
2. Select the product you want to configure.
3. Edit the Course field.
4. Select the appropriate course (Entree, Main, Dessert, or custom).
5. If you do not want a fixed course, select the Prompt option.
6. Prompt will ask the user to choose a course when adding the product to a sale.
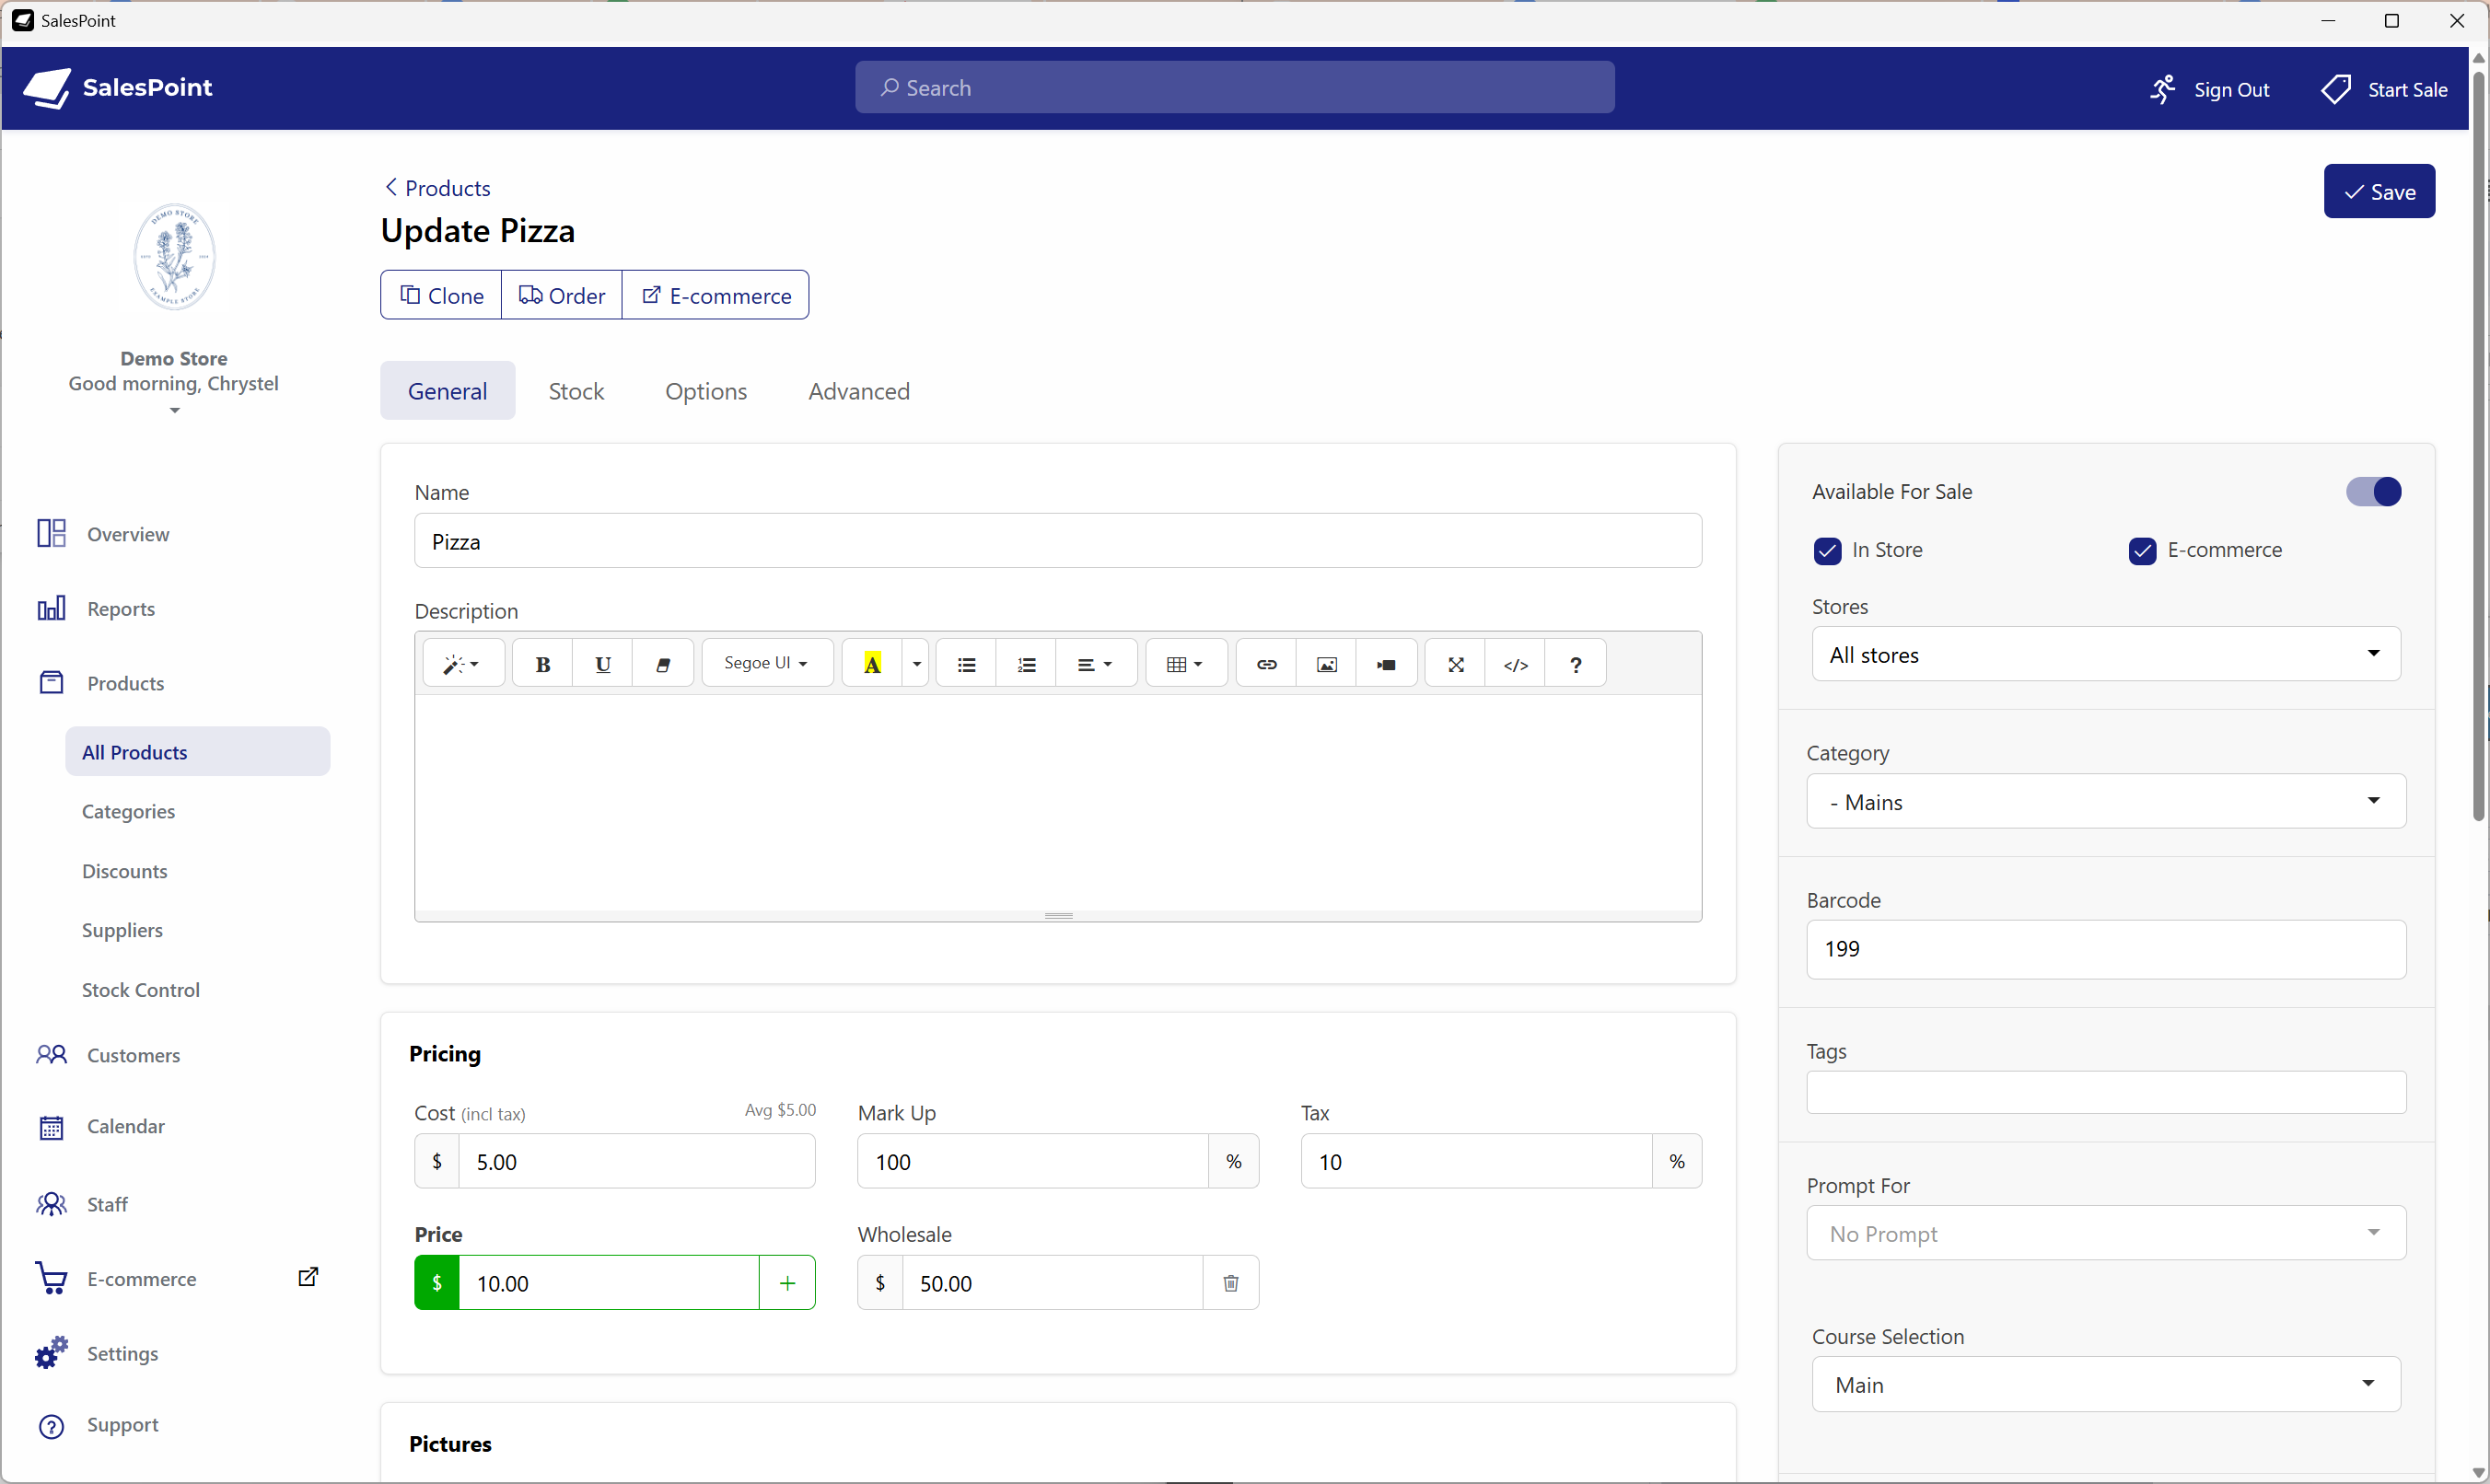
Figure 2: Assigning a course or enabling Prompt option in Product settings.
For courses to print on kitchen dockets, kitchen ticket printing must also be configured.
Step 4: Using Courses on the Sale Screen
1. Once configured, add a product to the sale screen.
2. The assigned course label will appear next to the product.
3. To change the course, select the product in the sale.
4. Click the action called "Course".
5. Select the desired course for that item.
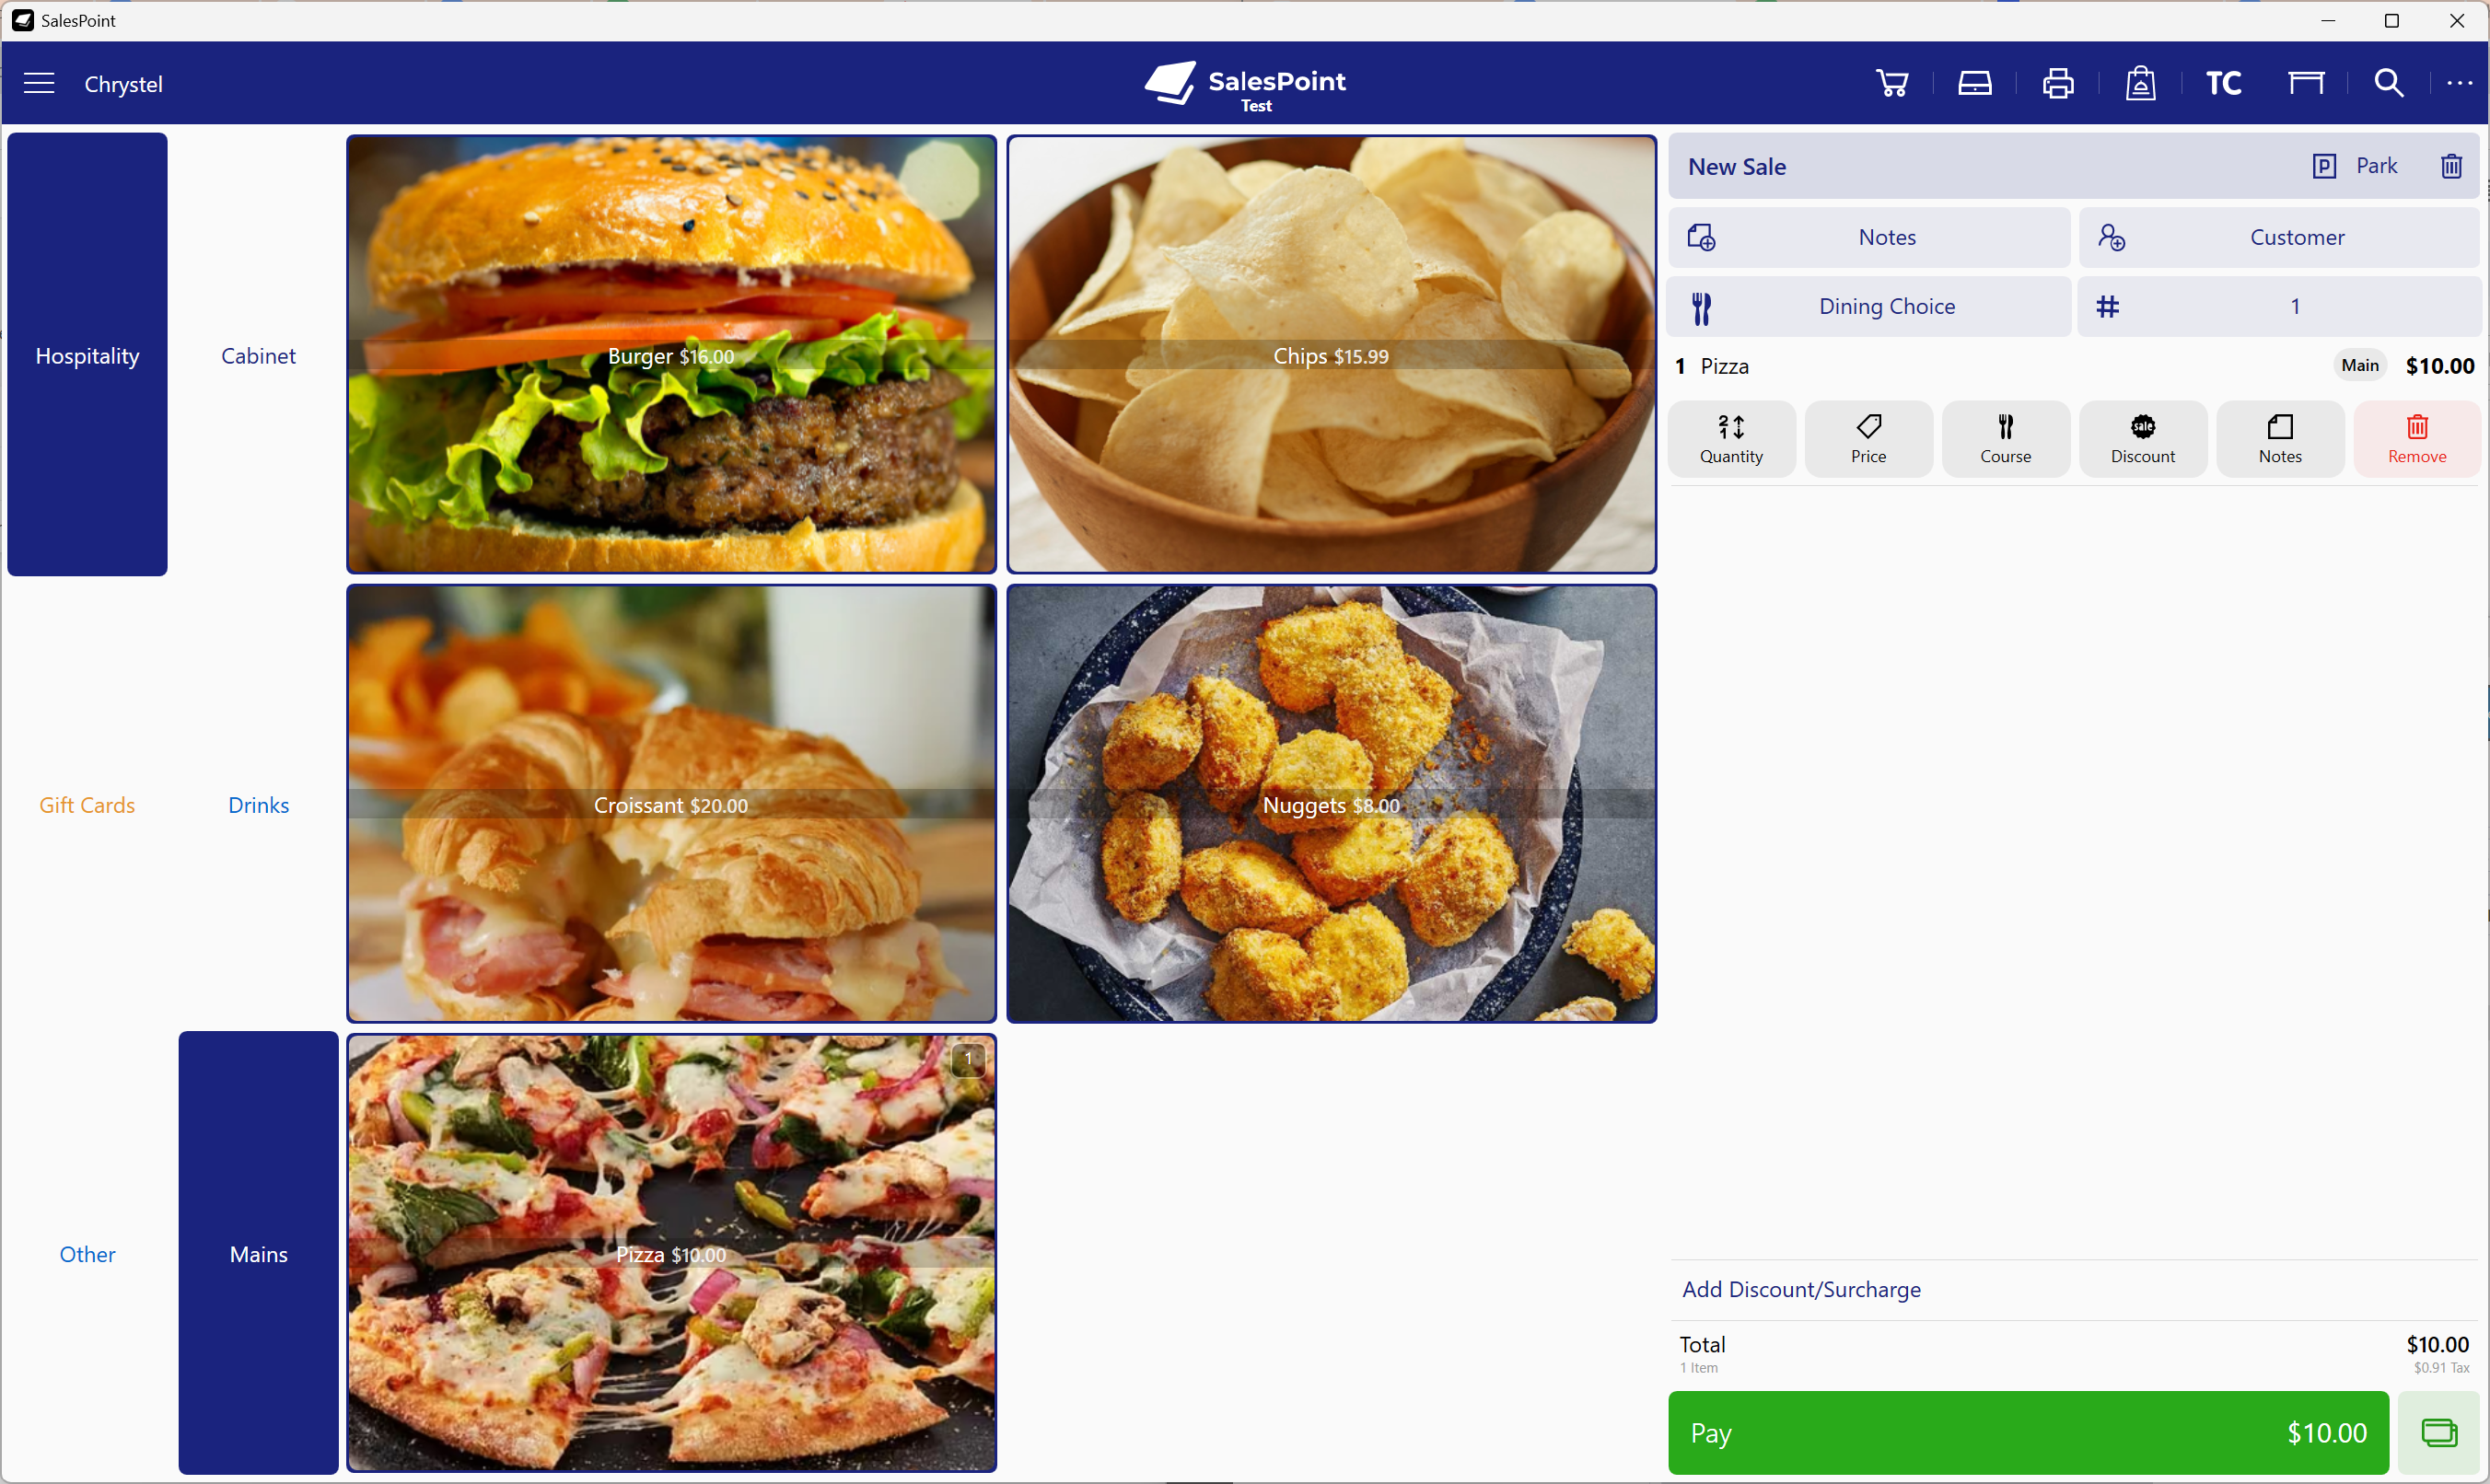
Figure 3: Changing course assignment on the Sale Screen.