Introduction to E-commerce
SalesPoint E-commerce allows you to sell your products online. With just a click, you can be online and trading instantly! To create your E-Commerce site, visit the address you created during signup.
For example https://demo.salespoint.nz/
Forgotten your SalesPoint Address? Find my SalesPoint address.
Step 1: Enable E-commerce
The first time you select "E-Commerce" in SalesPoint, you'll be prompted to set up your E-Commerce site if you haven't already done so. Here's how:
- Go to the Dashboard and select "E-Commerce."
- If you do not have an E-Commerce site set up, you'll be prompted to create one.
Address:
The website address where customers can view your products and make purchases.
Add All My Products:
This feature includes all your current products or services on your E-Commerce website.
Step 2: Set Up Products for Your Online Store
To control the visibility of products on your E-Commerce site, follow these steps:
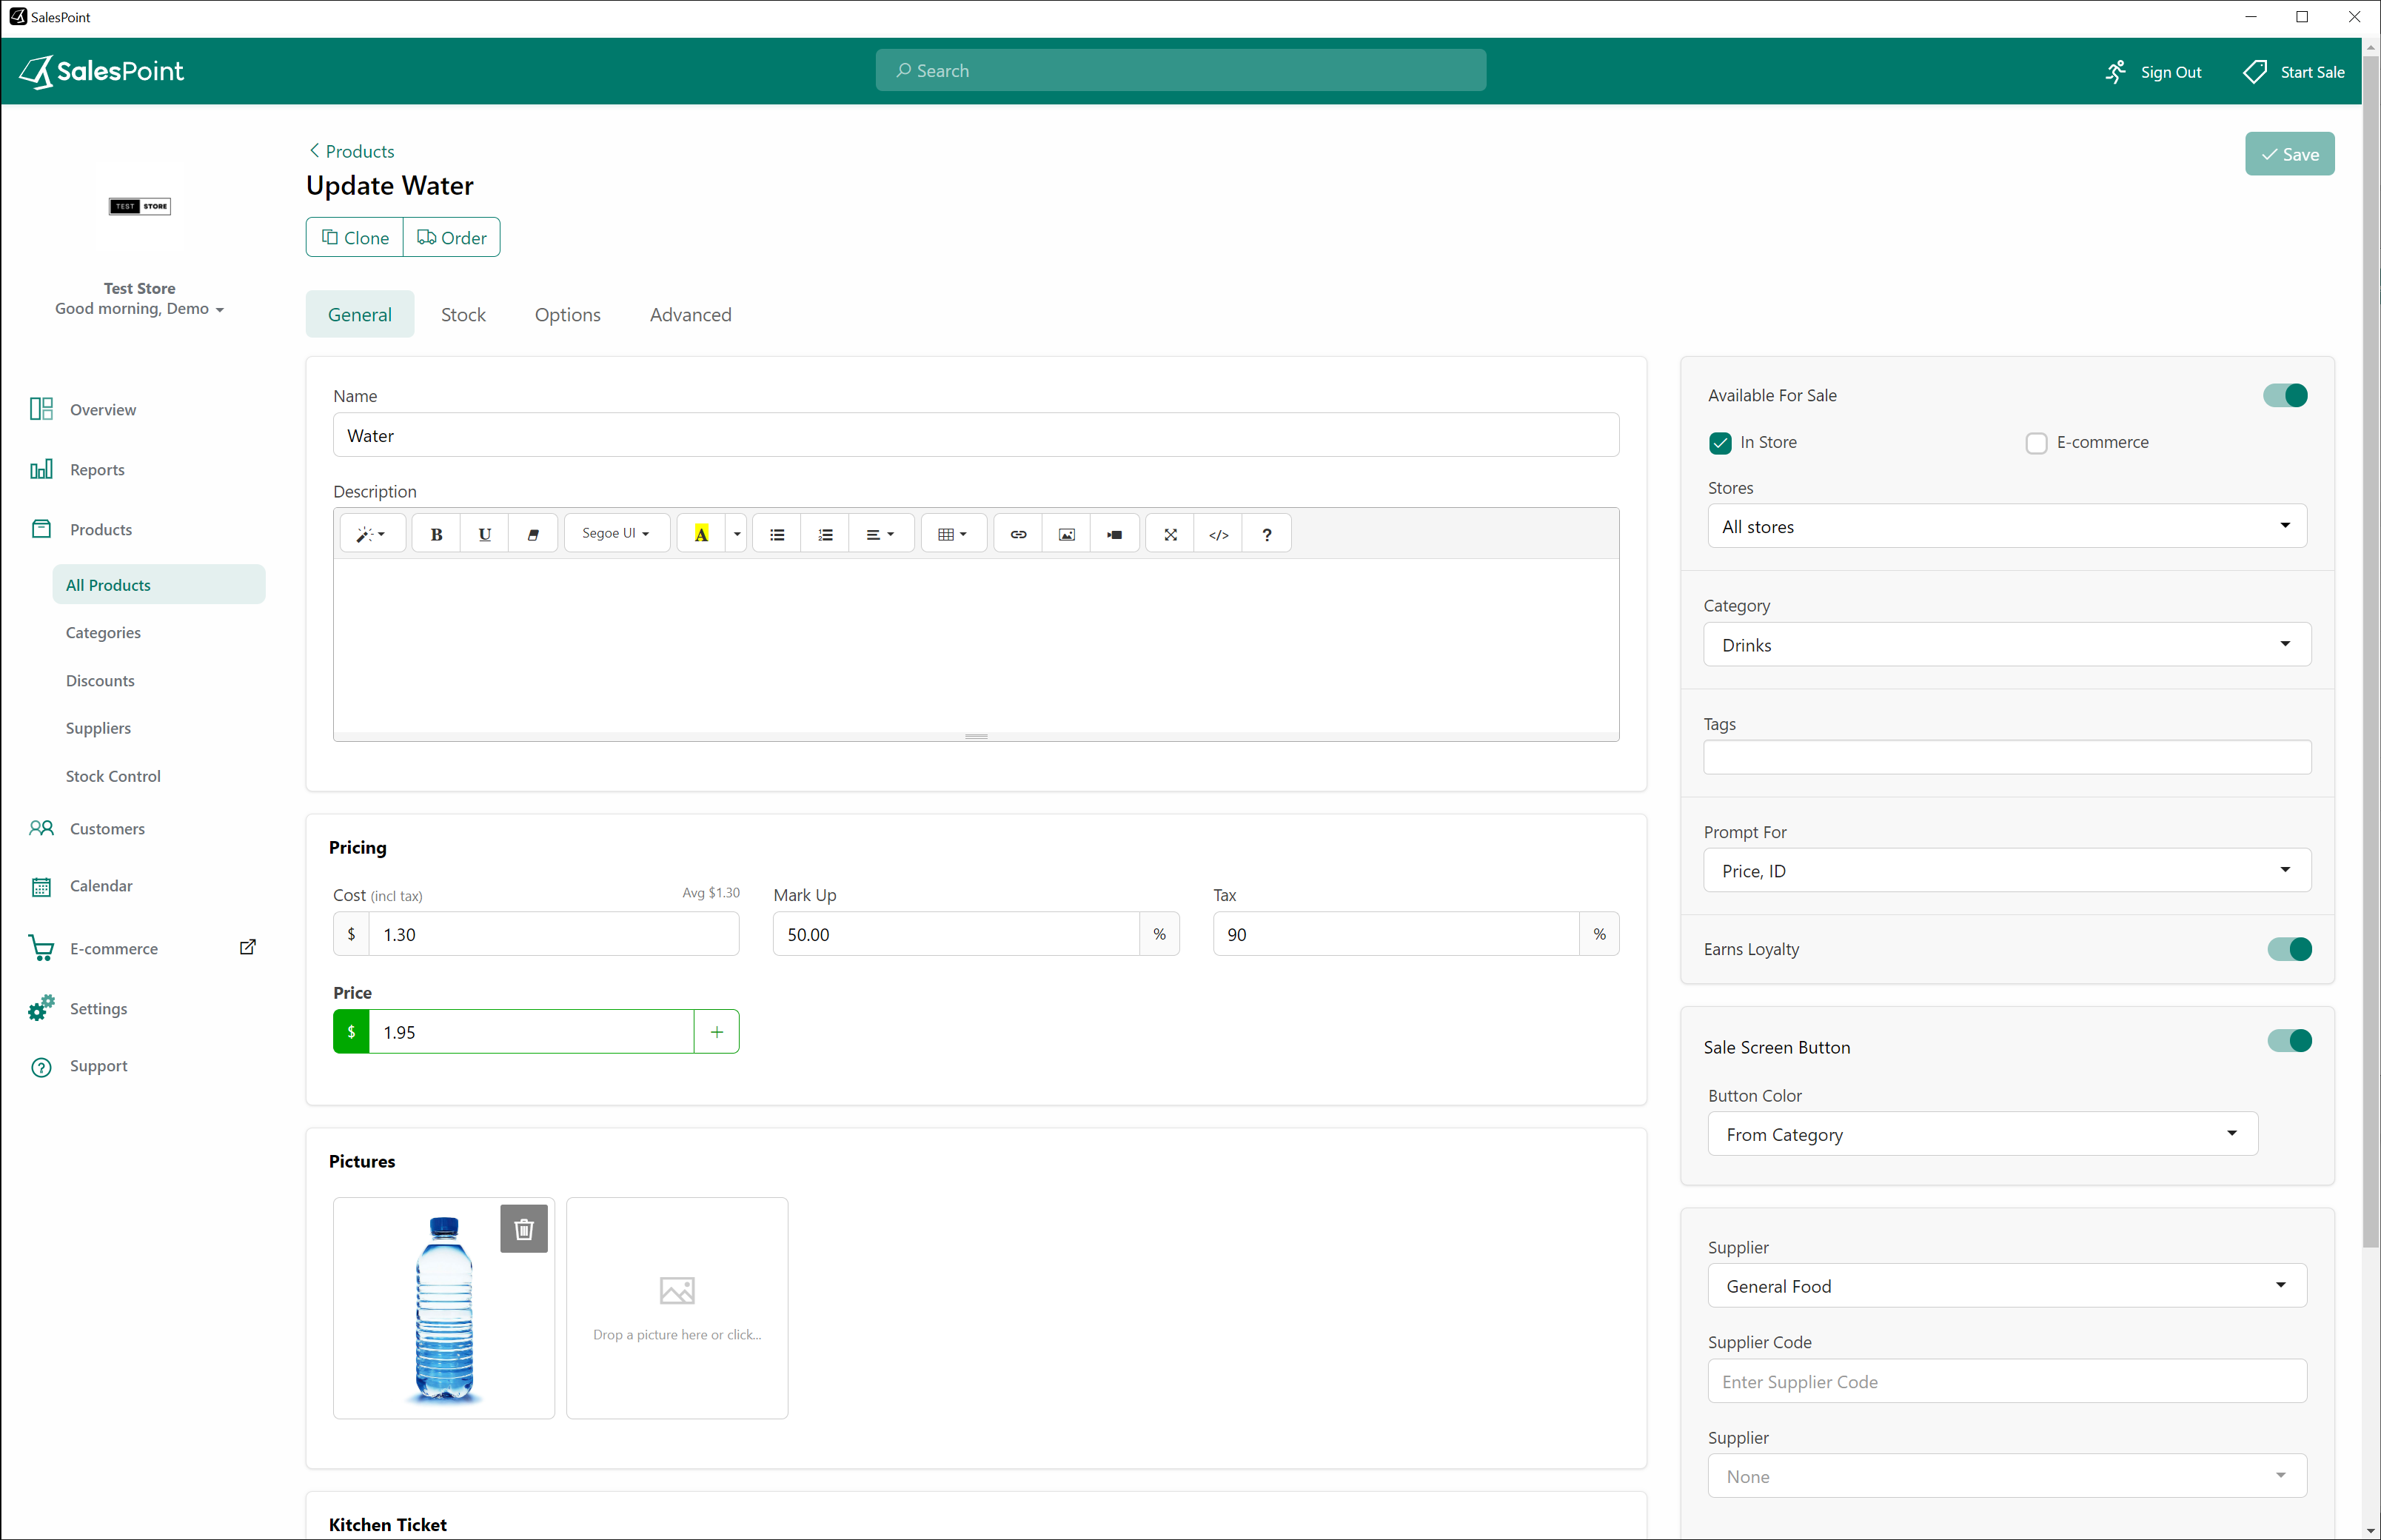
- Go to the "Products" tab and choose a specific product.
- Enable its availability by checking the "E-commerce" button and clicking "Save."
- Alternatively, you can select multiple products in the "Products" tab, click "Edit," and make them available in bulk.
- Activate the "Available in E-Commerce" toggle.
- Click the "Update" button next to the toggle line.
- After making the necessary changes, click "Save" to apply the updates and ensure the products are visible on your website.
To verify the availability of your online products:
- Access the dashboard and navigate to the "E-Commerce" tab.
- Within this tab, click on "Products." This will direct you to the filter options where you can view all the products currently available online.
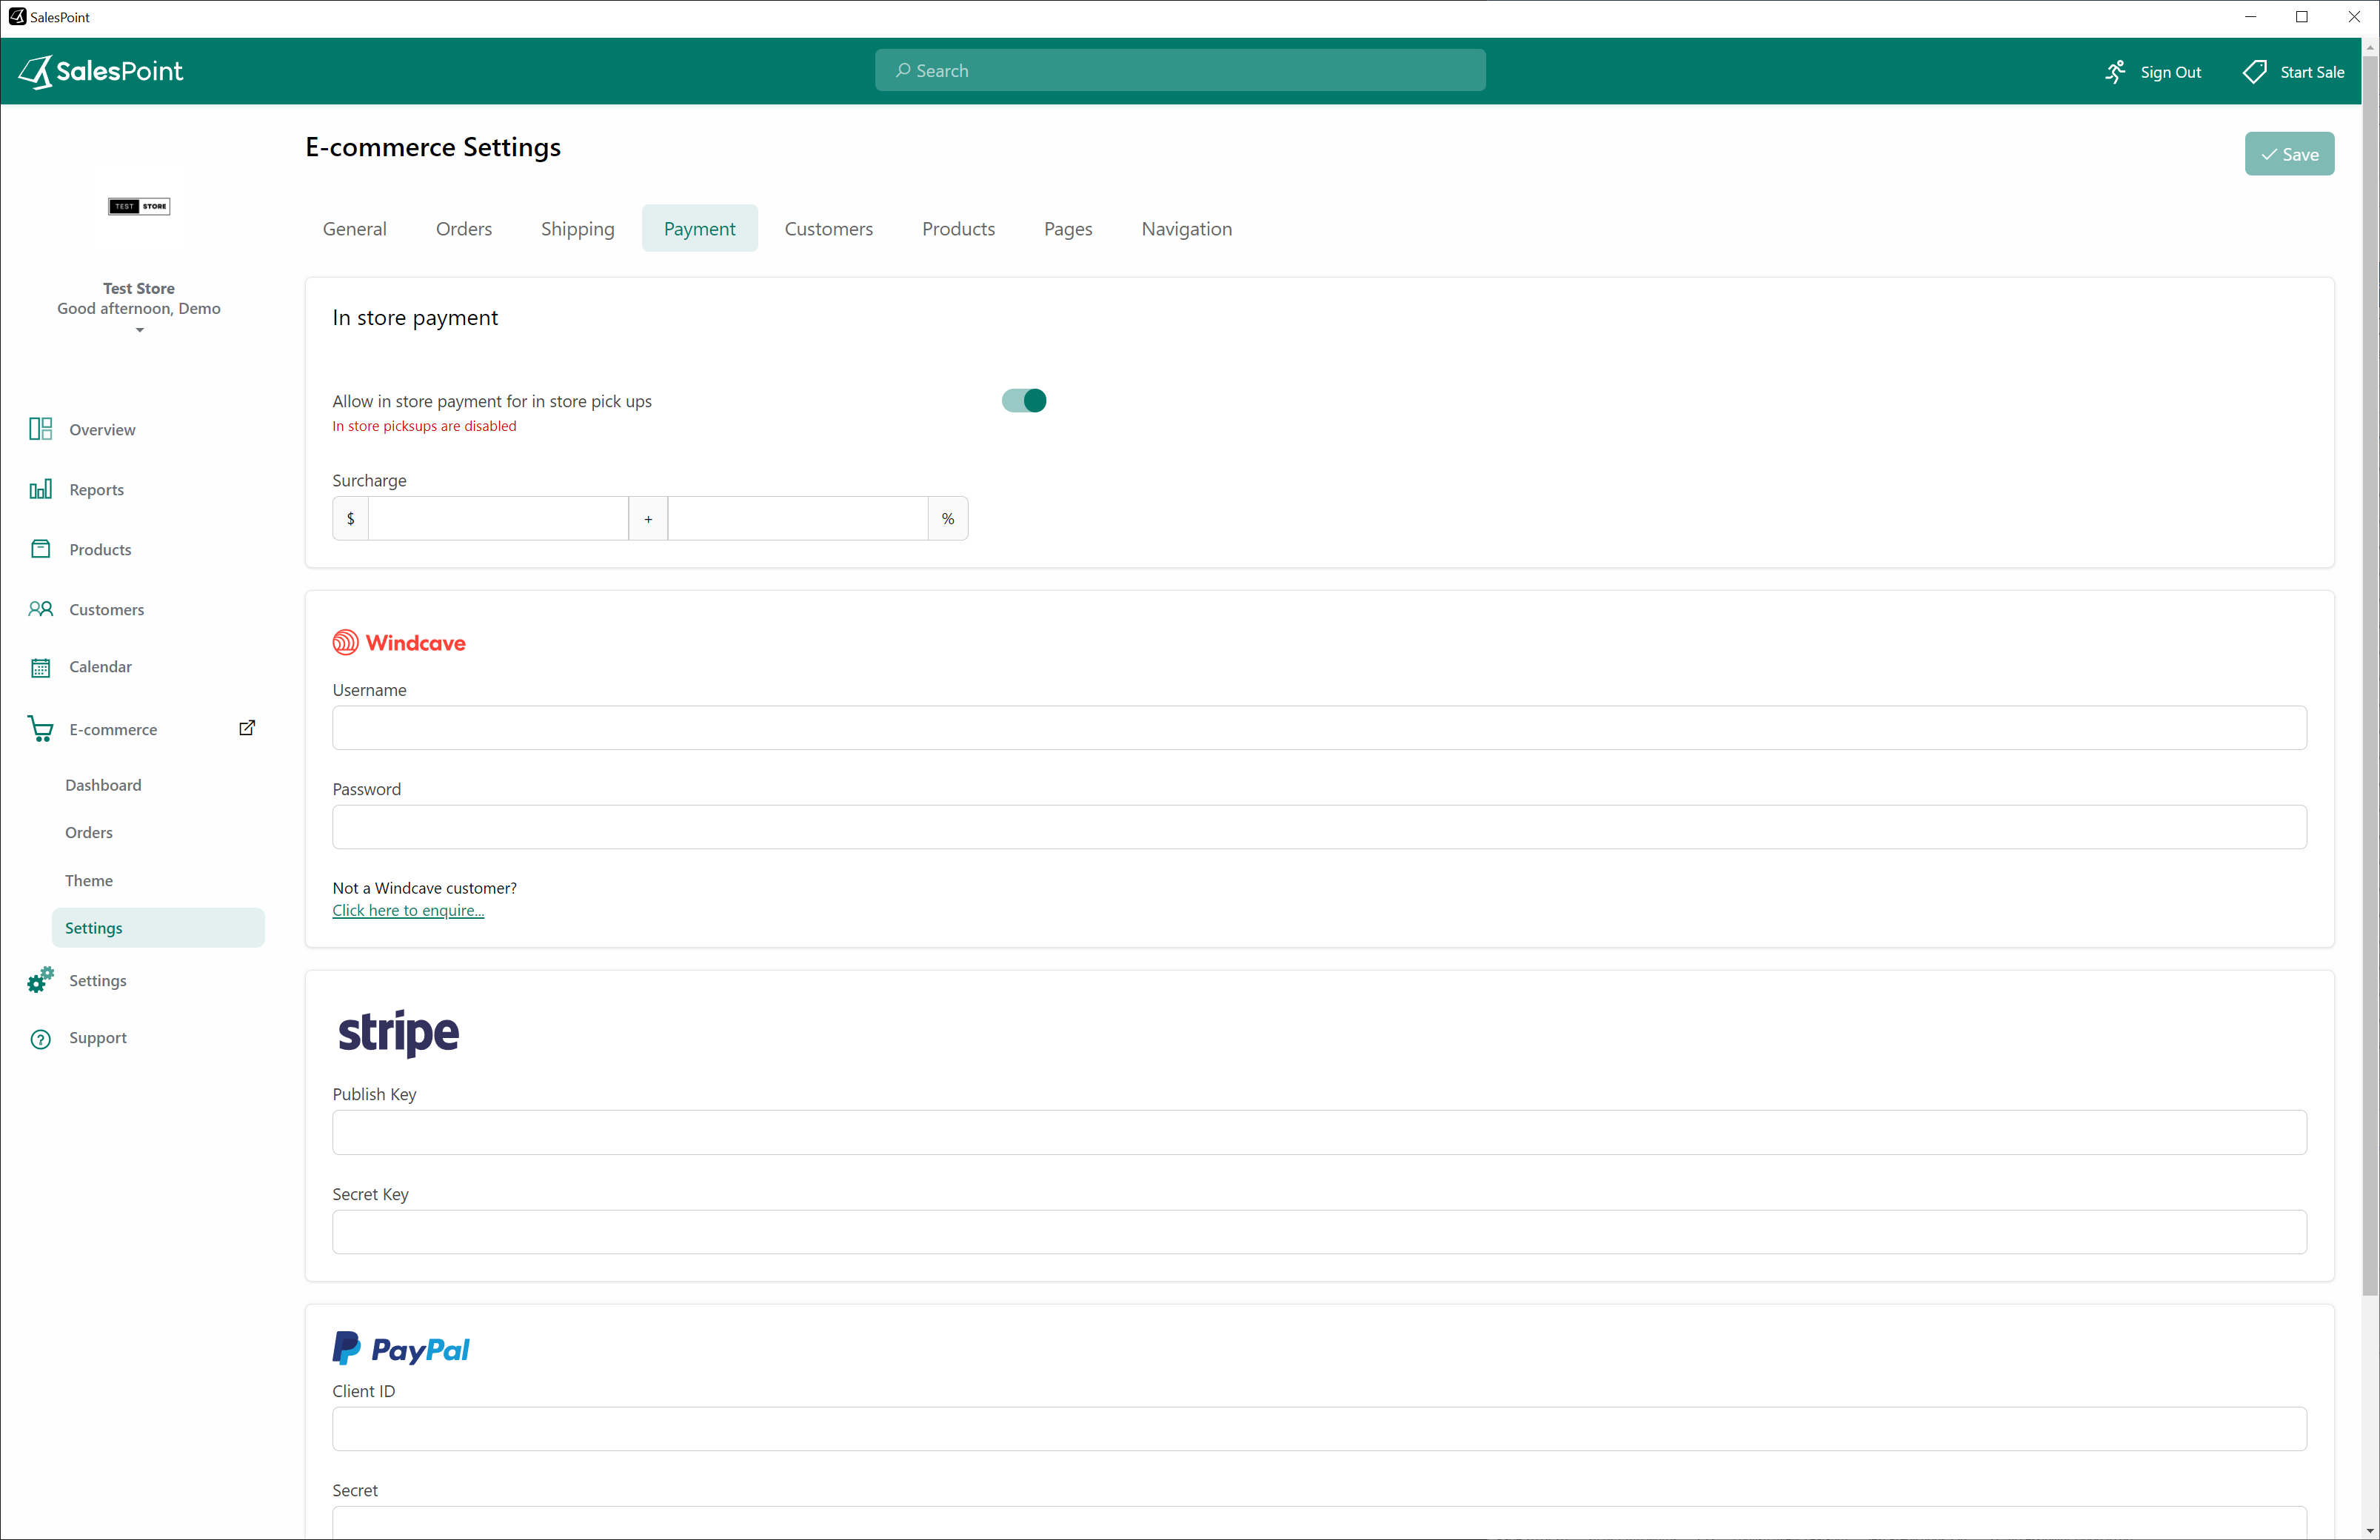
Step 3: Set Up Payment Methods
To process payments for online purchases, you need to set up your payment methods first:
- Access the Dashboard and navigate to the "E-Commerce" tab.
- Within this tab, locate and click on the "Settings" subcategory.
- In this tab, find the "Payment" section.
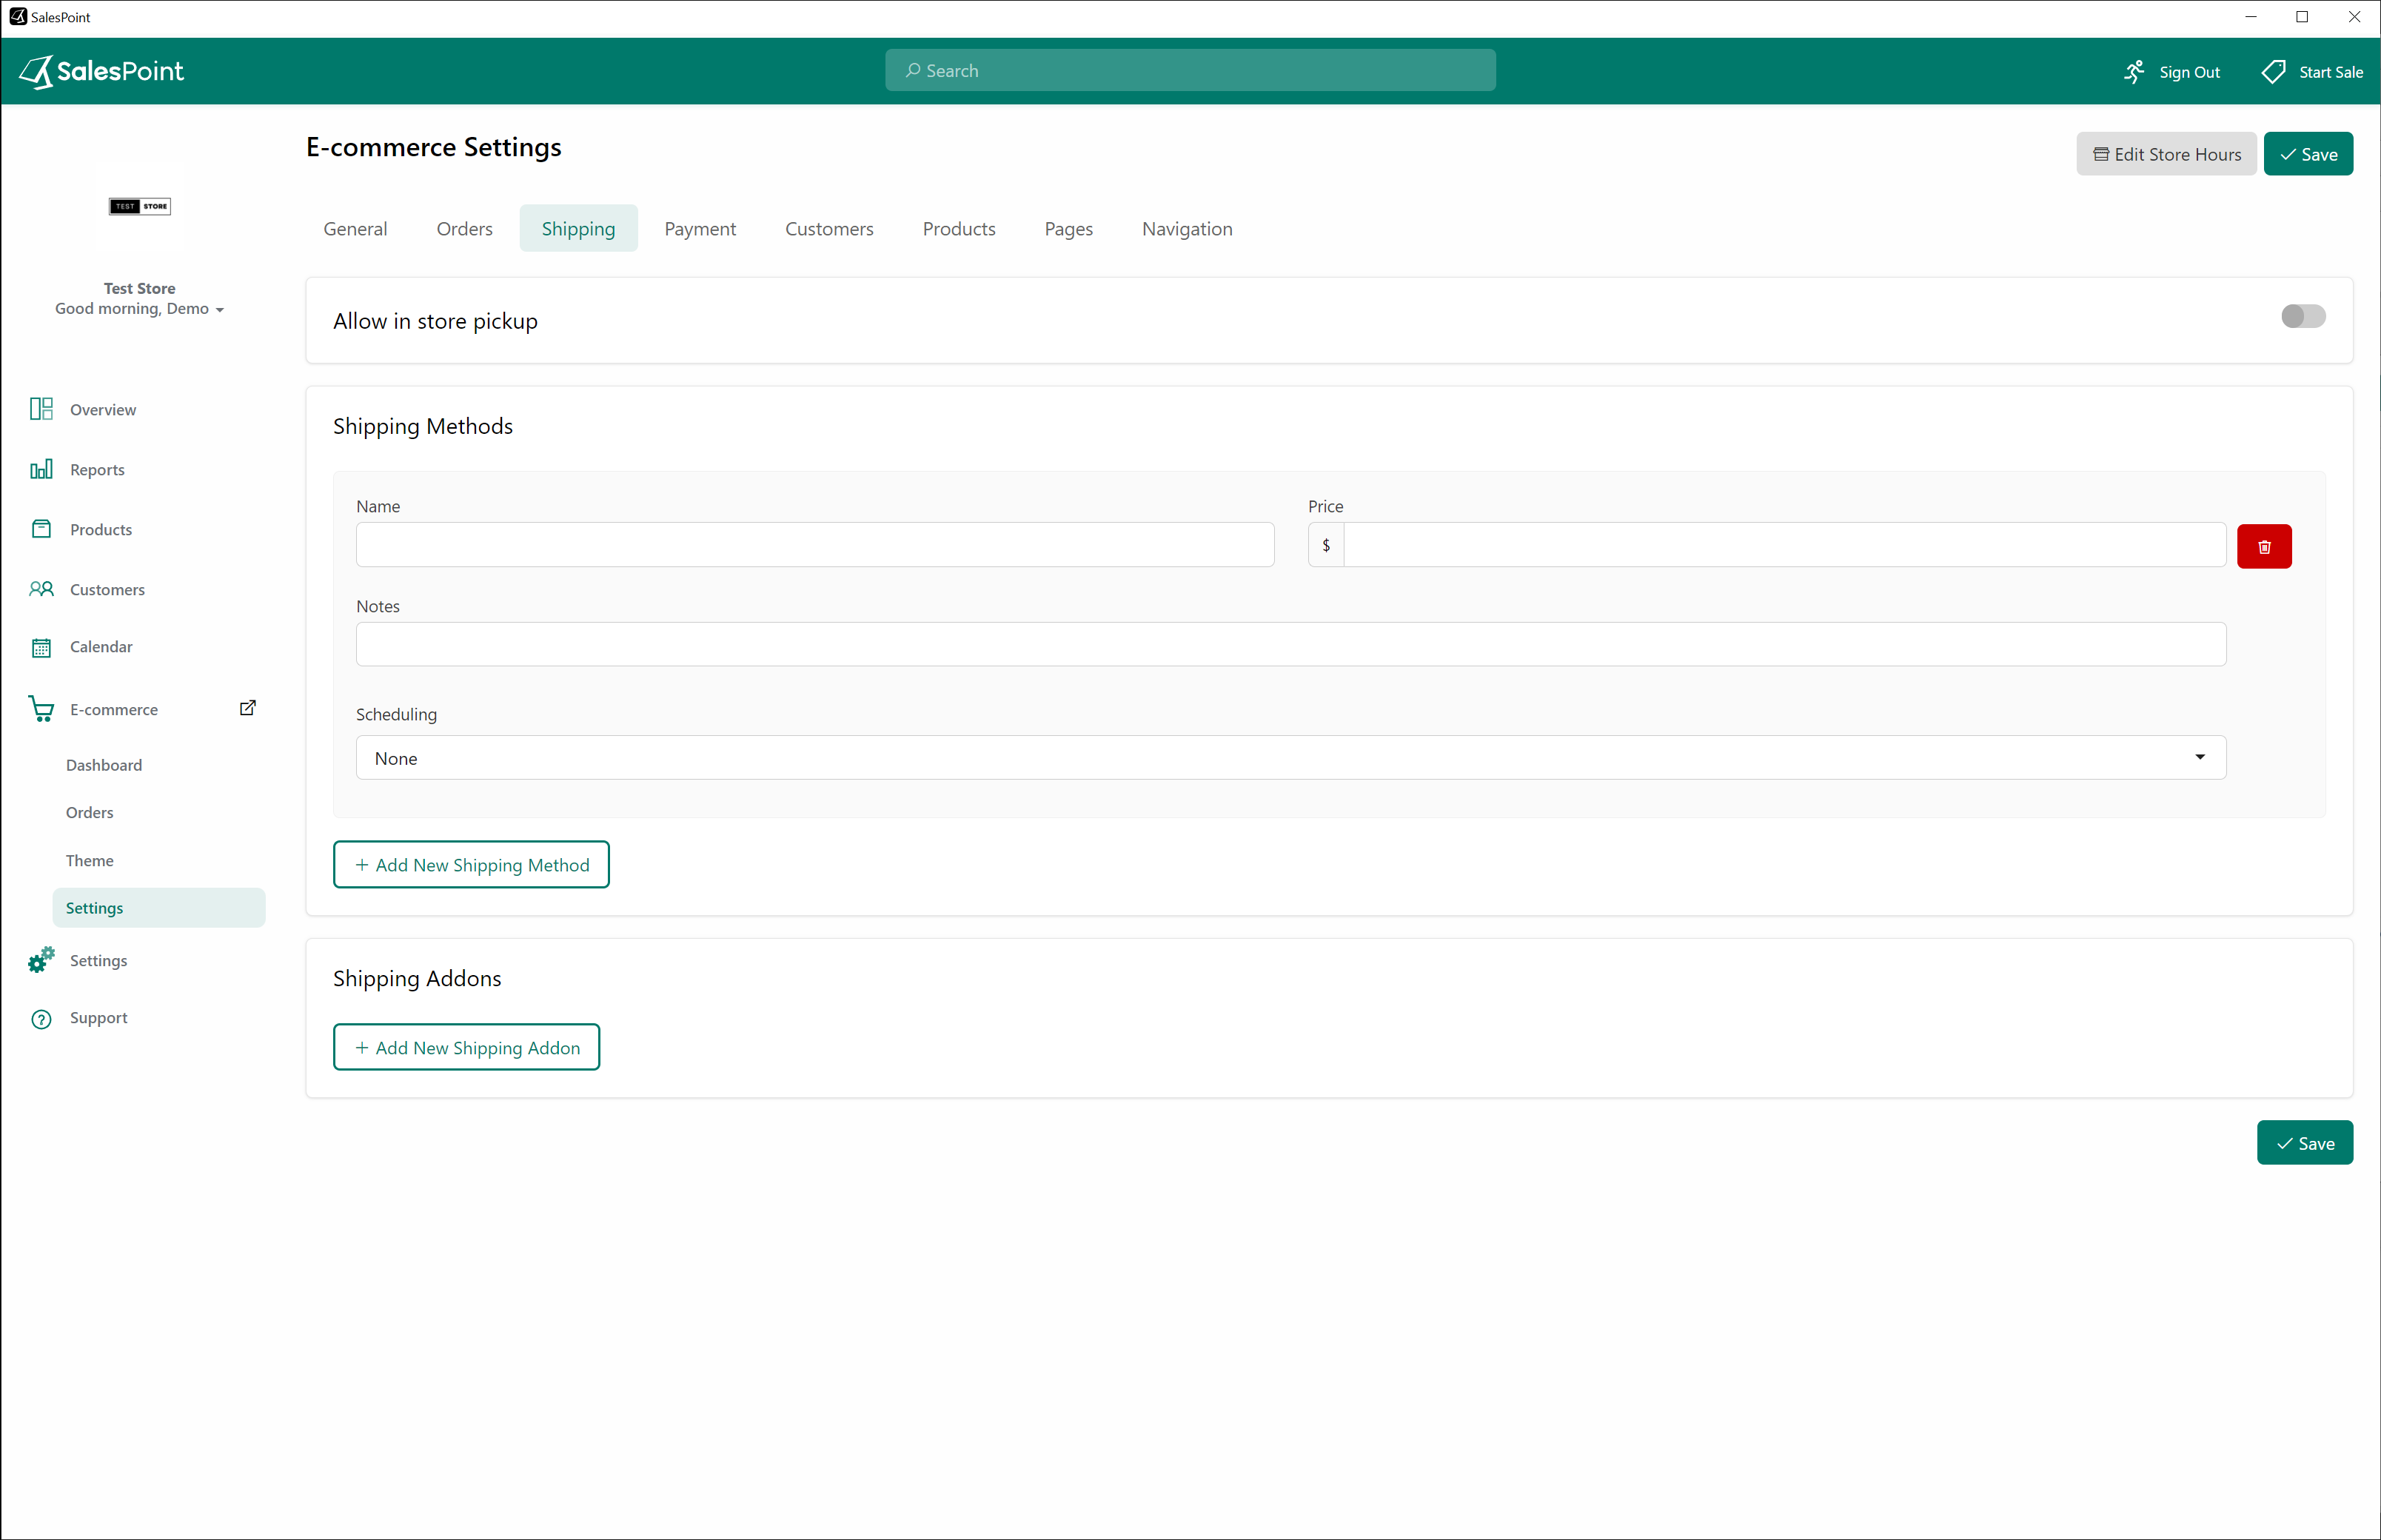
Step 4: Set Up Shipping
To create a shipping method for your online products, follow these steps:
- In the "E-Commerce" tab, within the "Settings" subcategory, select the "Shipping" section.
- Add the types of shipping you'd like for your e-commerce. Specify the name, price, and scheduled time for shipment.
Step 5: Ready, Set, Go
Once everything is set up, enable the "Store is available (online)" toggle to make your e-commerce system live.
When a customer places an order, it will sync to SalesPoint. To load the e-commerce order to the sales screen, let your reseller know so they can enable this for you.
Once enabled, orders will have a notification on top and will move through the following sections:
- New Section:
This is where new orders first appear. You can either accept or reject the order from this section. - Accepted Section:
Once an order is accepted, it moves to the "Accepted" section. The next steps depend on the payment status and the delivery method:- Unpaid Orders for Pickup: These will move to the "Ready for Pickup" section once the payment is received.
- Paid Orders for Shipping: These will move to the "Shipped" section after the shipping process is initiated.
- Paid Orders for Pickup: These will also move to the "Ready for Pickup" section.
- Shipped Section:
Orders that have been paid for and shipped will move to the "Shipped" section after you select the "Shipped" button from the "Accepted" section. - Ready for Pickup Section:
Orders ready for customer pickup will be listed here. Once the customer has picked up the product, select the "Complete" button to finalize the sale. - Completed Section:
All completed sales, whether shipped or picked up, will move to the "Completed" section after the final action is taken. - Rejected Section:
Orders that are rejected will be moved to the "Rejected" section.