Requirement:
1. You must have your store set to Business Type: Hospitality
2. Enable Table and Takeaway Queues: https://salespoint.nz/support/articles/Set-Up-Tables-and-Takeaway-Queues
How to Enable QR Ordering:
Just like E-commerce, QR ordering is simply when a customer scans the QR and orders their food without service.
To do this, please do the following:
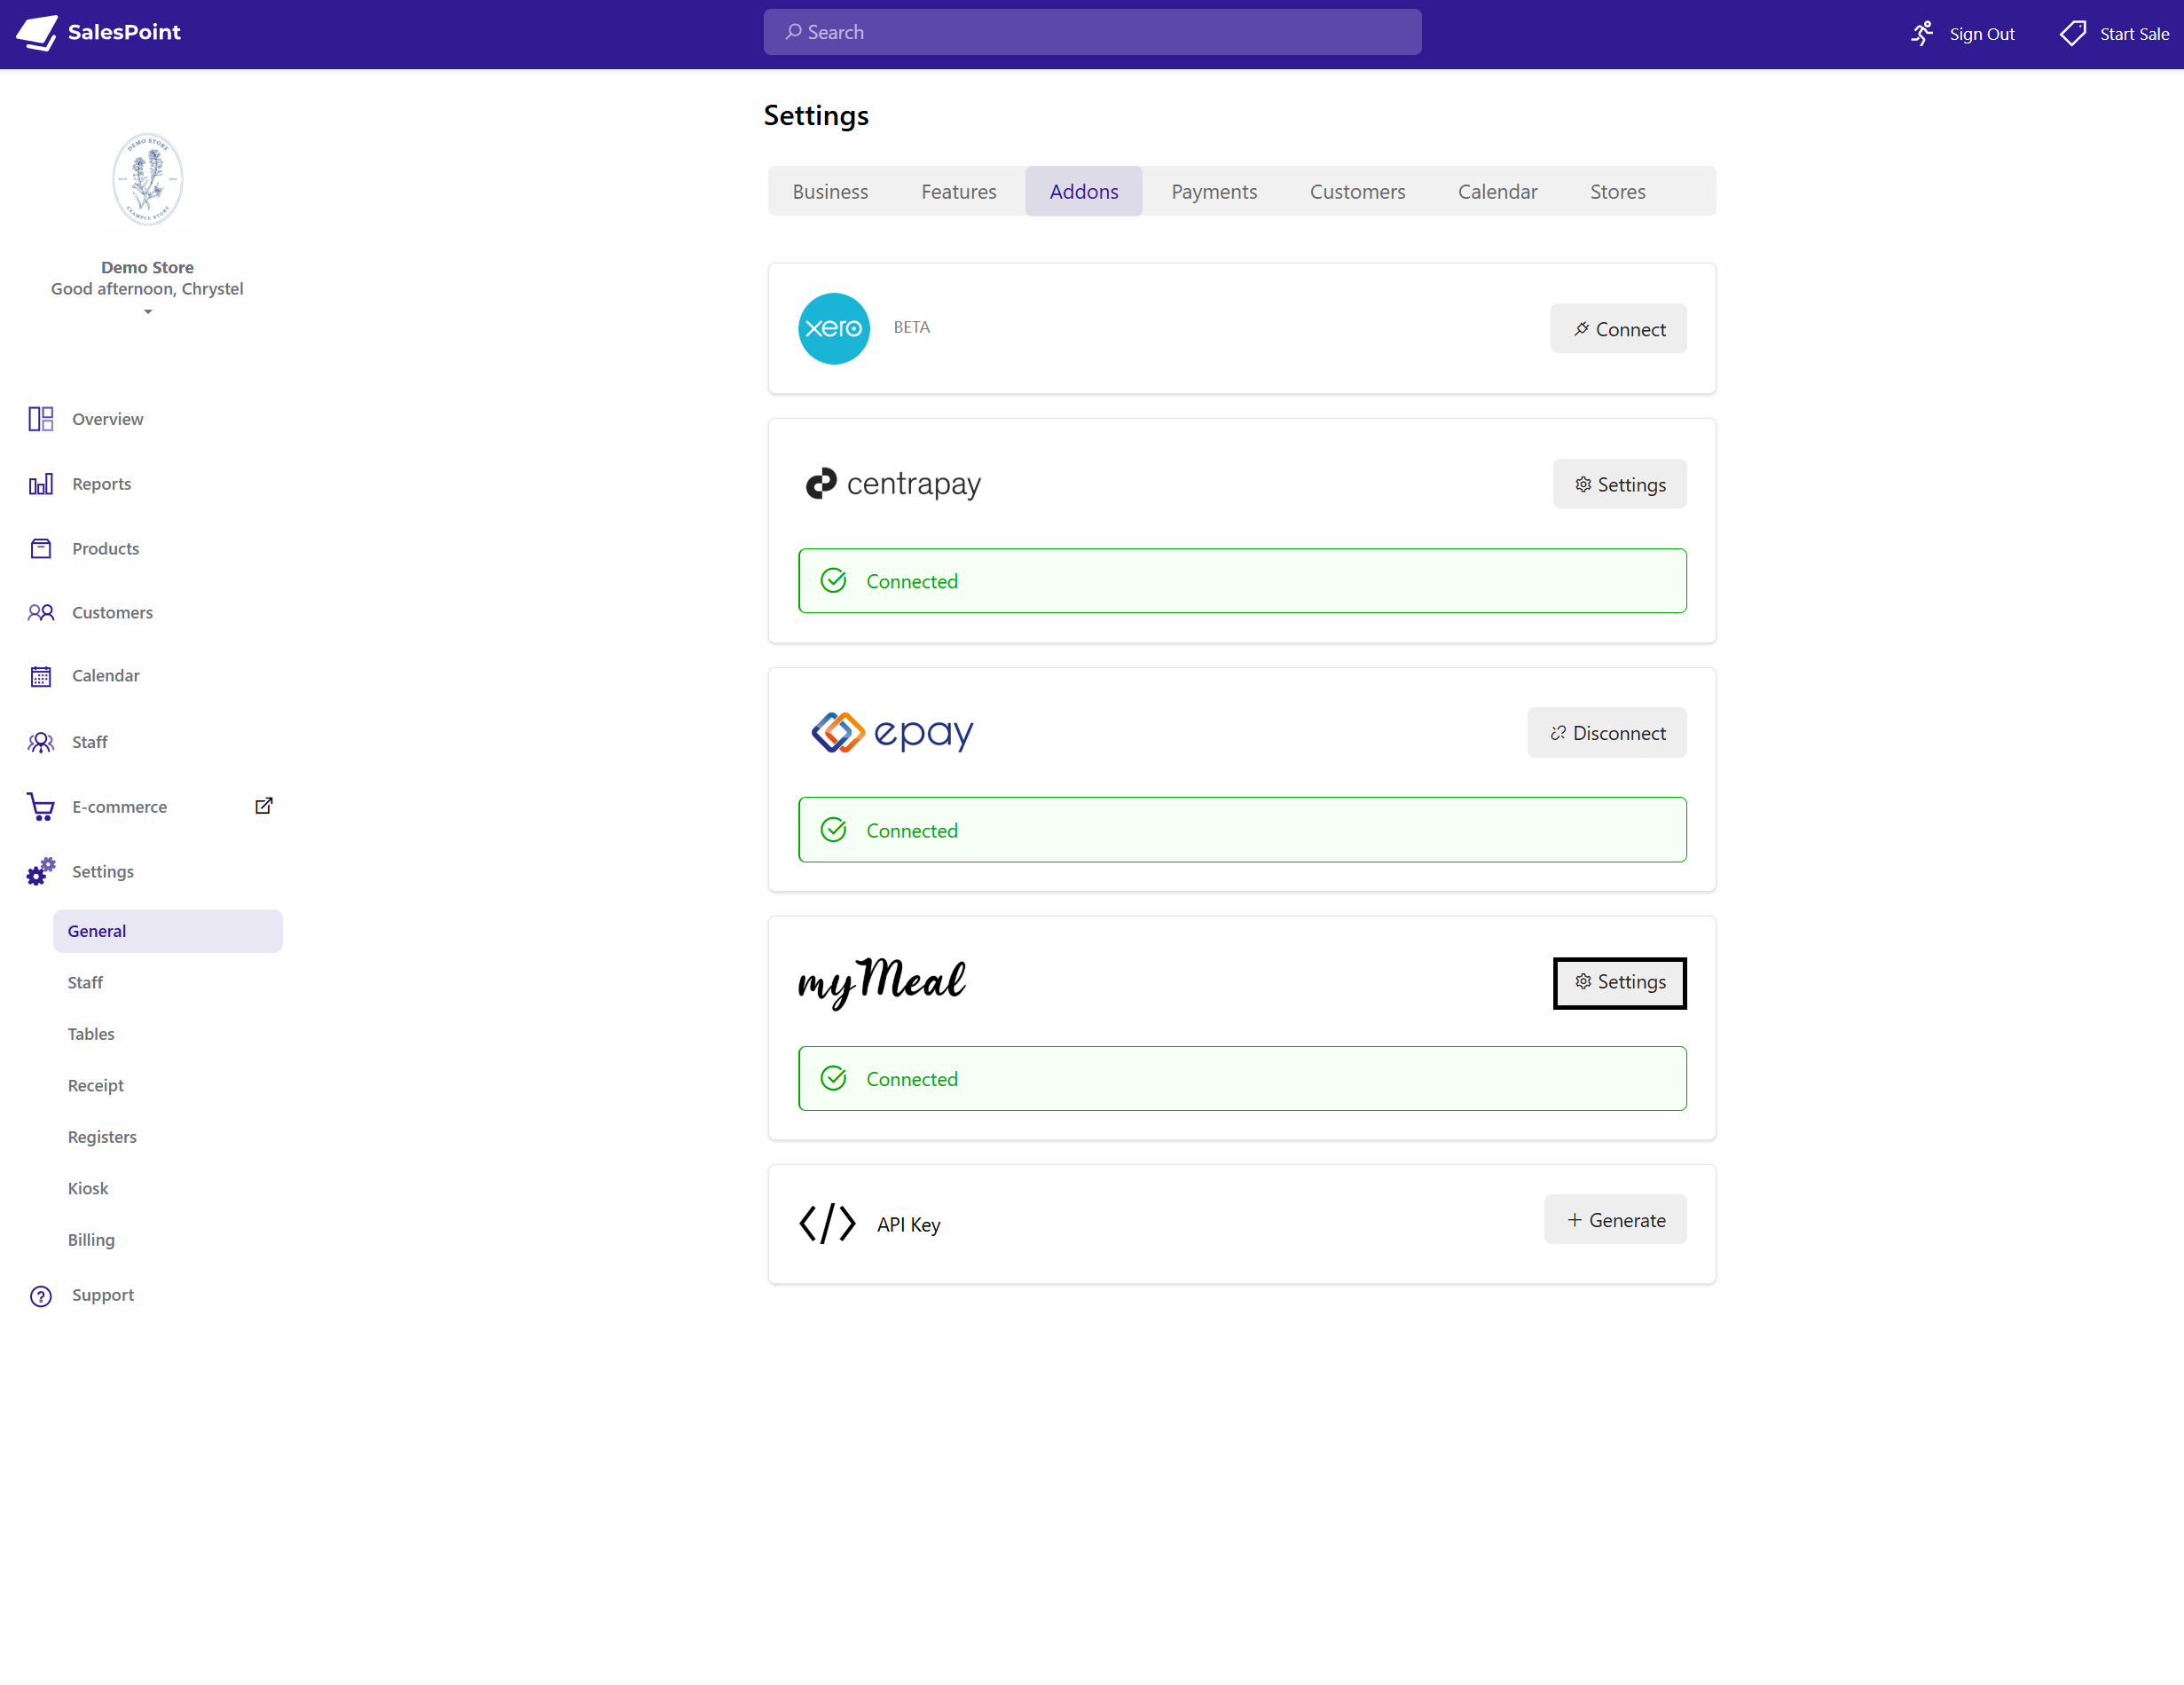
1. On the Dashboard, navigate to General Settings, then select the Addons section.
2. From here, select the MyMeal Connect button. At first, it will ask you to enable E-commerce. Once enabled, select the Create My Store button.
3. After this, go back to the Addons. MyMeal will now change to a Setup button. Select the Setup button and enter your URL. This URL is essential, as you will need it to generate your own QR code for customers to scan.
4. Configure the settings. If you do not want specific products to show on sale, follow this guide: Adding Products to Your E-Commerce Site
Orders Enabled: Enable for Customers to order using mymeal
Allow Table Order: allow custoemrs to dine in and order from their table
Allow Customers to Choose A Table: allow customers to select what table they are seating in for orders
Allow Pay Later on Check out: Allow customers to pay for their meal later on.
Information
1. once you have it enabled, the The URL for example should be like this: "myme.al/a/storename"
2. To get the QR part working for the tables, you will need scan the qr by selecting the edit button from the table and select Create qr, you can save this and print this on for customers to use.
How it works:
1. Once you have the QR generated, when a customer scans it, it will direct them to the URL you set on the QR code.
2. They will select the dining choice — either table or takeaway — then add their product and pay.
3. You will then receive it in your E-commerce Recall Order. Select accept or decline.
How to Enable E-commerce Order Recall:
1. If you are signed in, sign out or select Switch User until you are on the login page.
2. Once on the login page, select the Settings button. Triple click the Version number to enable Advanced Settings.
3. Navigate to the Advanced section and enable "Load E-Commerce Orders".
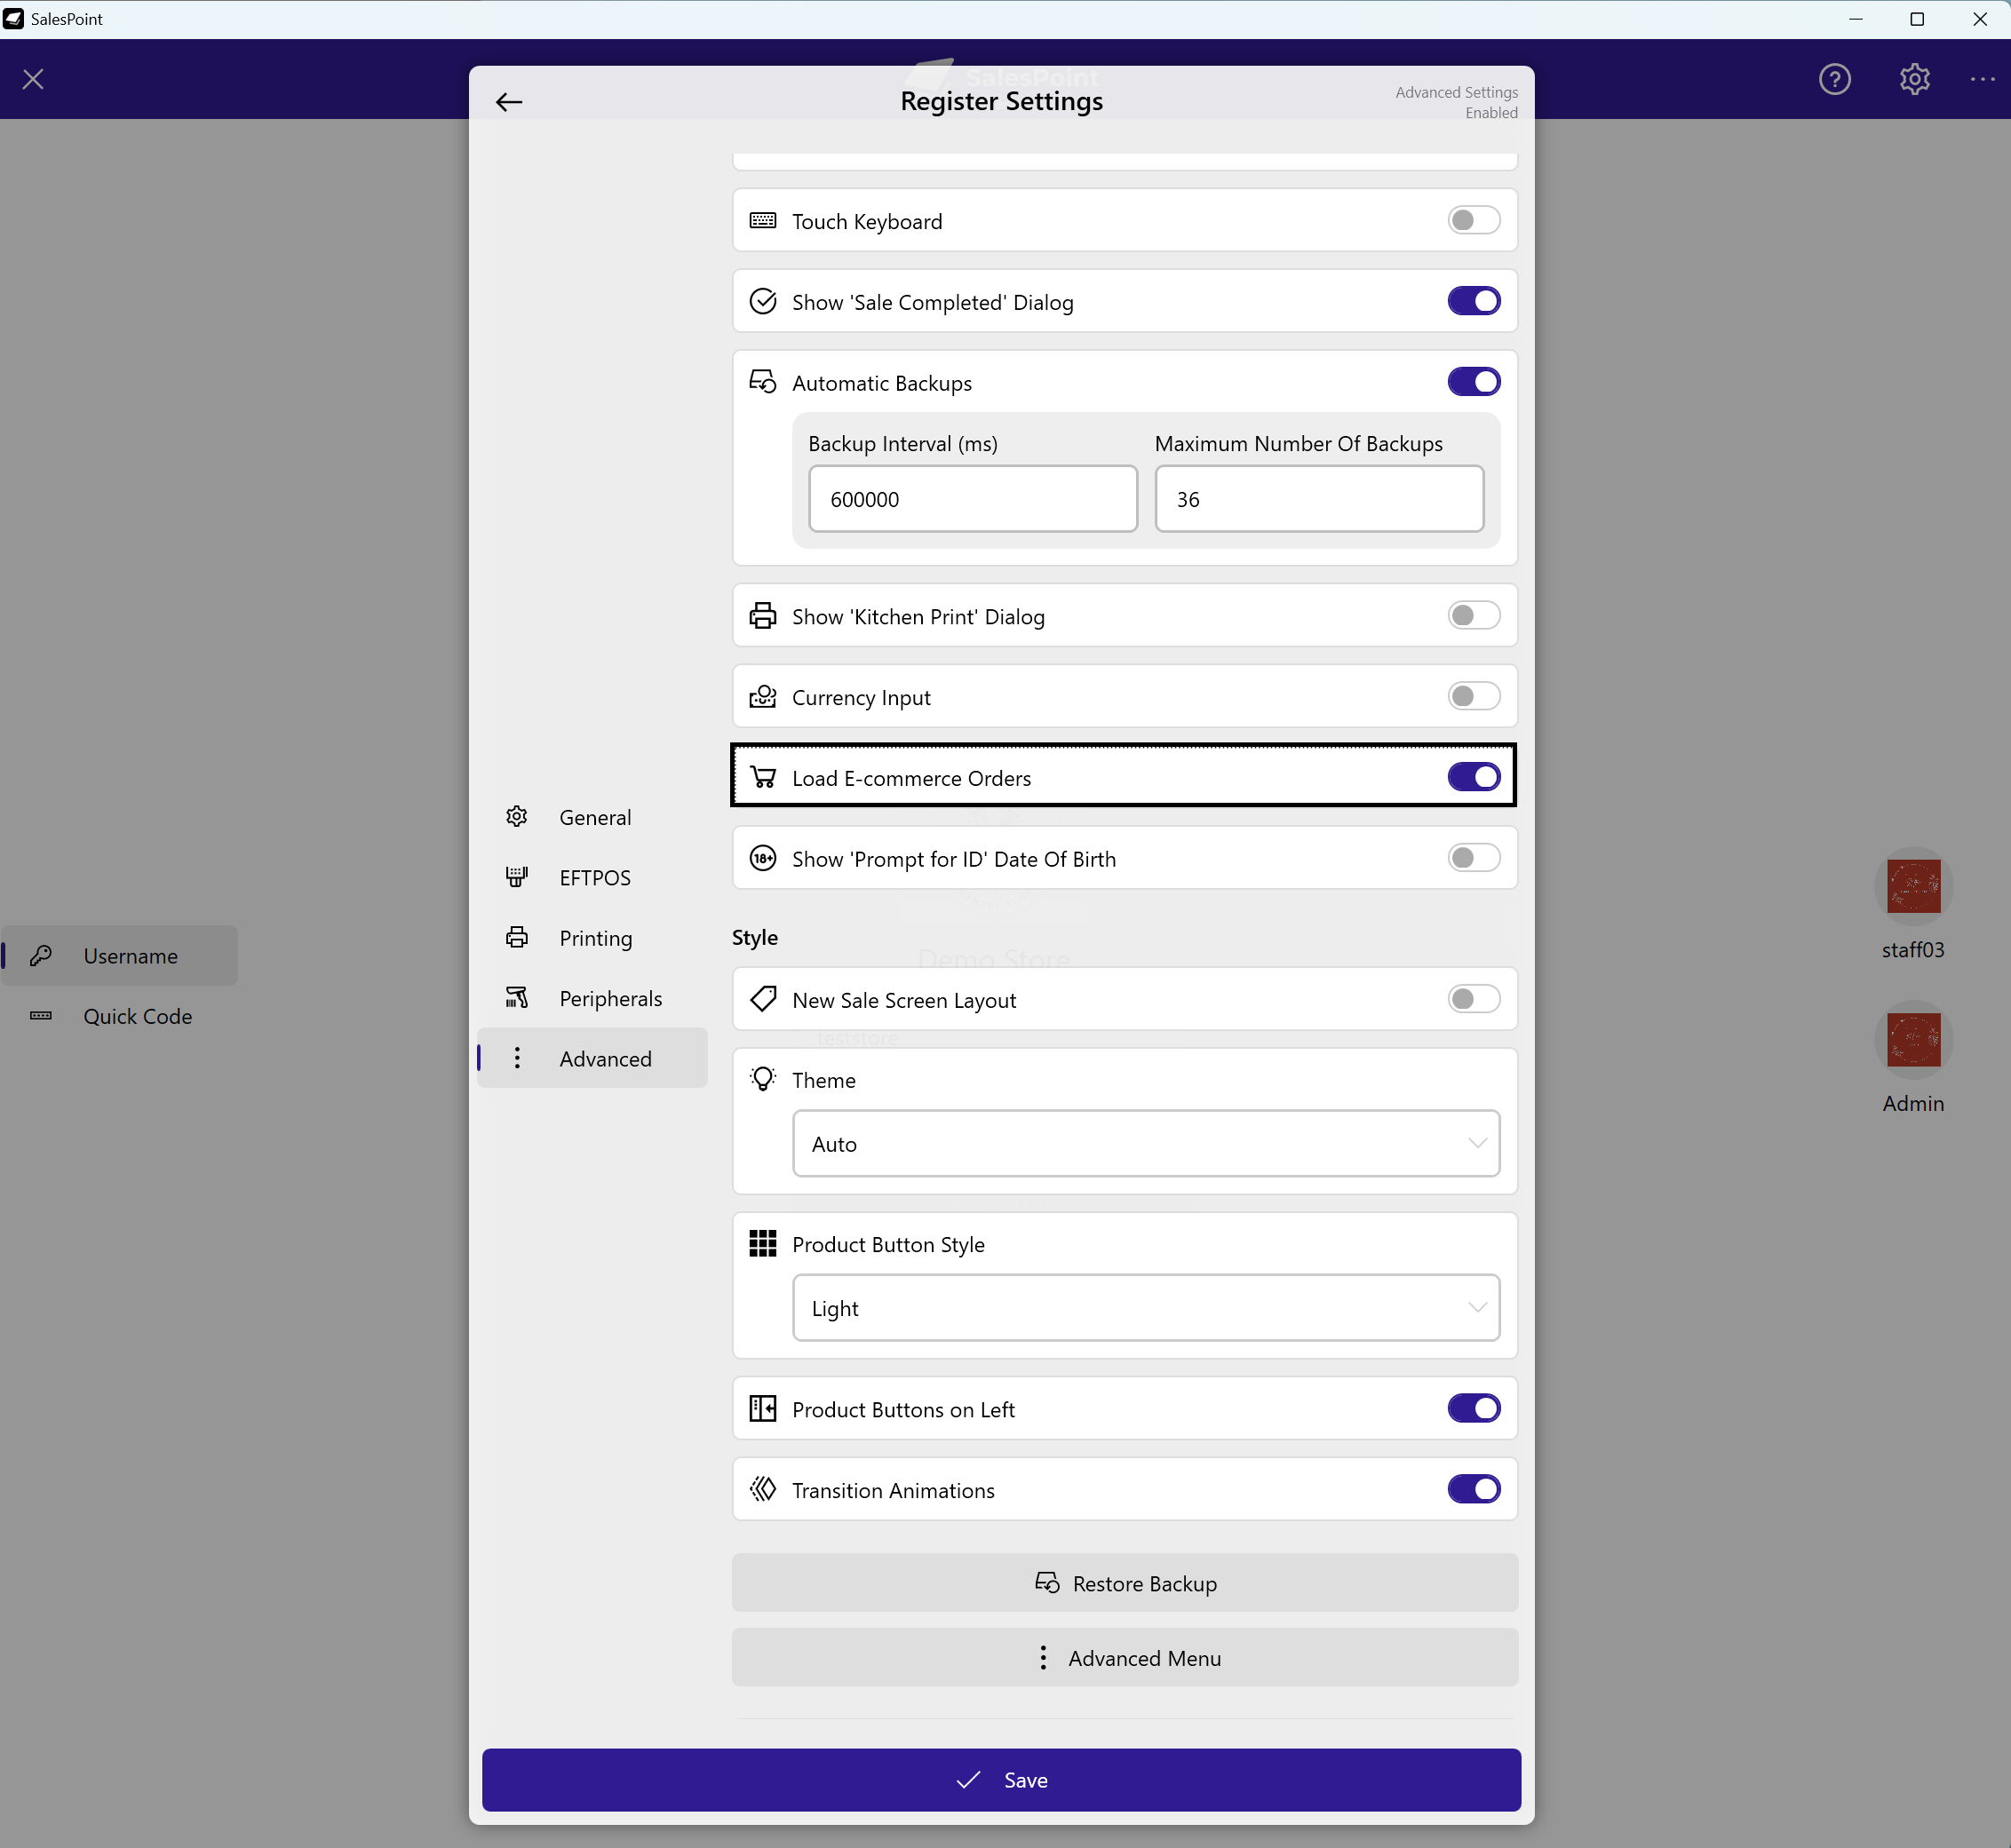
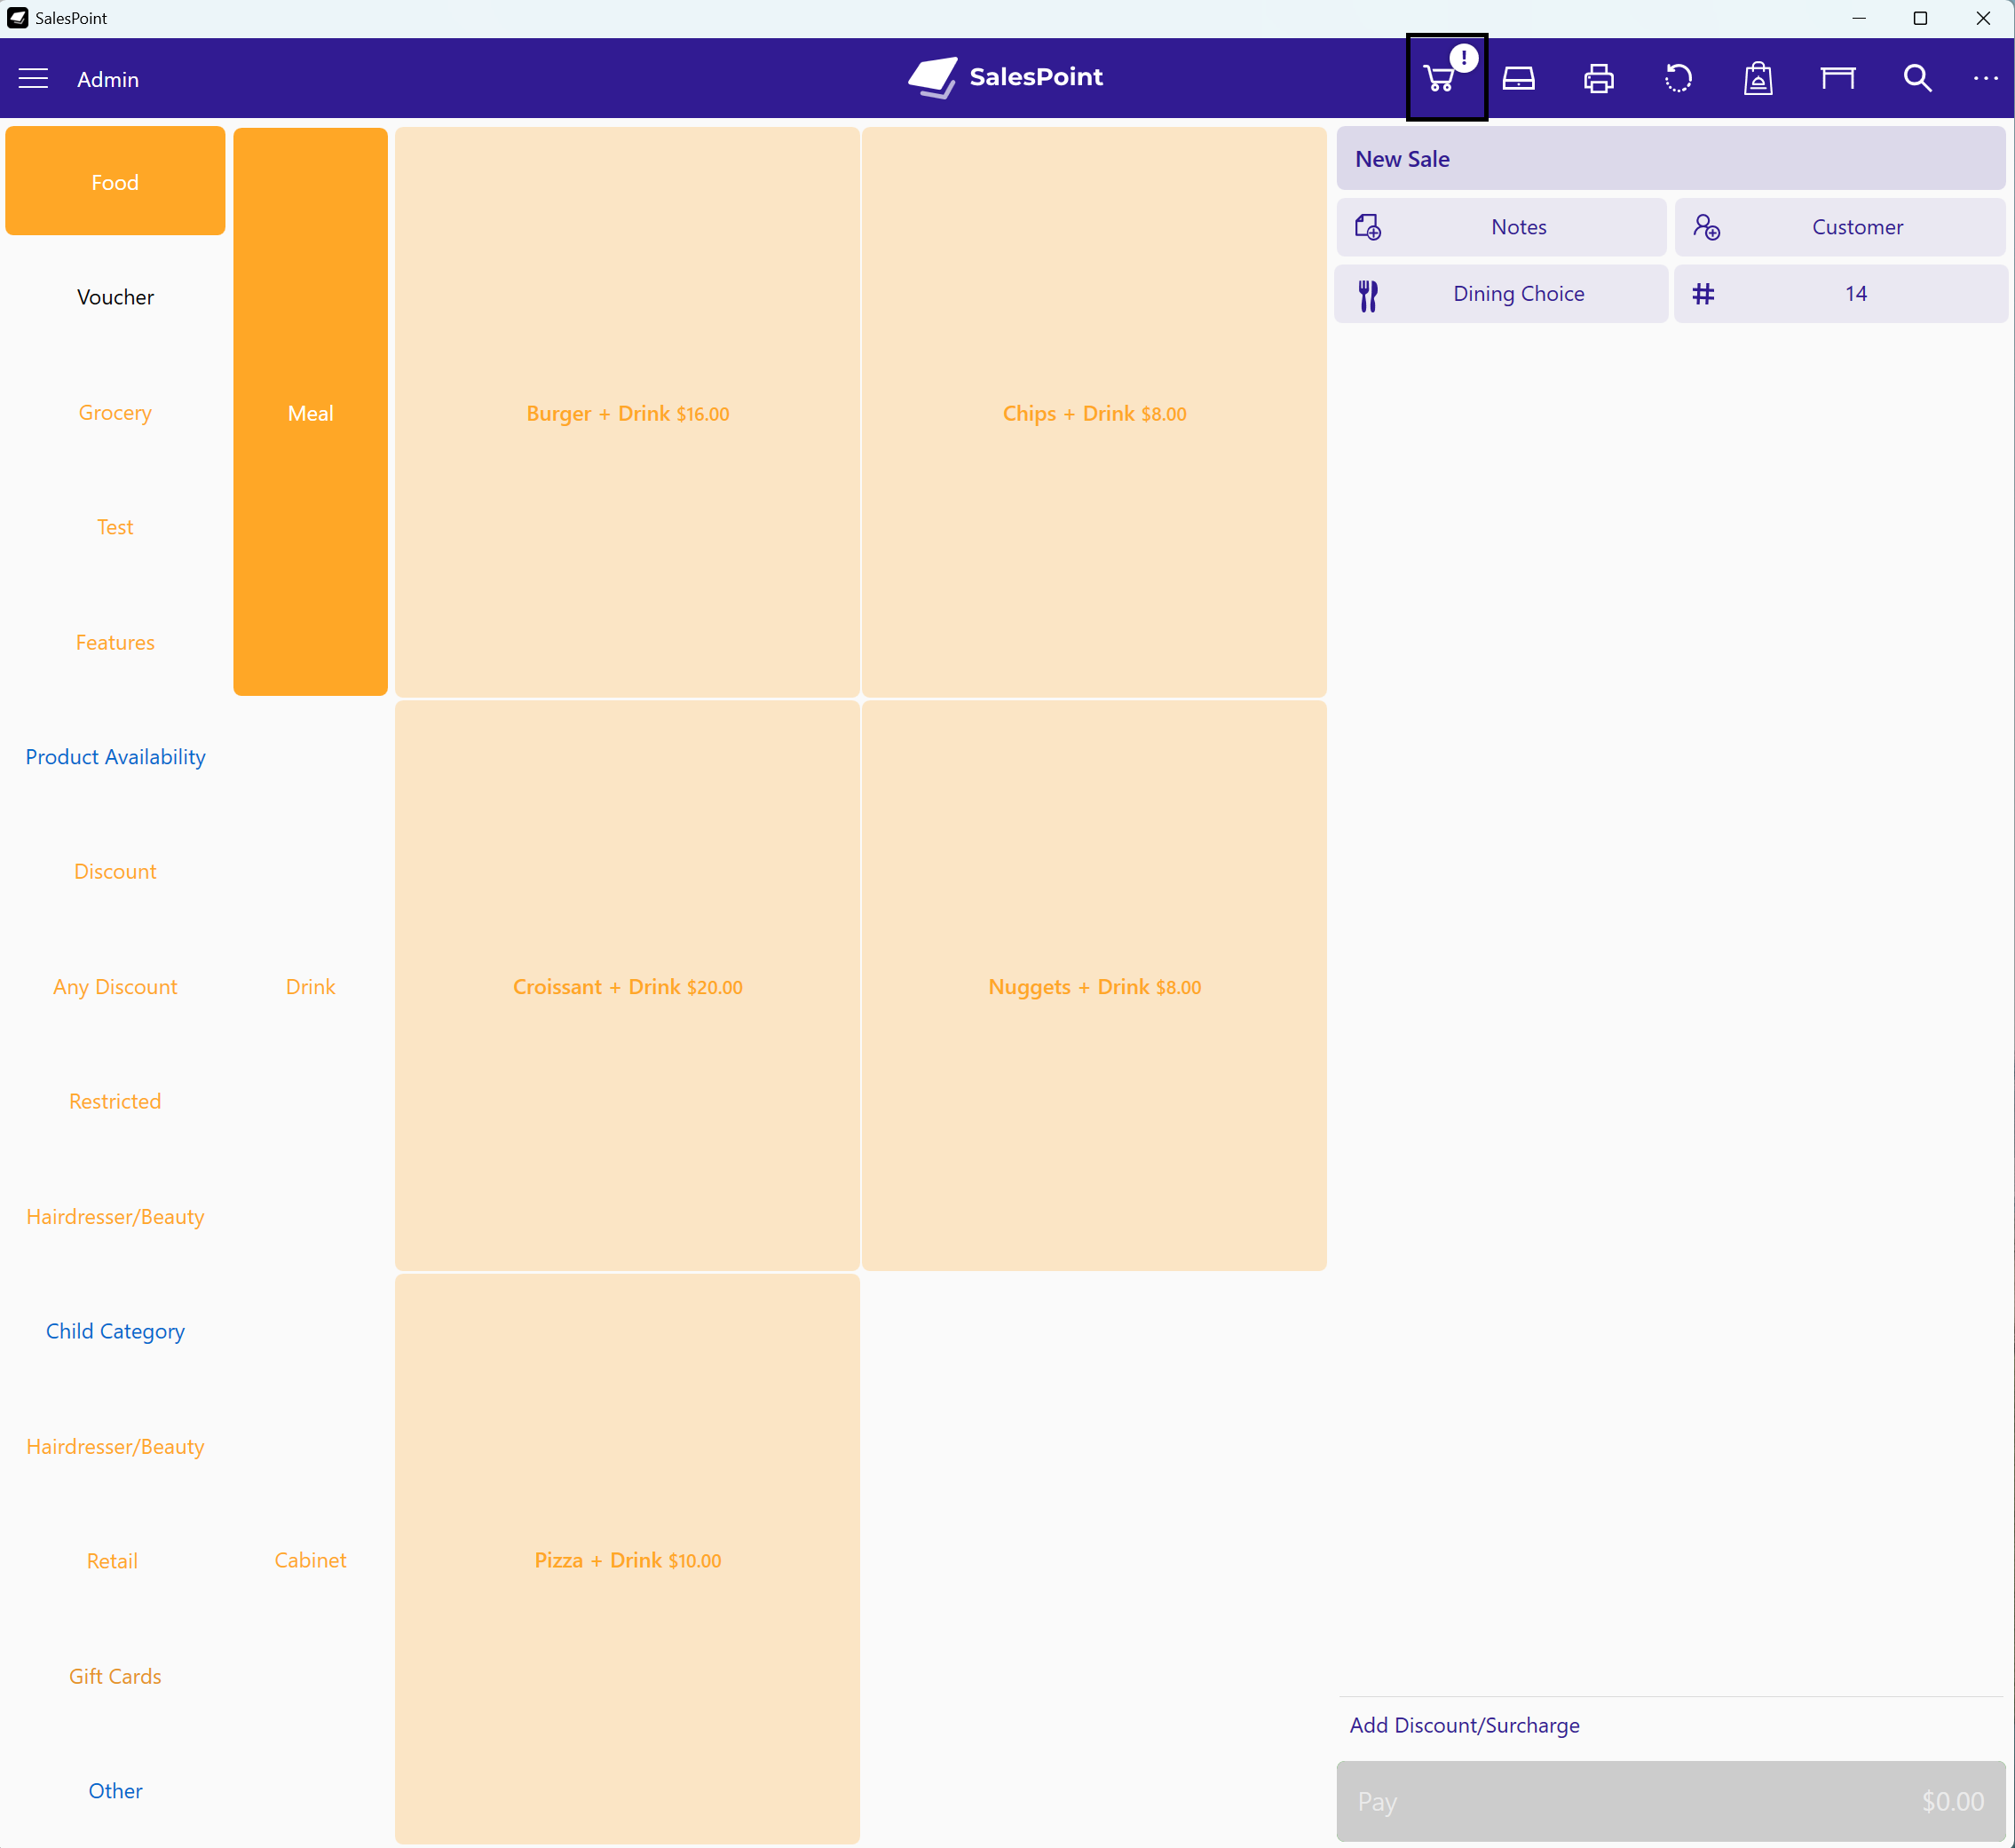
4. Once saved, you will see a notification in the top corner letting you know there is an order from your E-commerce store.