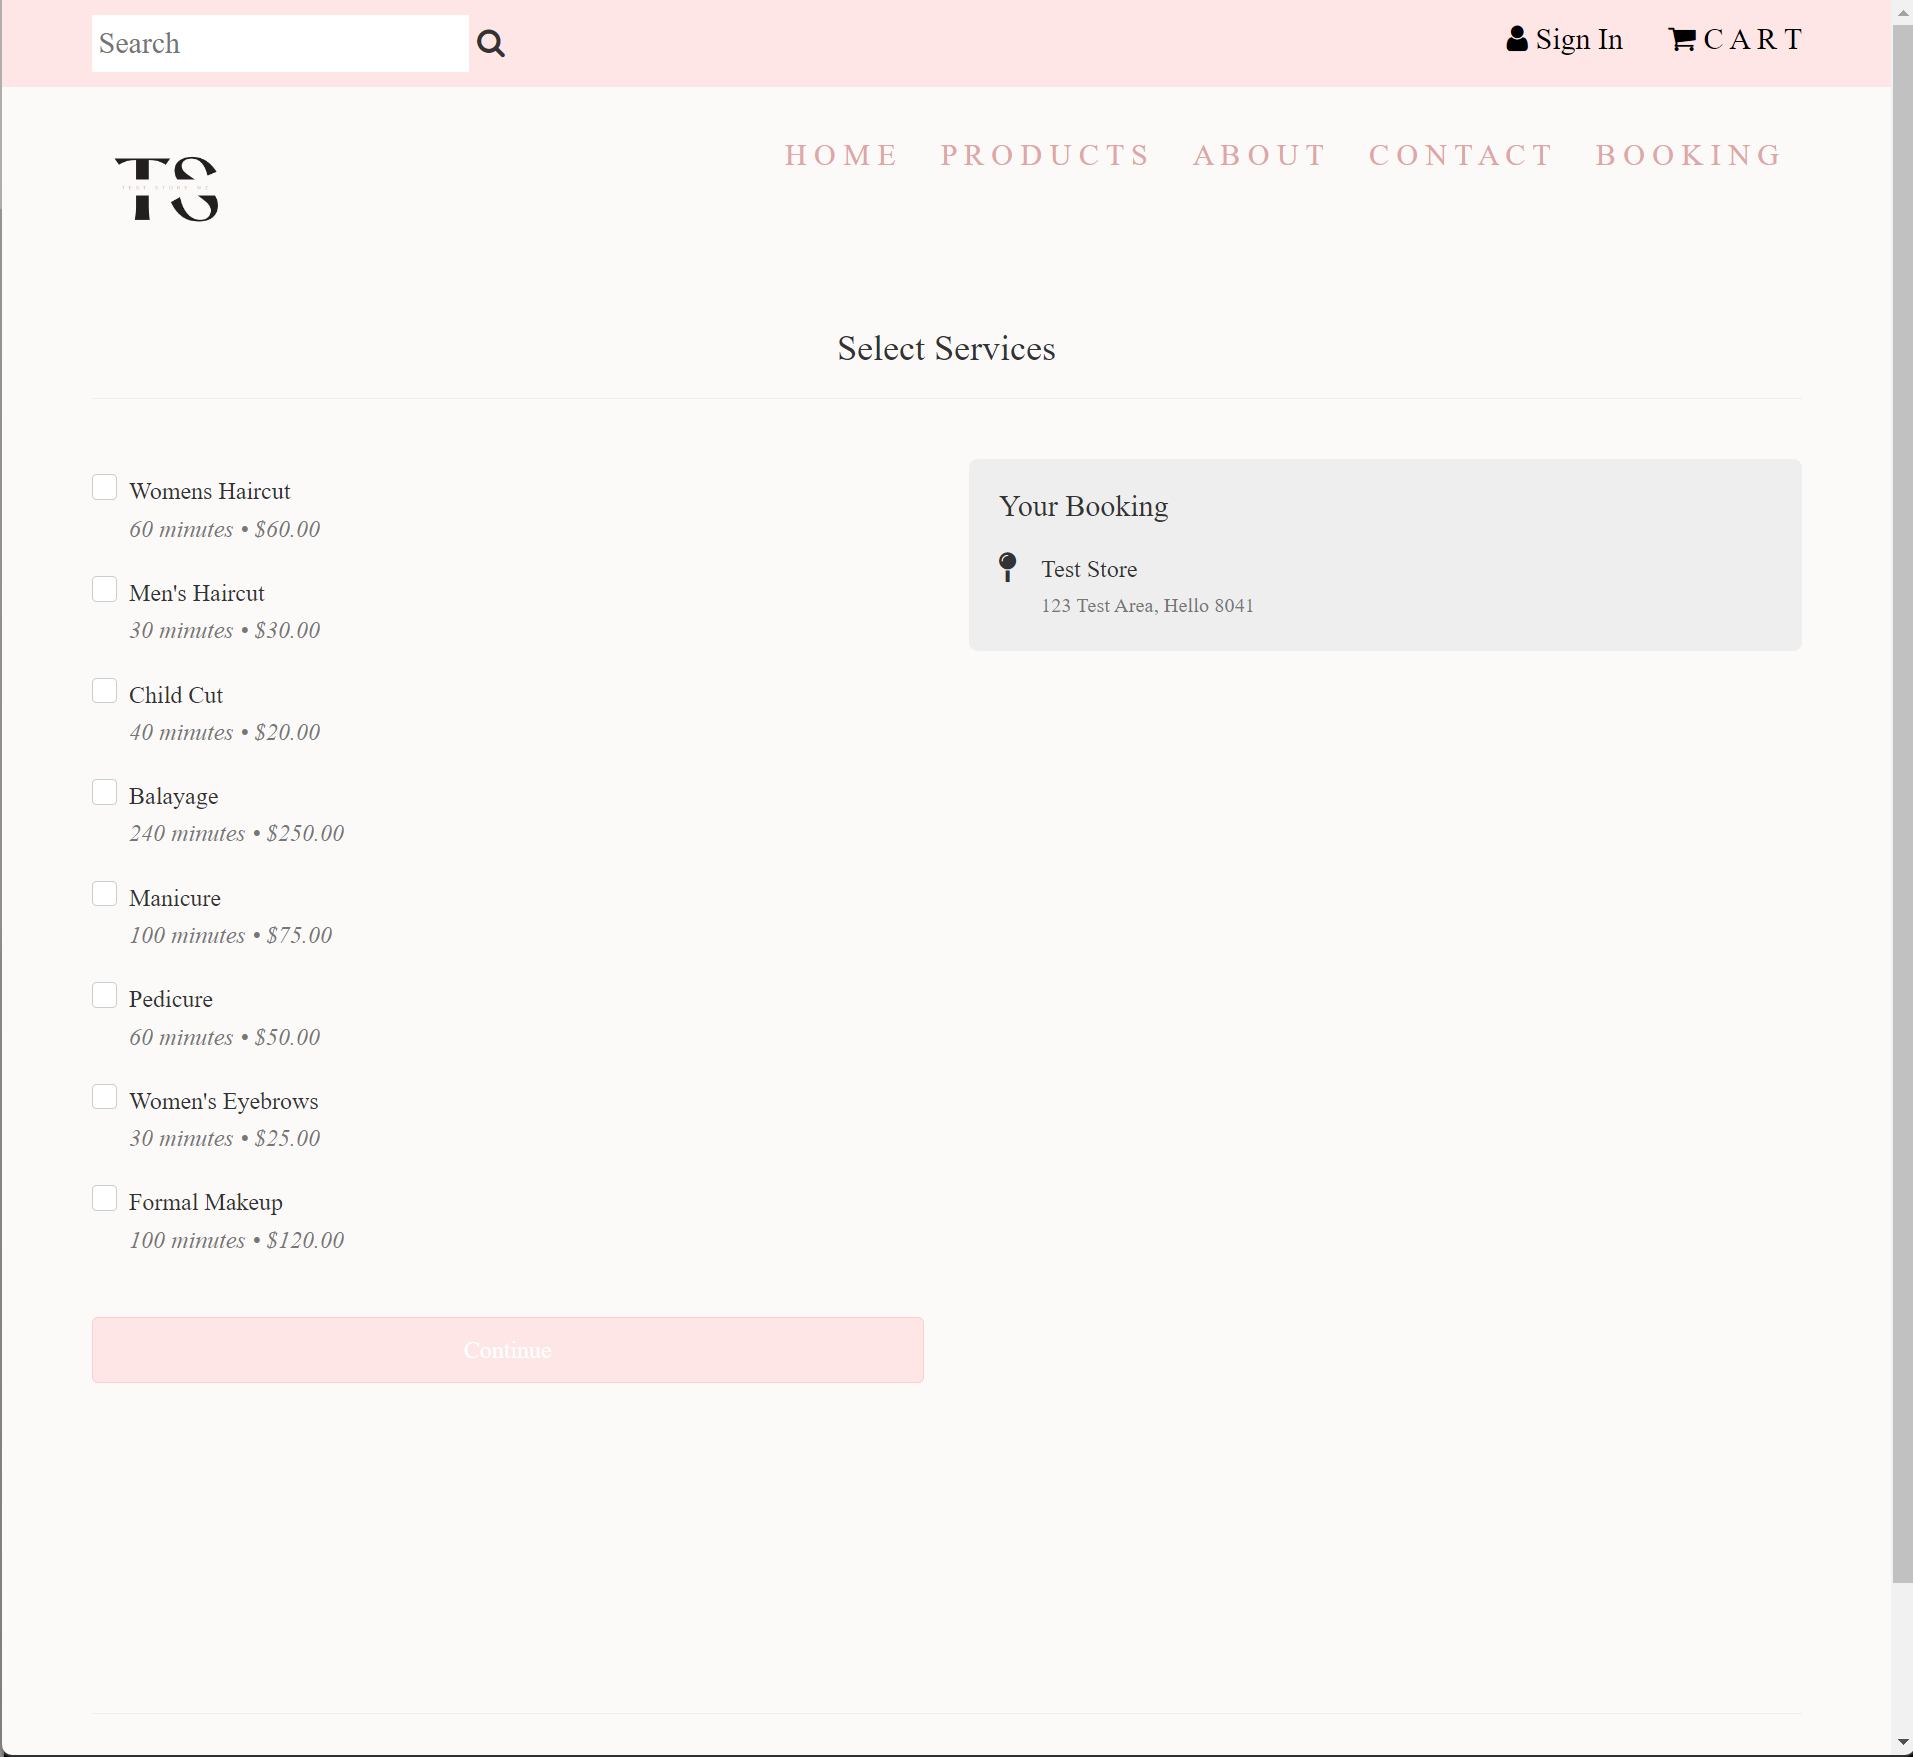
Ensure the business type is Hairdresser/Beauty.
Step 1: Enable Calendar
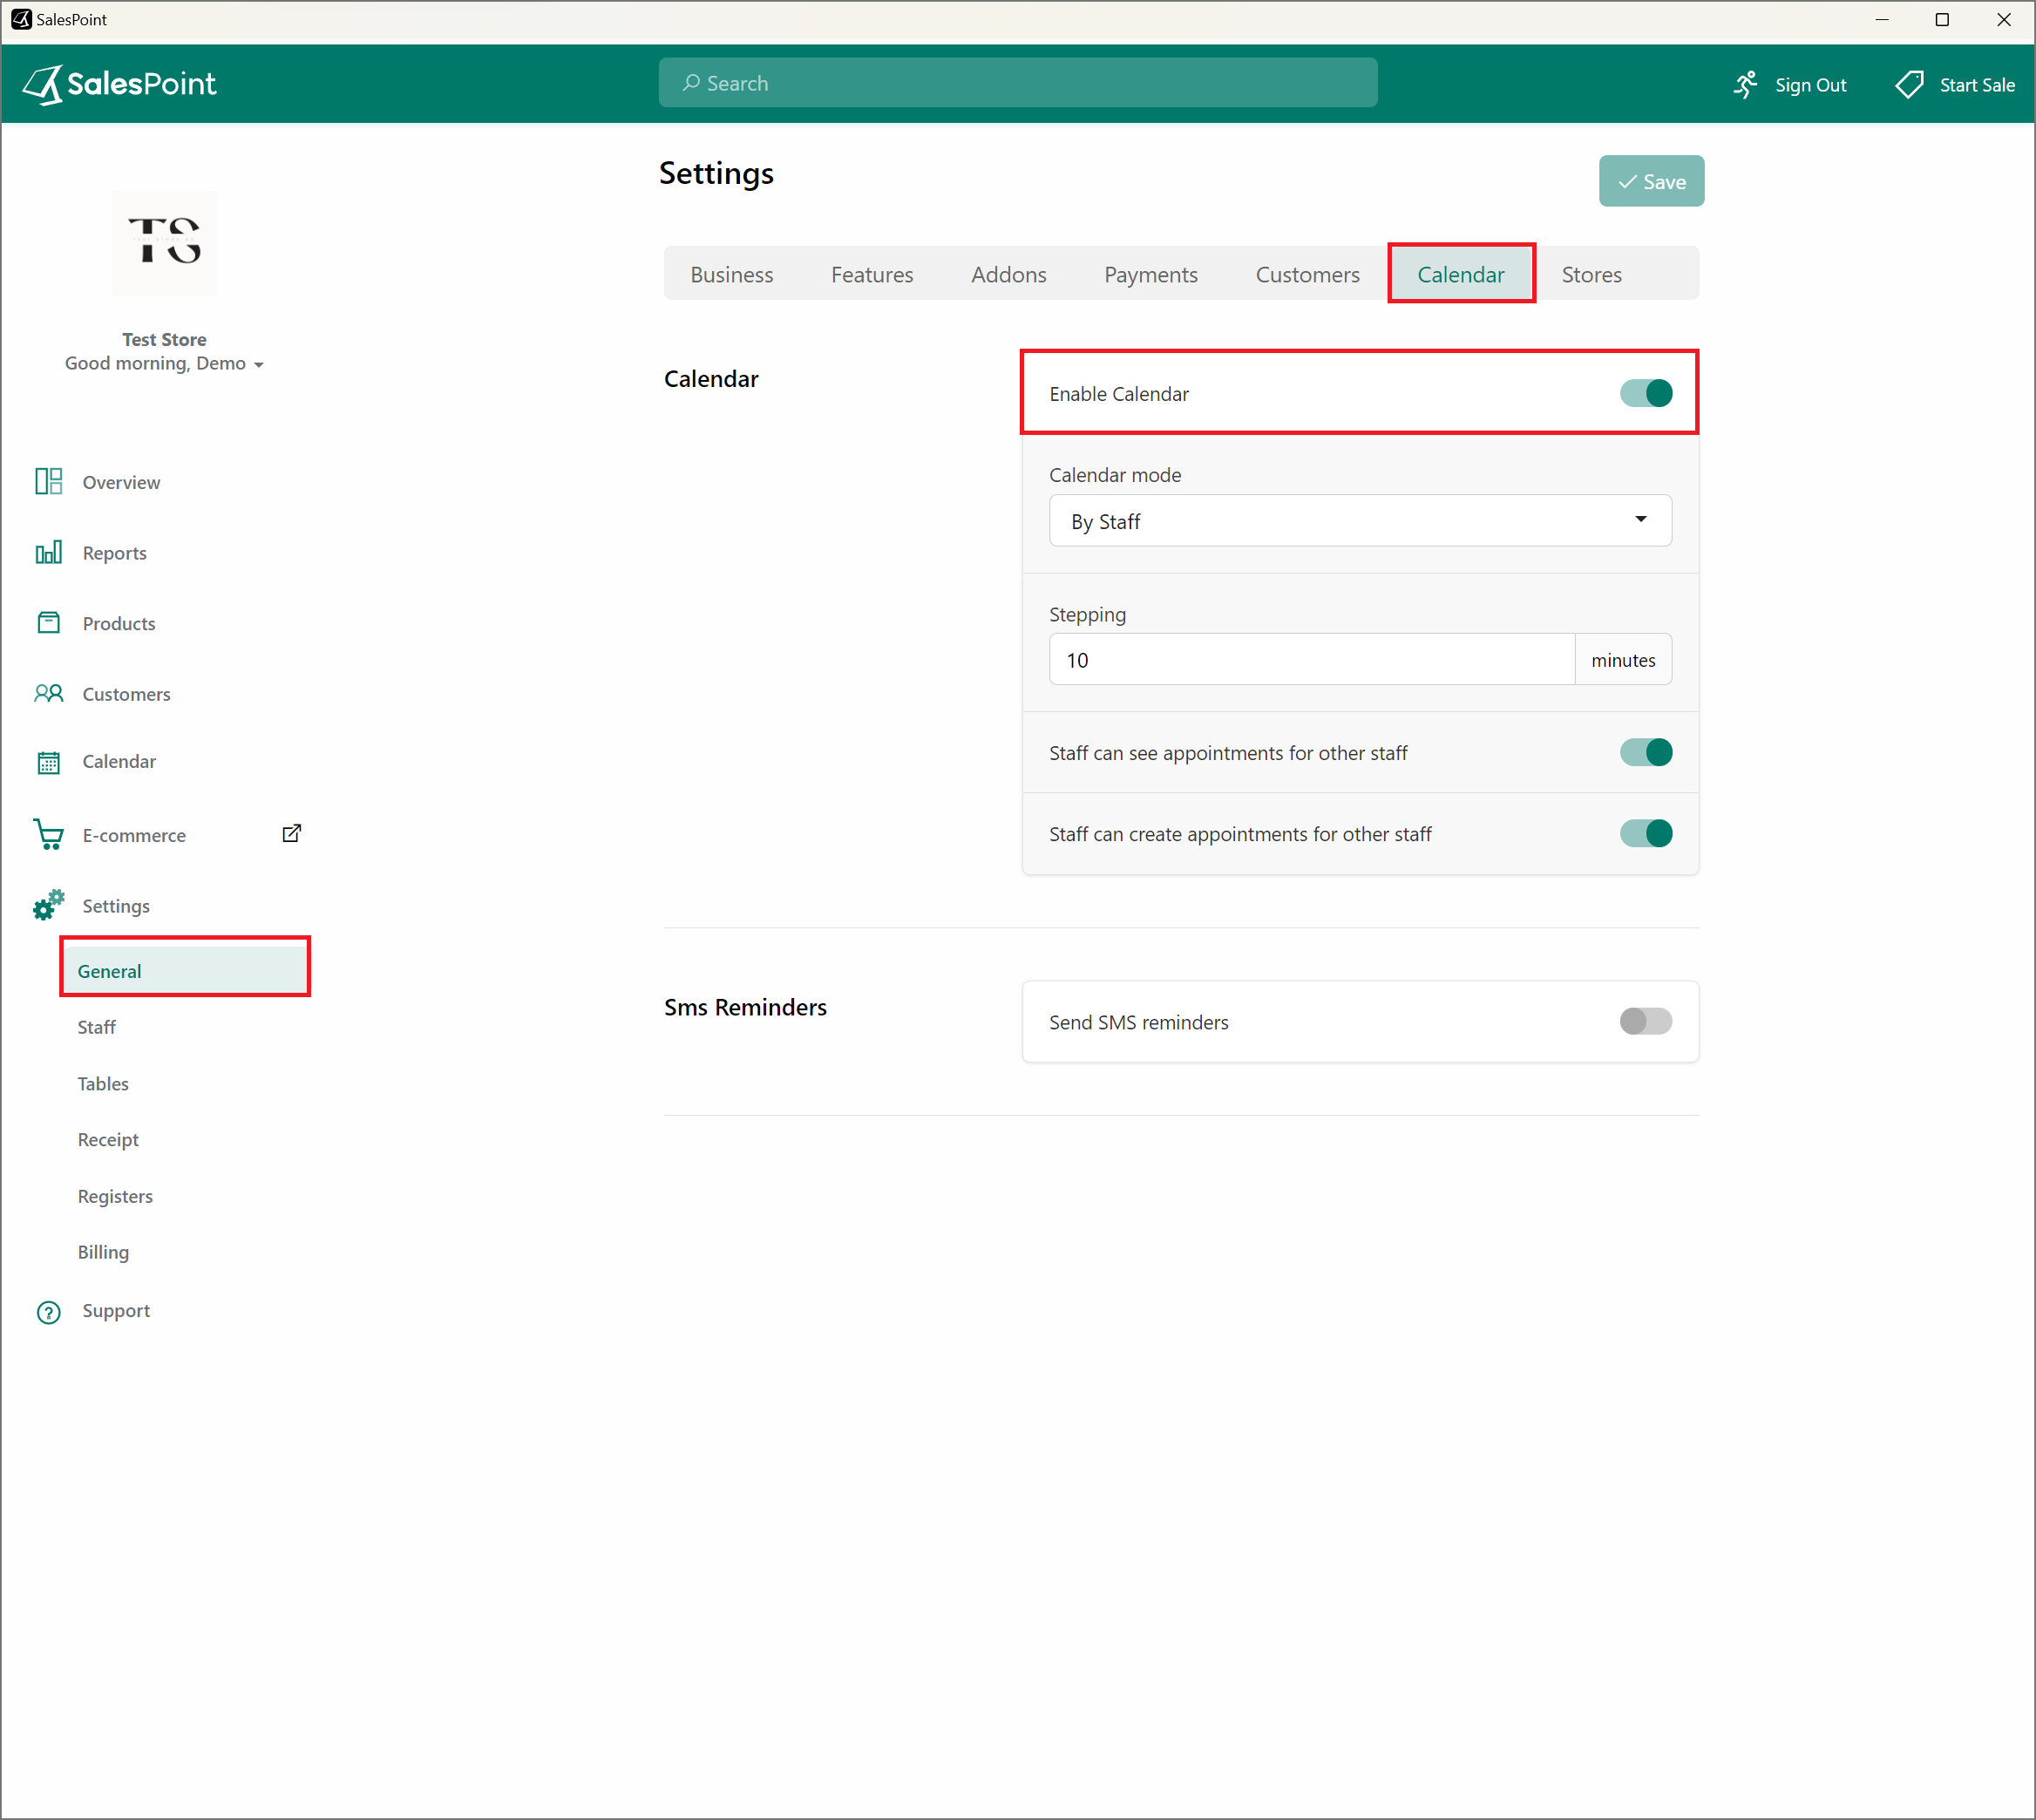
The Calendar must be enabled for staff booking to work. To do this, go to the Dashboard, navigate to settings, and select the Calendar section. Enable the Calendar toggle and change the calendar mode to "By Staff". Click save.
Step 2: Staff Hours
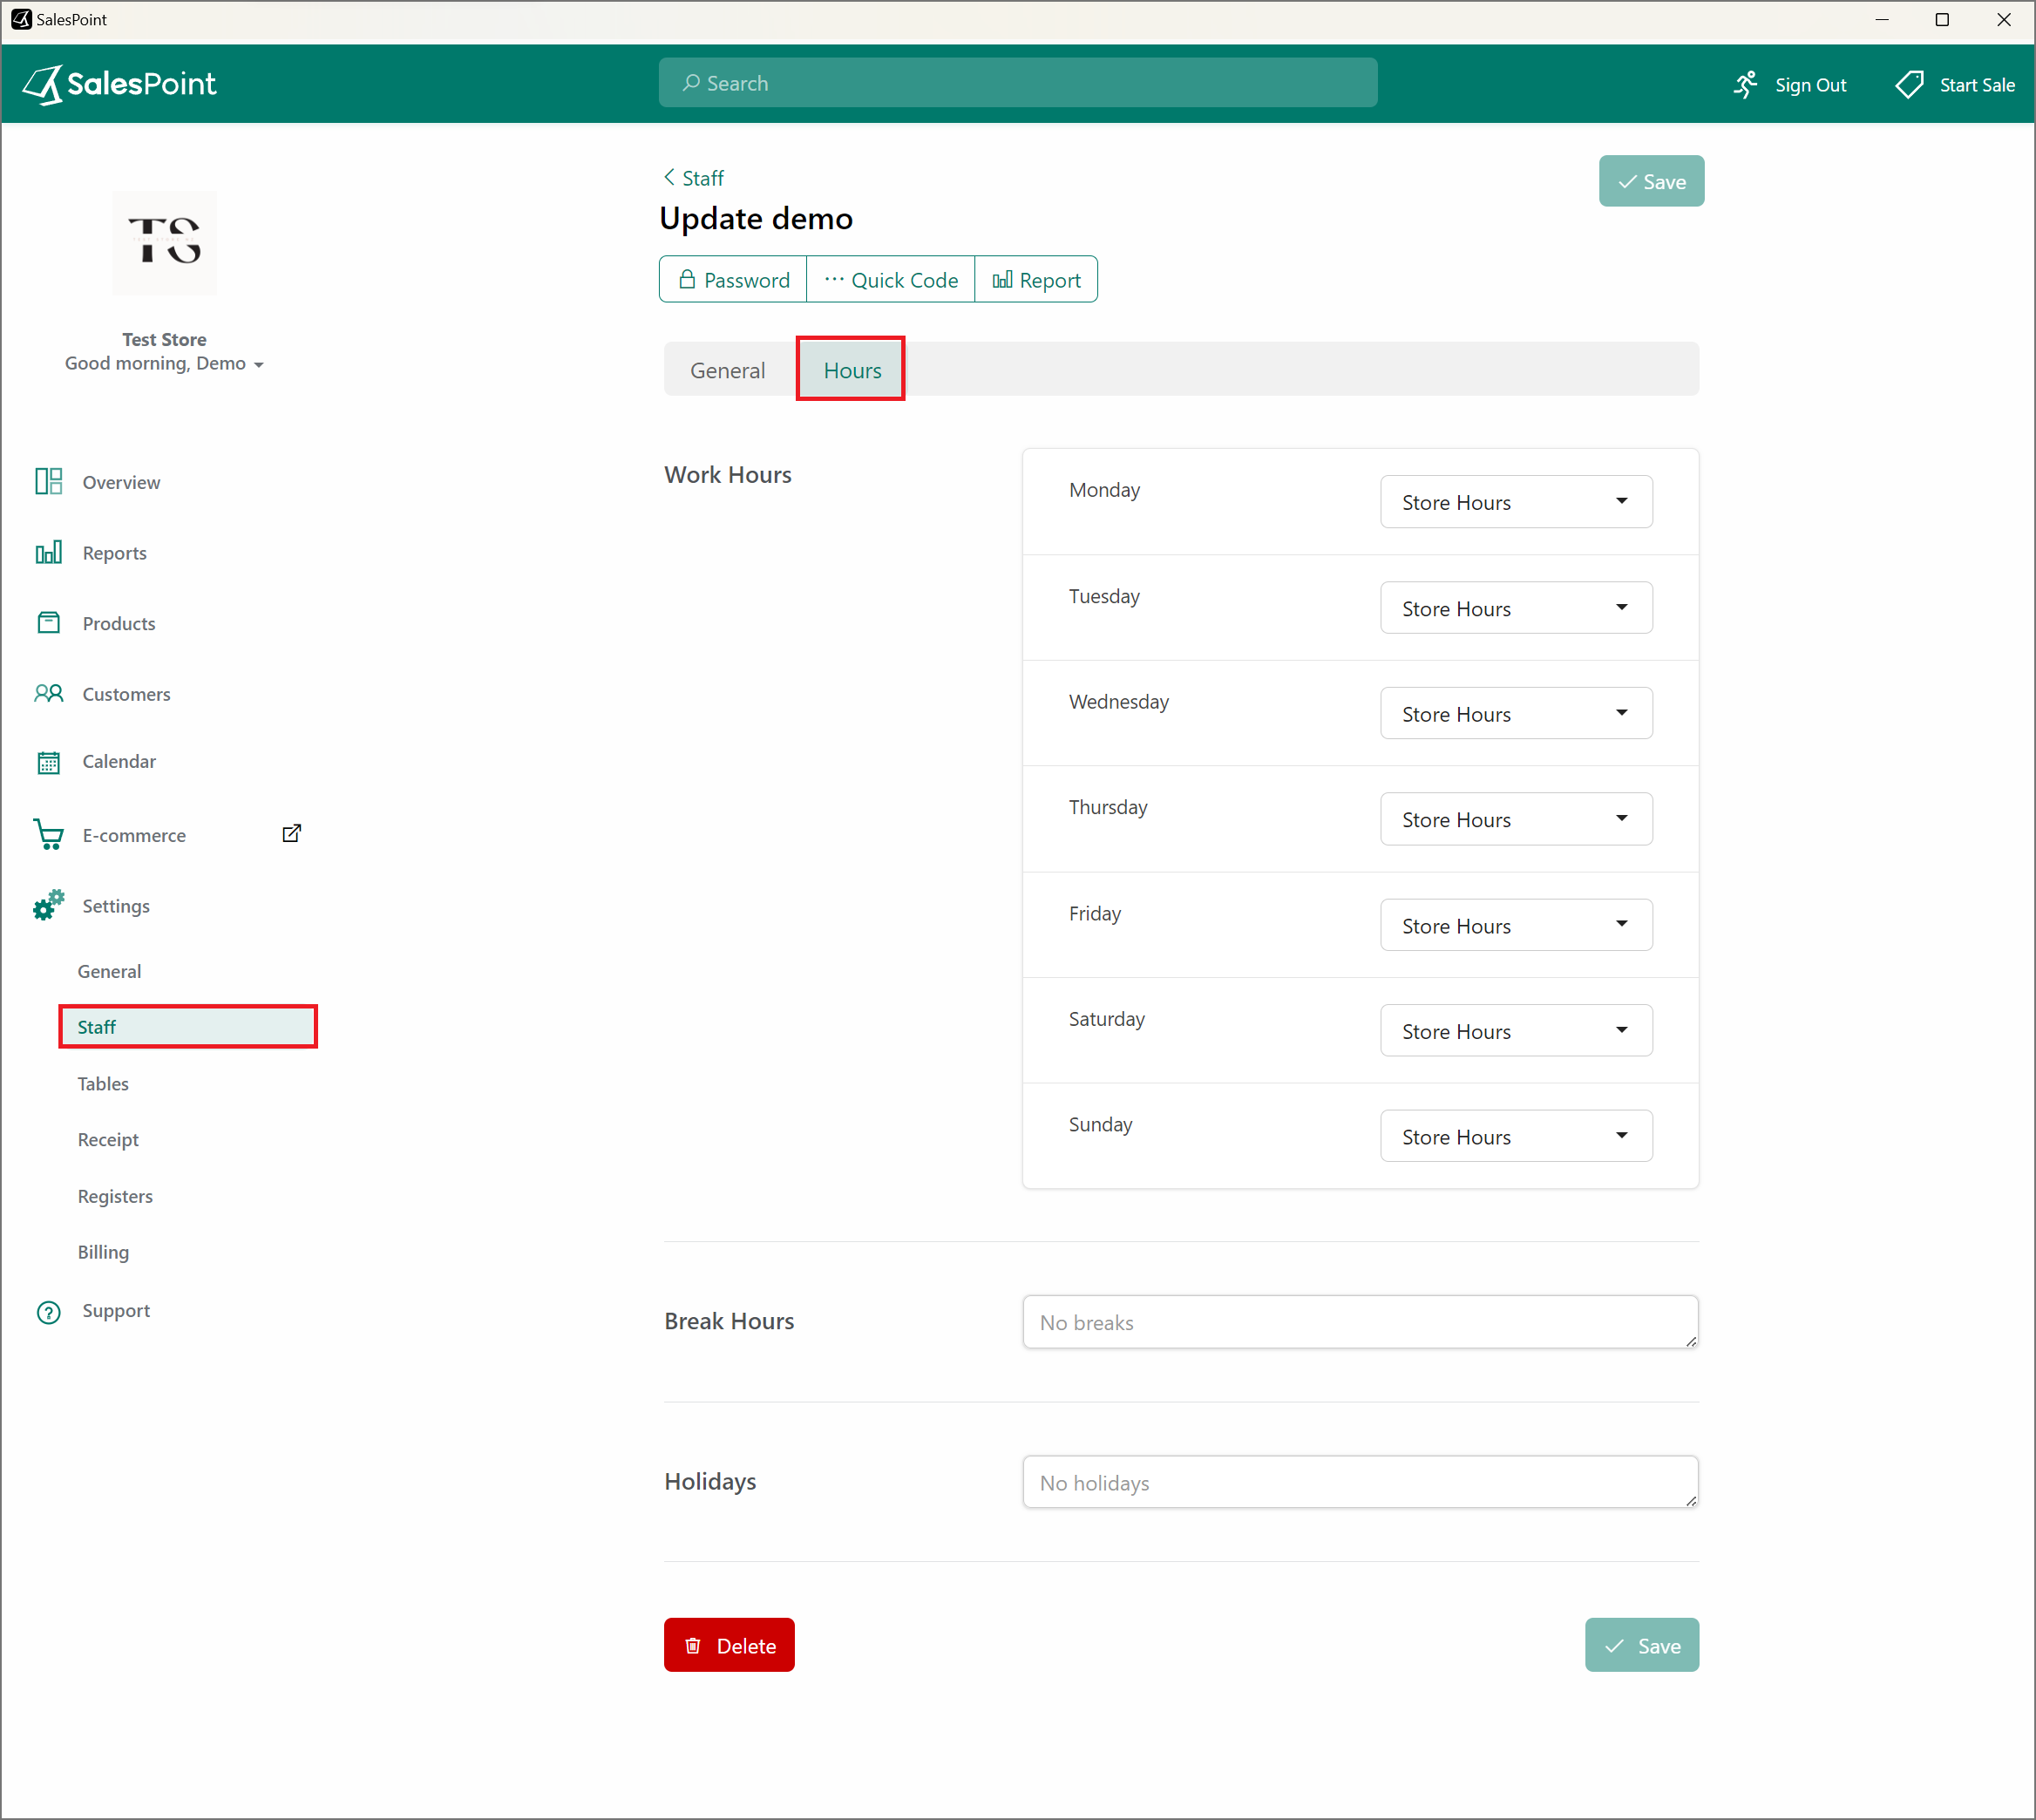
Make sure that staff members have designated work hours. To do this, go to the Dashboard Settings, and under this tab select Staff Settings. Here, select a staff member and set their work hours. This will be reflected on the Calendar.
Step 3: Enable Staff Booking
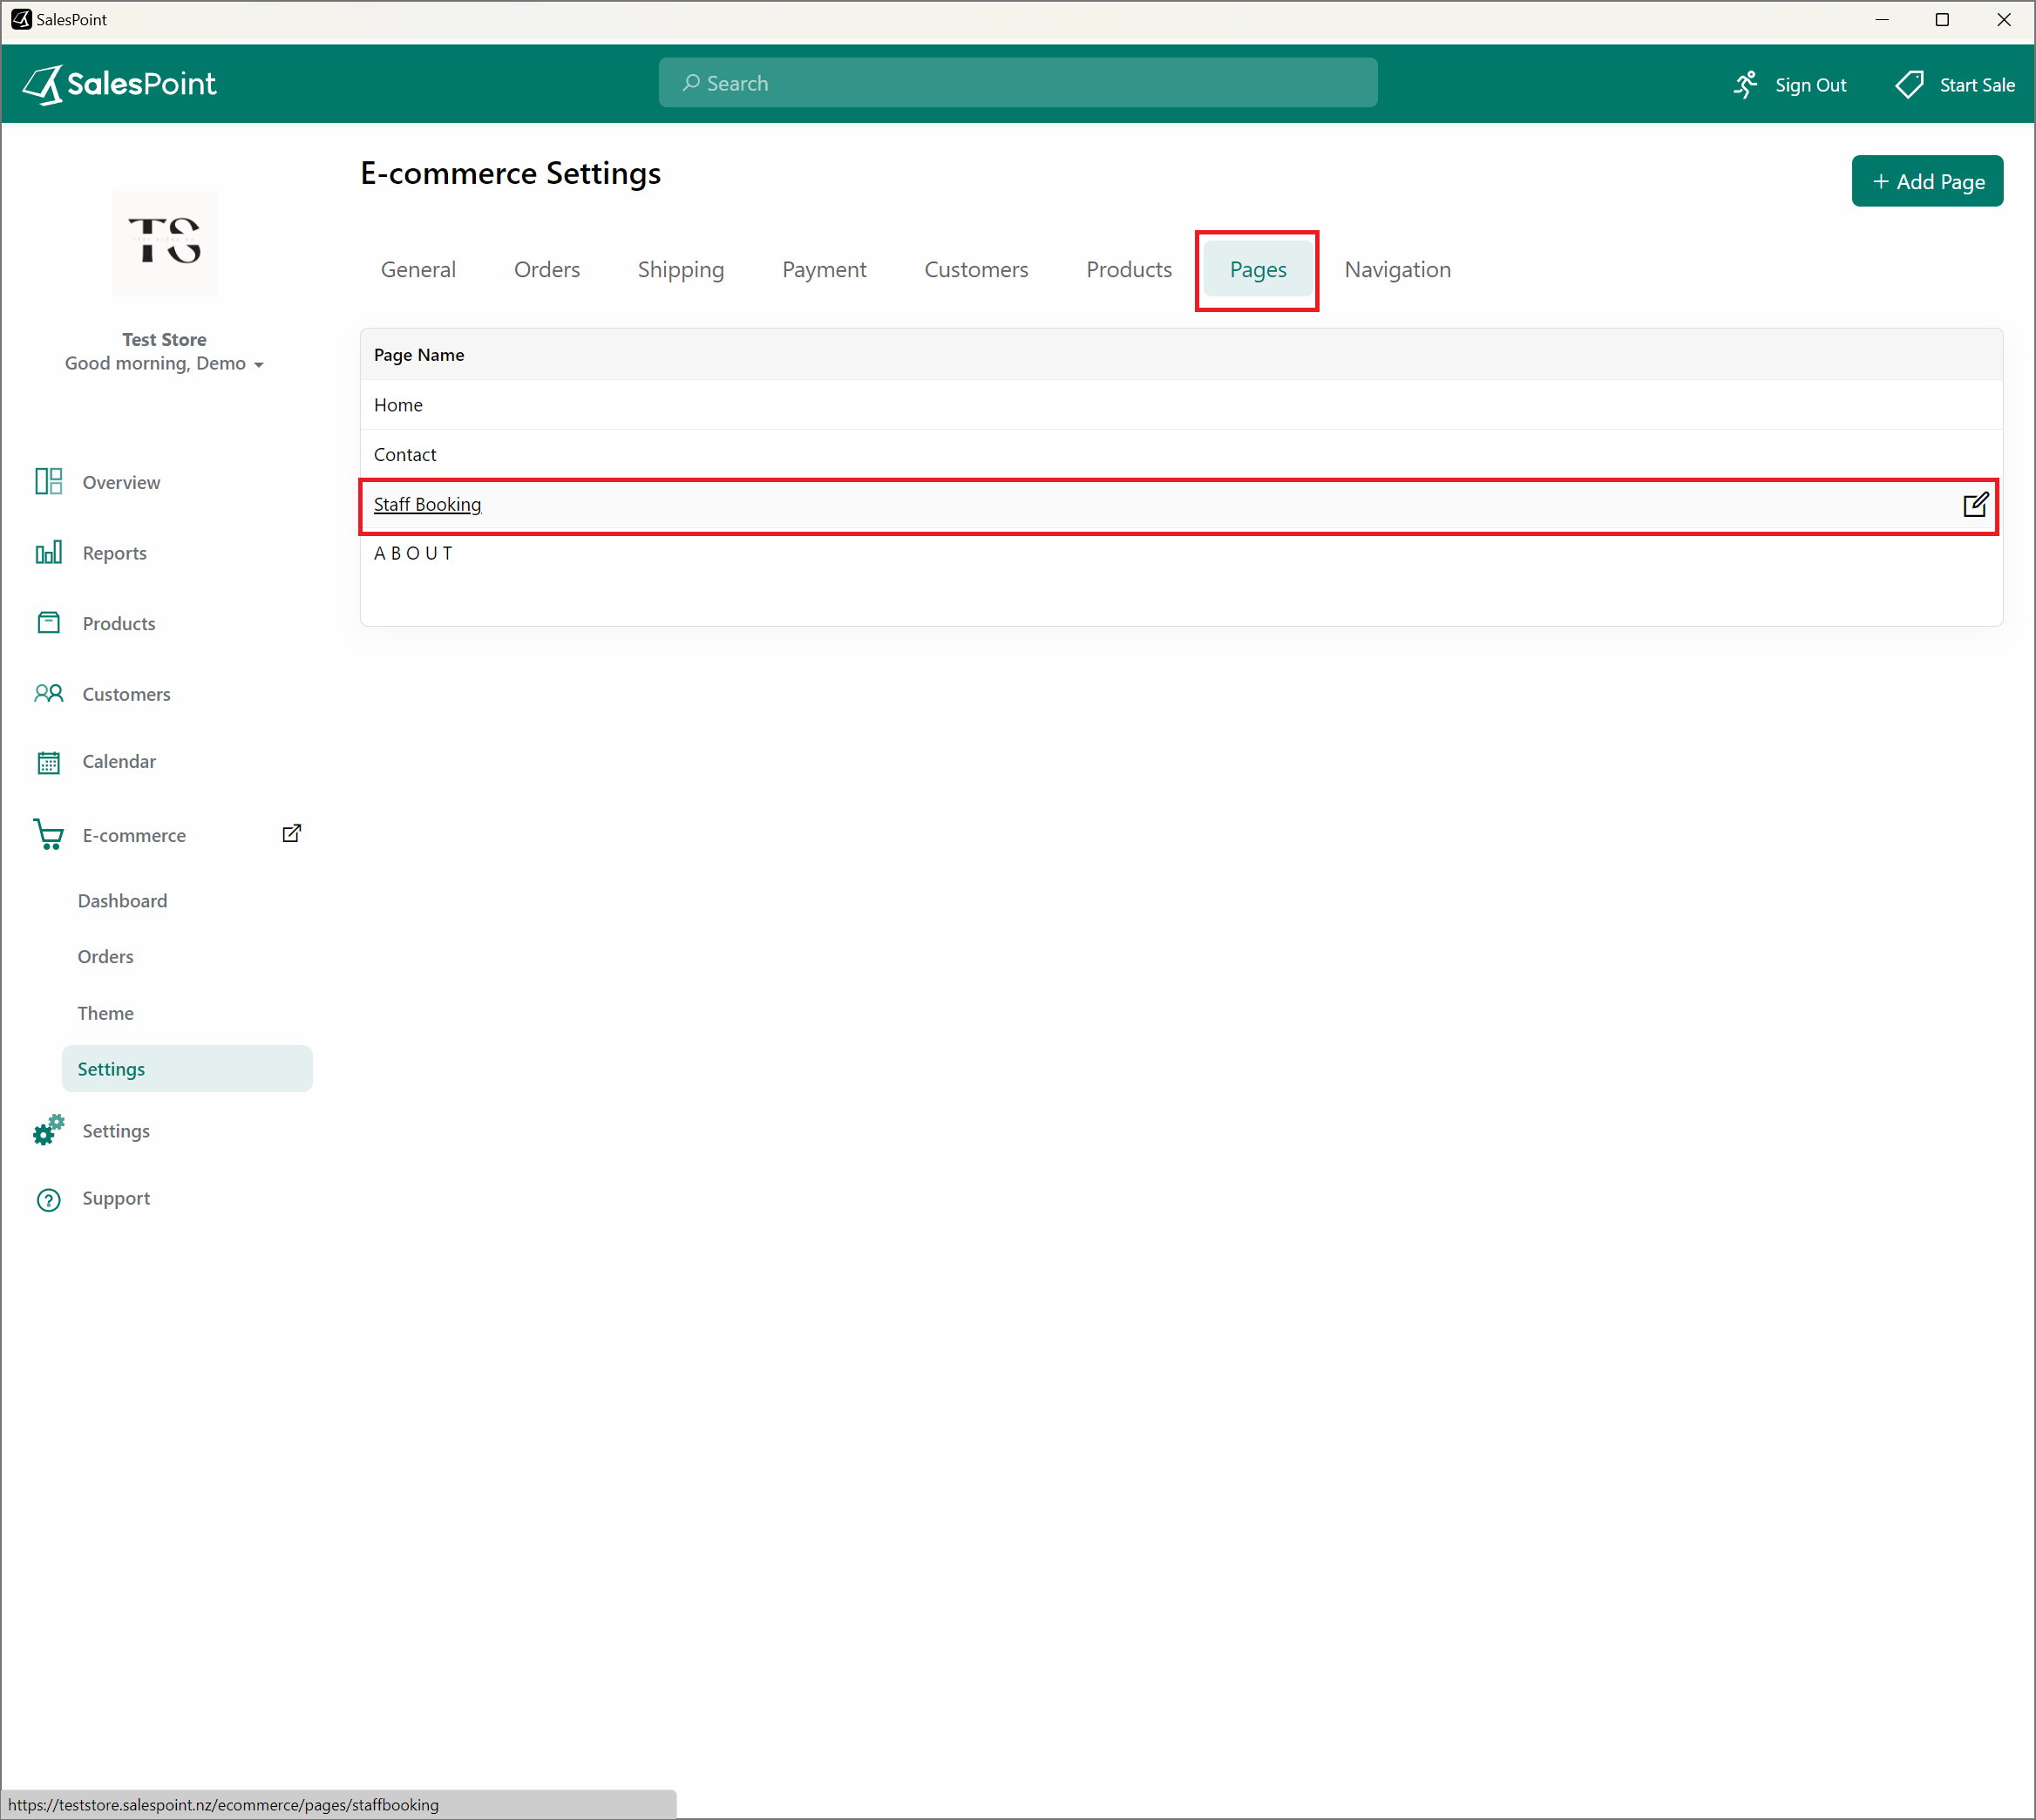
The Staff Booking needs to be enabled next to the E-commerce. To do this, go to the Dashboard and navigate to the E-Commerce tab. From here, go to the Pages Tab. Select "Staff Booking" and enable the toggle. Select the Products that are serviced for a certain duration. Add staff members that are available. Fill in the rest of the information for the staff booking.
Step 4: Add a Navigational Link
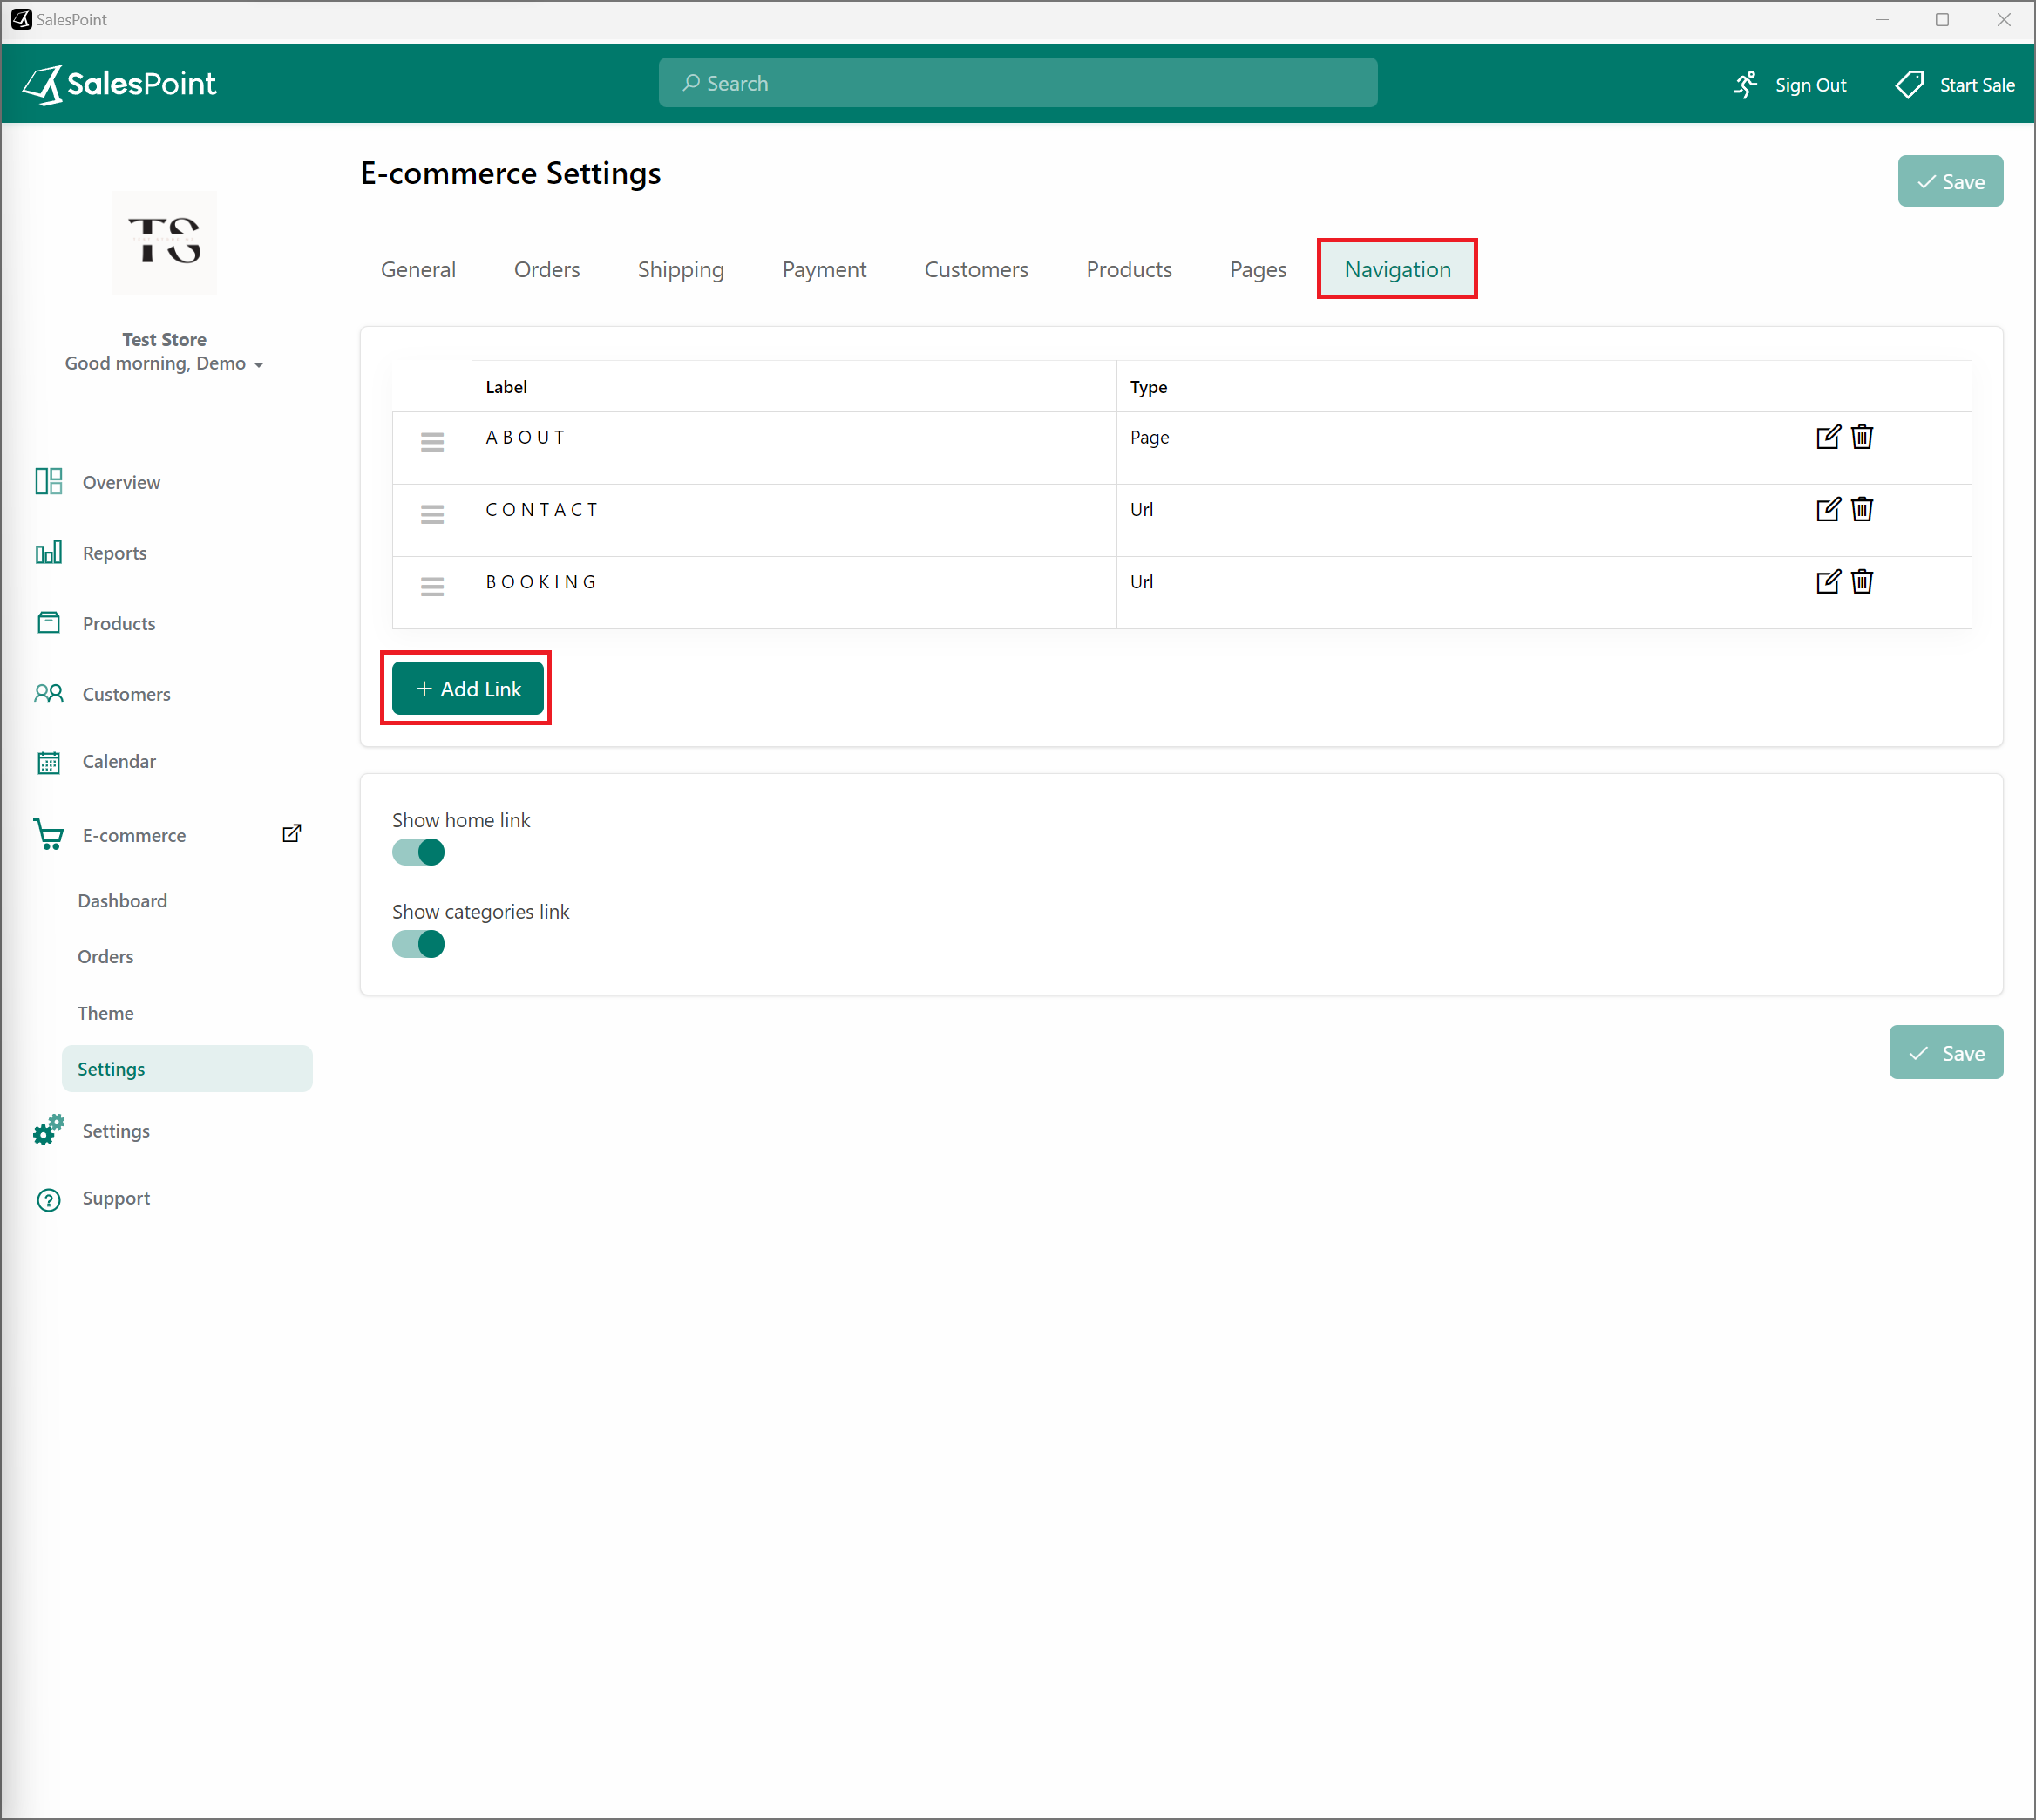
The Staff booking must be added to the e-commerce page. To do this, still on the E-commerce settings, select the Navigation section. Select Add Link button to create a staff booking link. Add a label and make sure the Destination is a type URL and the link is: "/booking/staff/". Click Save once done.
Step 5: Check your E-Commerce Site
Once everything is set up, the link will show up on your store's E-Commerce site. Customers can now select what services they would like to have an appointment with and which staff member they would like to book it with.
