Set Up Customer Pricing for a Product
Introduction
Let's say, for example, that registered customers at your store are students from a particular school who visit regularly. If your business wants to change the pricing for these students without having to apply a product discount, follow these steps:
Step 1: Create a Customer Category for the Students
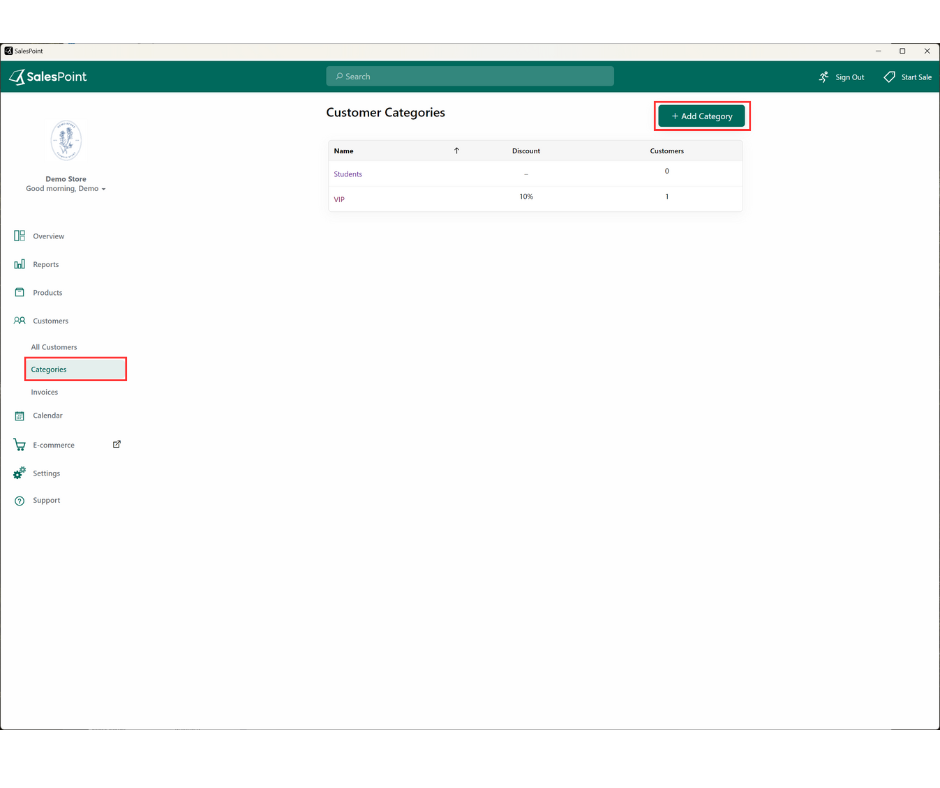
- On the Dashboard, navigate to the Customers tab. Select the Categories sub-tab.
- Select Create New Category and name it "Students."
Step 2: Create a Customer for the School
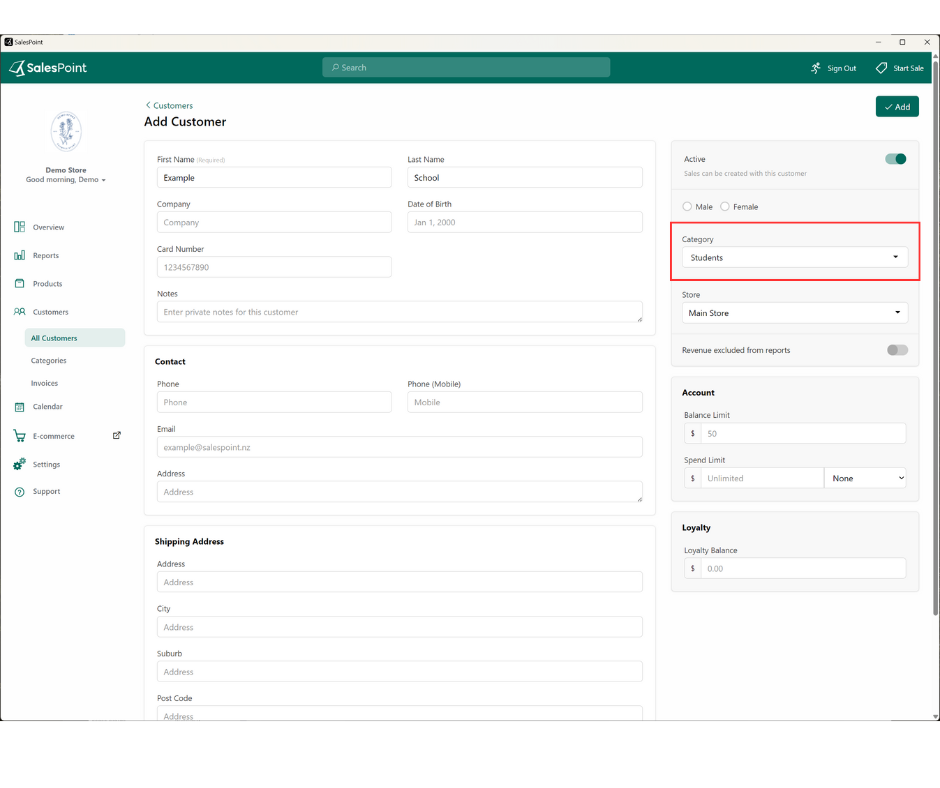
- On the Dashboard, navigate to the Customers tab. Select Create New Customer.
- For this customer, since you don't need to record all the students individually, use the school's name as the first and last name.
- Select the Category dropdown and assign this customer to the "Students" category.
Step 3: Create Customer Product Pricing
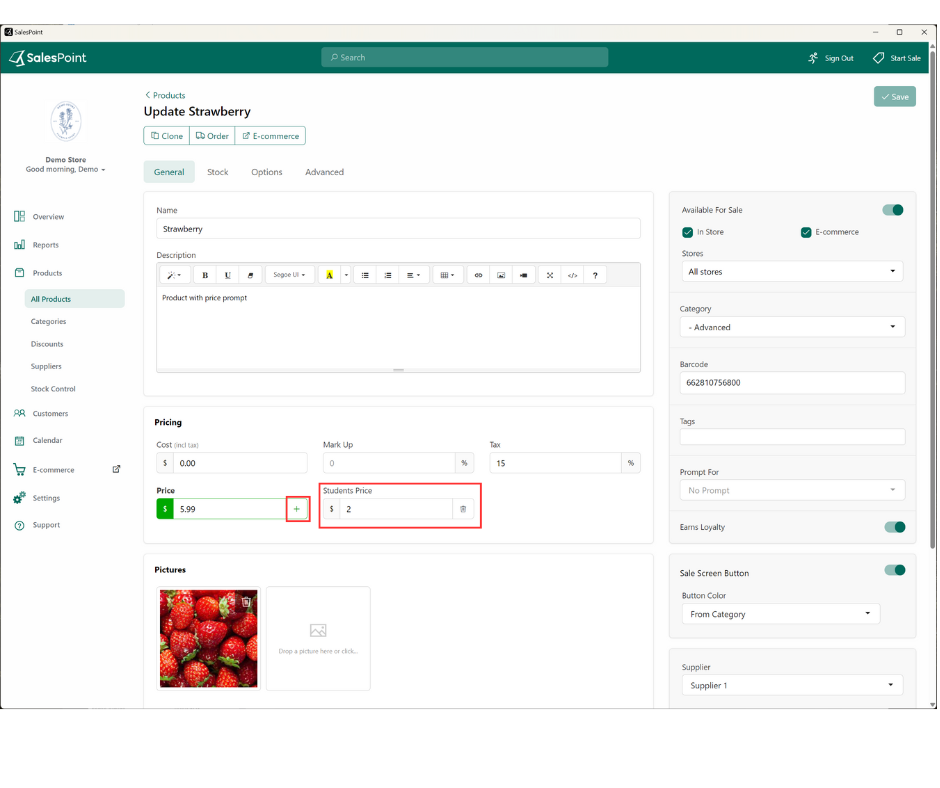
- Still on the Dashboard, go to the Products tab.
- Select the product for which you want to change the pricing when a student is added to the sale.
- Select the Add button next to the price field, choose the customer type, and select "Students."
How to Use This
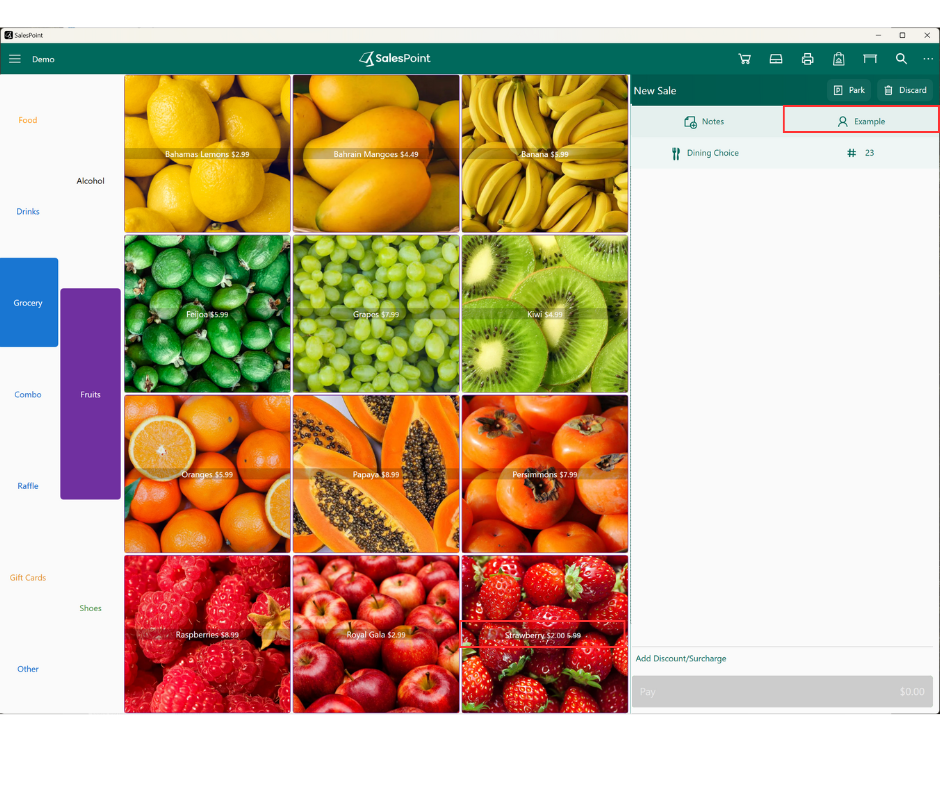
- On the sale screen, add the customer "Student" to the sale first.
- Now, select the product with the special pricing. You will see that the product price changes when this customer is selected.
This guide helps set up customer-specific pricing, allowing you to cater to special groups like students efficiently.